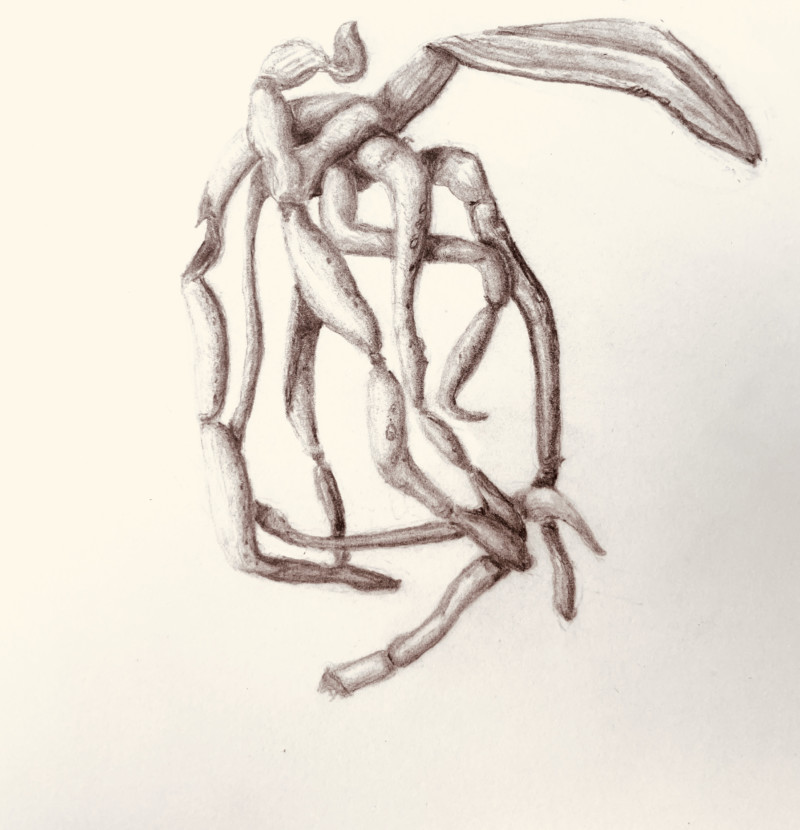
Hi Constance- interesting roots! They kind of look like bones. Be careful – some of them look like they are outlined rather than having a range of tone that would give them form. A few tweaks and you will be there.
Thanks for your comments. I will work some more on these. They are orchid roots and some of them are flattened and not cyclindrical so the whole face looks the same tone; I was stumped on how to make them look more three dimensional. Also, I erased so much that in some places, I can’t erase pencil marks I changed. Do you have any tips for how to cover these up? Thanks!
15 July 2021
These look pretty 3-dimensional to me, Constance. I think you did a nice job showing the connections and segmentation here. I would work on creating overall depth of form here by keeping those few roots that are in the front very light, and then darkening the others as they recede in space. For example, the 3rd root from the right could be darker at the top, to show that it is further behind the ones in front… does that make sense? You can use “tiers” of dark tones to create 3-d space moving from front to back. Re: pencil erasing… are you using the Tombow Mono Zero eraser? That one really helps me precisely attack those stray marks. If that doesn’t work, then you may have to leave them in and chalk it up as “humanity” and the beauty of hand-drawn images. 😉 Sometimes if you have a more complex composition, you can add in another element as a “cover-up” of a pesky stray mark.
Thanks! Your suggestions on showing depth make perfect sense. I do have a Tombow eraser and it’s not helping. I’m using Fluid 100 Hot Press paper; maybe the Stonehenge would allow more erasing. But, I am learning so much about drawing as well as different supplies. I really appreciate the comments I get from all of the instructors here.
Hi Constance- interesting roots! They kind of look like bones. Be careful – some of them look like they are outlined rather than having a range of tone that would give them form. A few tweaks and you will be there.
Thanks for your comments. I will work some more on these. They are orchid roots and some of them are flattened and not cyclindrical so the whole face looks the same tone; I was stumped on how to make them look more three dimensional. Also, I erased so much that in some places, I can’t erase pencil marks I changed. Do you have any tips for how to cover these up? Thanks!
These look pretty 3-dimensional to me, Constance. I think you did a nice job showing the connections and segmentation here. I would work on creating overall depth of form here by keeping those few roots that are in the front very light, and then darkening the others as they recede in space. For example, the 3rd root from the right could be darker at the top, to show that it is further behind the ones in front… does that make sense? You can use “tiers” of dark tones to create 3-d space moving from front to back. Re: pencil erasing… are you using the Tombow Mono Zero eraser? That one really helps me precisely attack those stray marks. If that doesn’t work, then you may have to leave them in and chalk it up as “humanity” and the beauty of hand-drawn images. 😉 Sometimes if you have a more complex composition, you can add in another element as a “cover-up” of a pesky stray mark.
Thanks! Your suggestions on showing depth make perfect sense. I do have a Tombow eraser and it’s not helping. I’m using Fluid 100 Hot Press paper; maybe the Stonehenge would allow more erasing. But, I am learning so much about drawing as well as different supplies. I really appreciate the comments I get from all of the instructors here.