How to Draw Lichen & Moss
Technique Tips to Illustrate Types of Moss & Lichen
Using Colored Pencil Drawing & Watercolor Painting
By Pam Thompson & the Draw Botanical Team
When nature’s beauty leaves me speechless, observational drawing is how I express my awe. Botanical art gives me an excuse to study a plant closely, learn about them, become their friend, and create a portrait to remember them always.
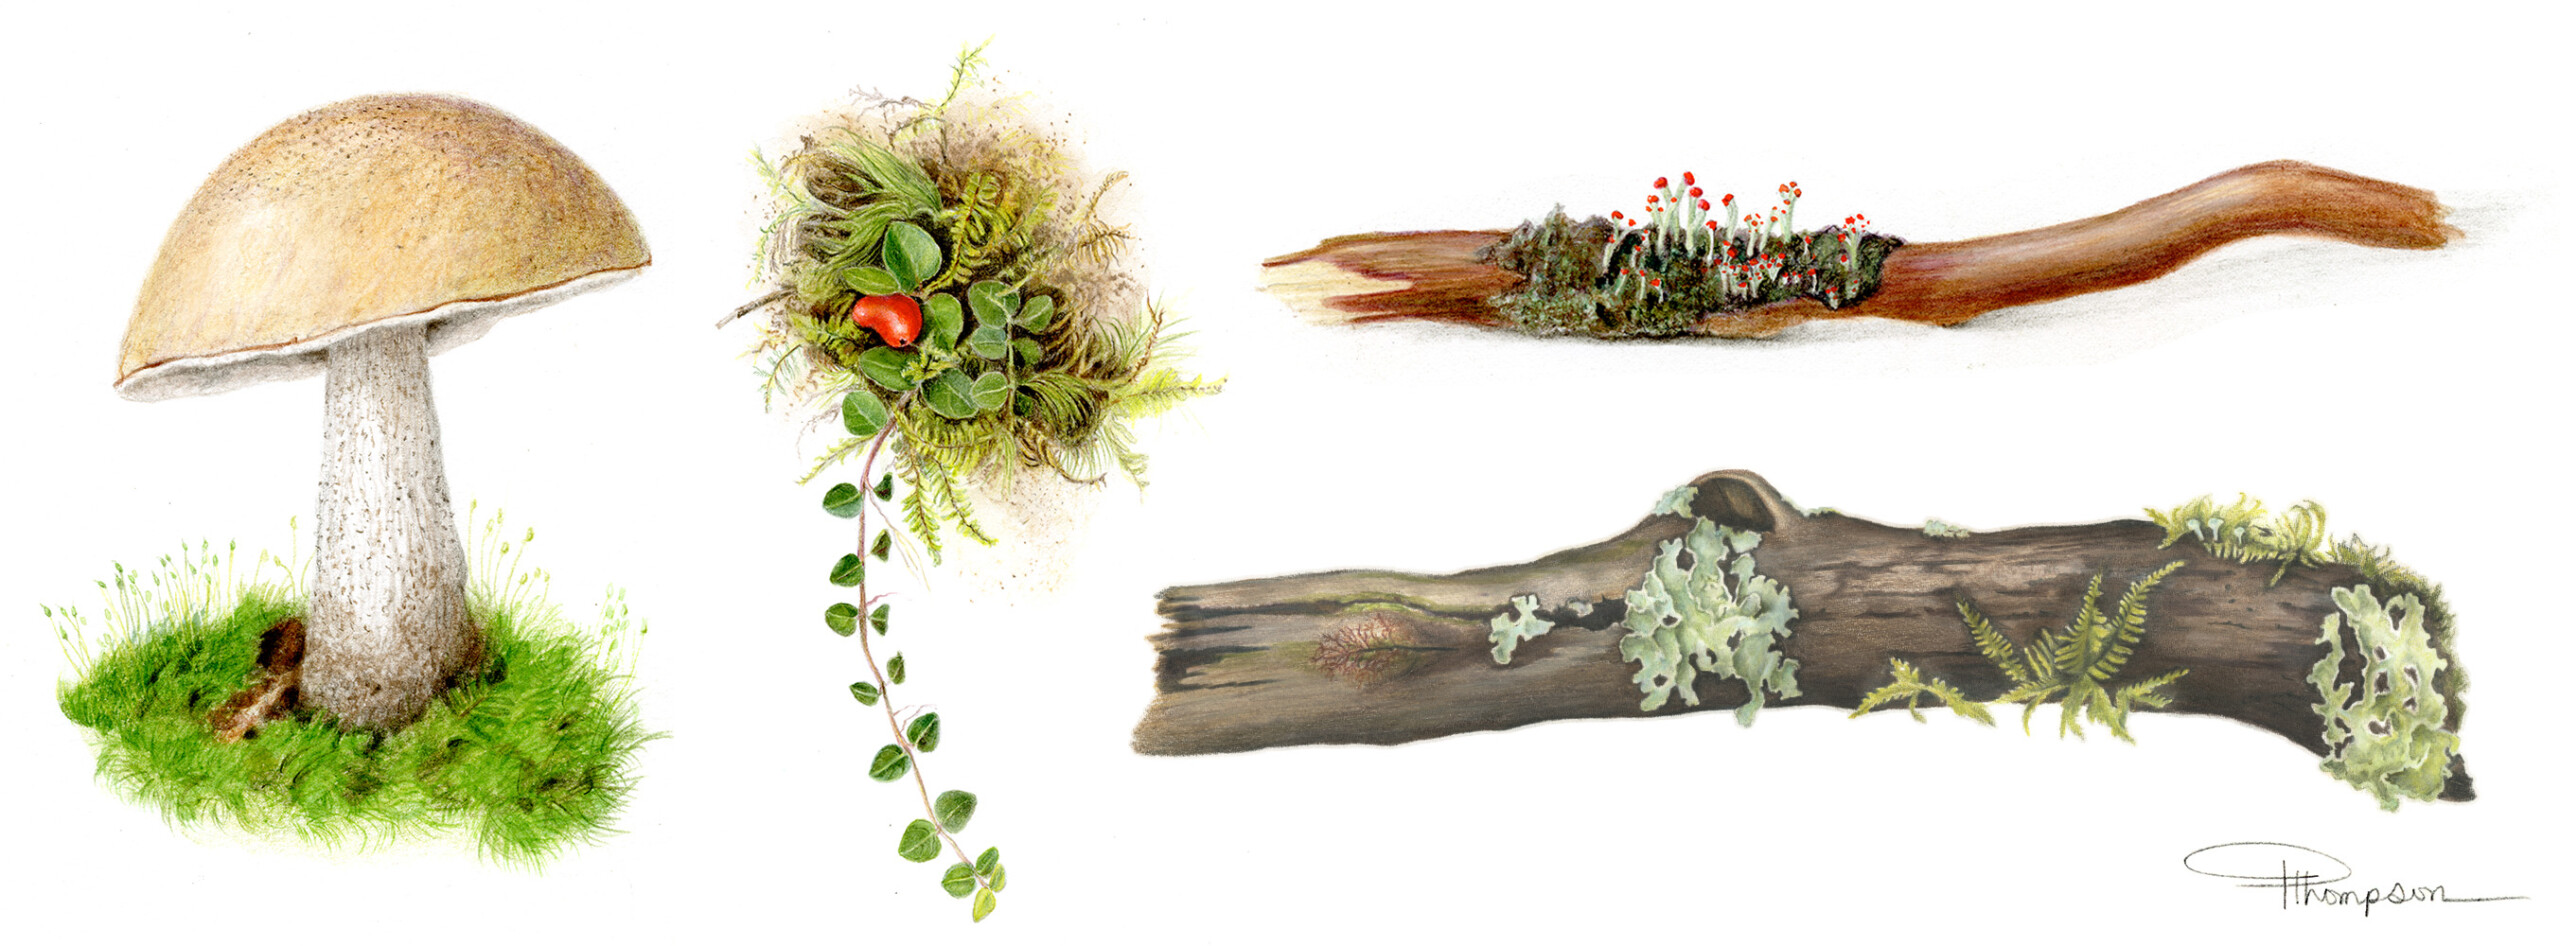
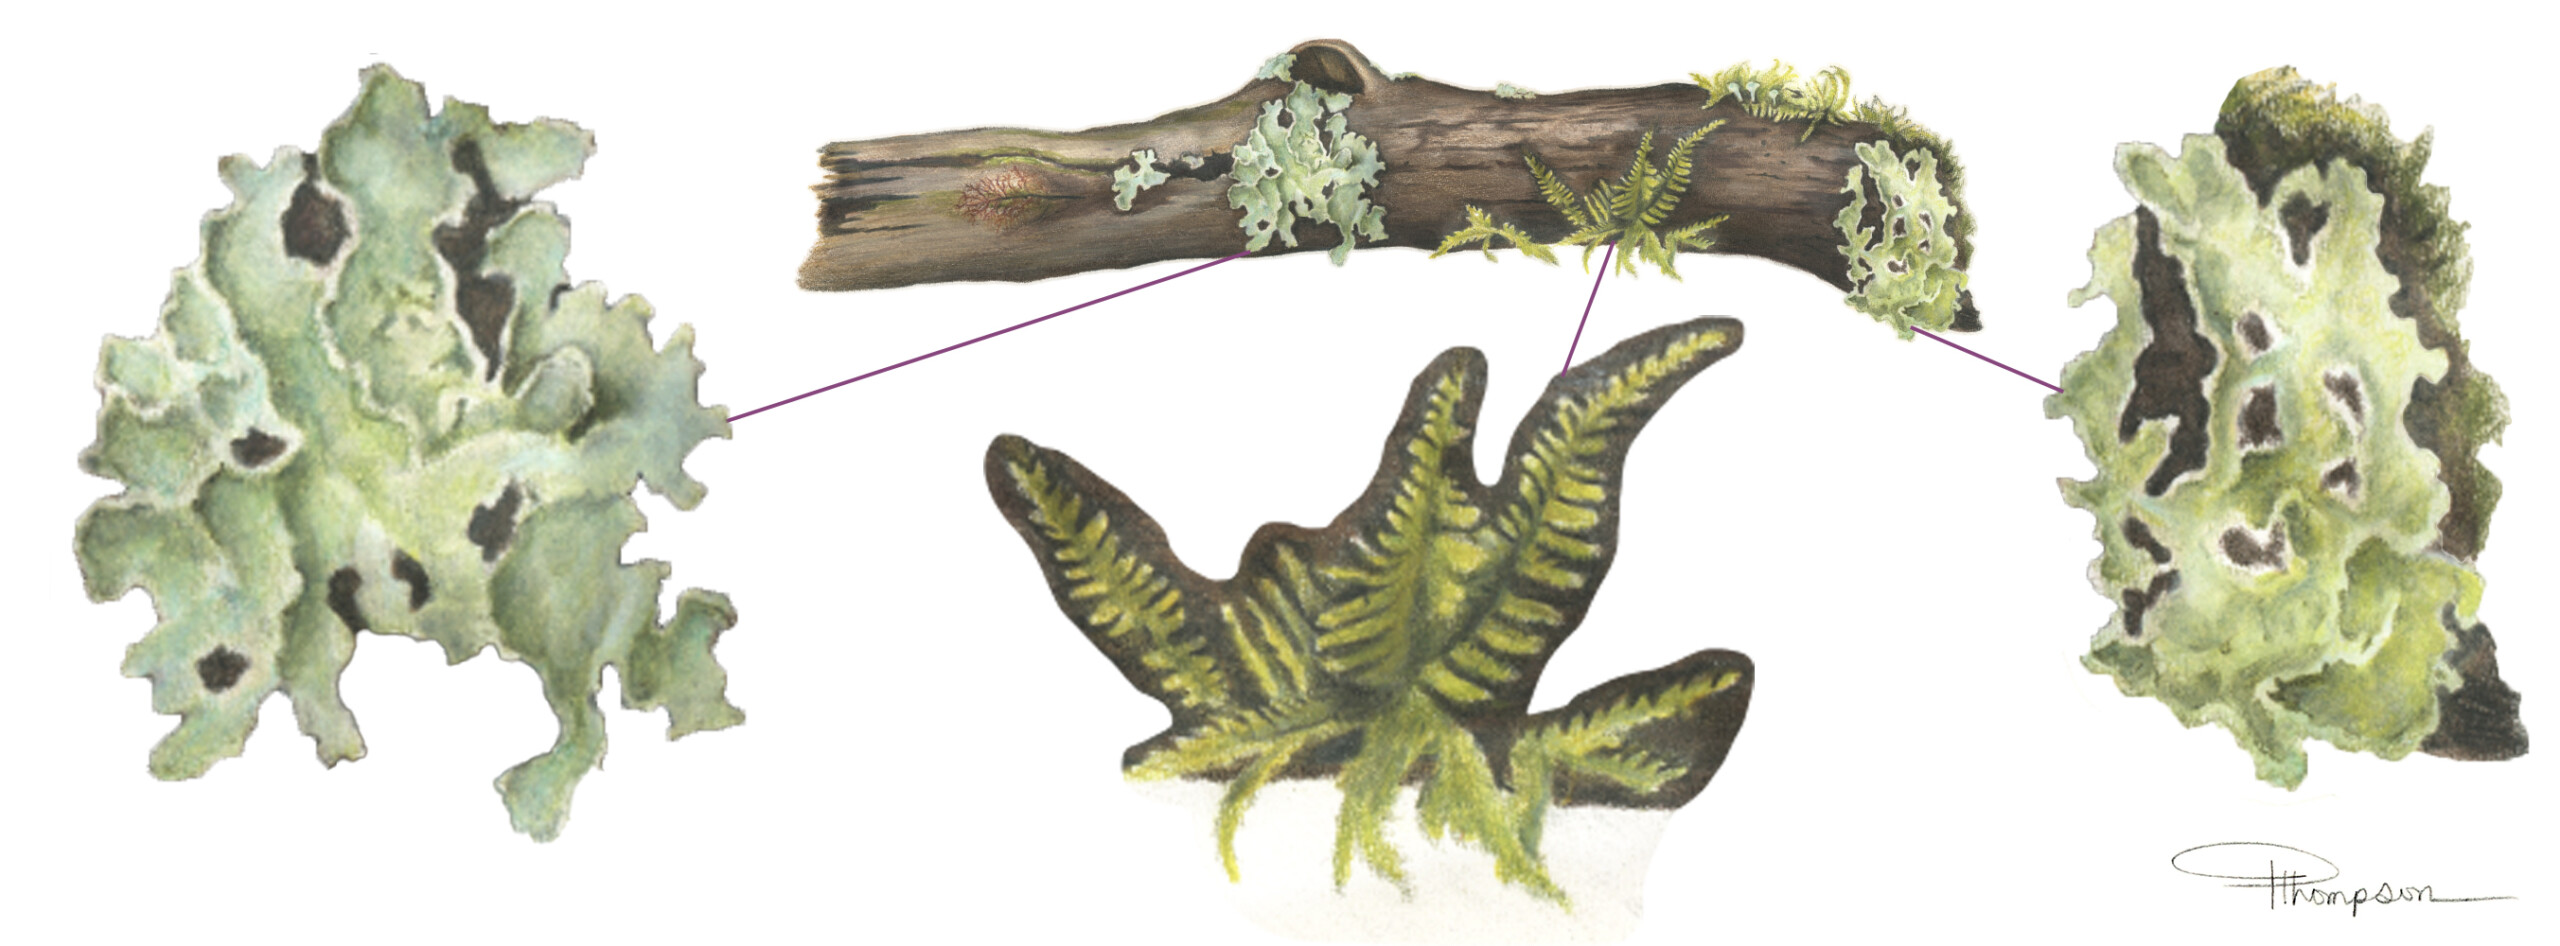
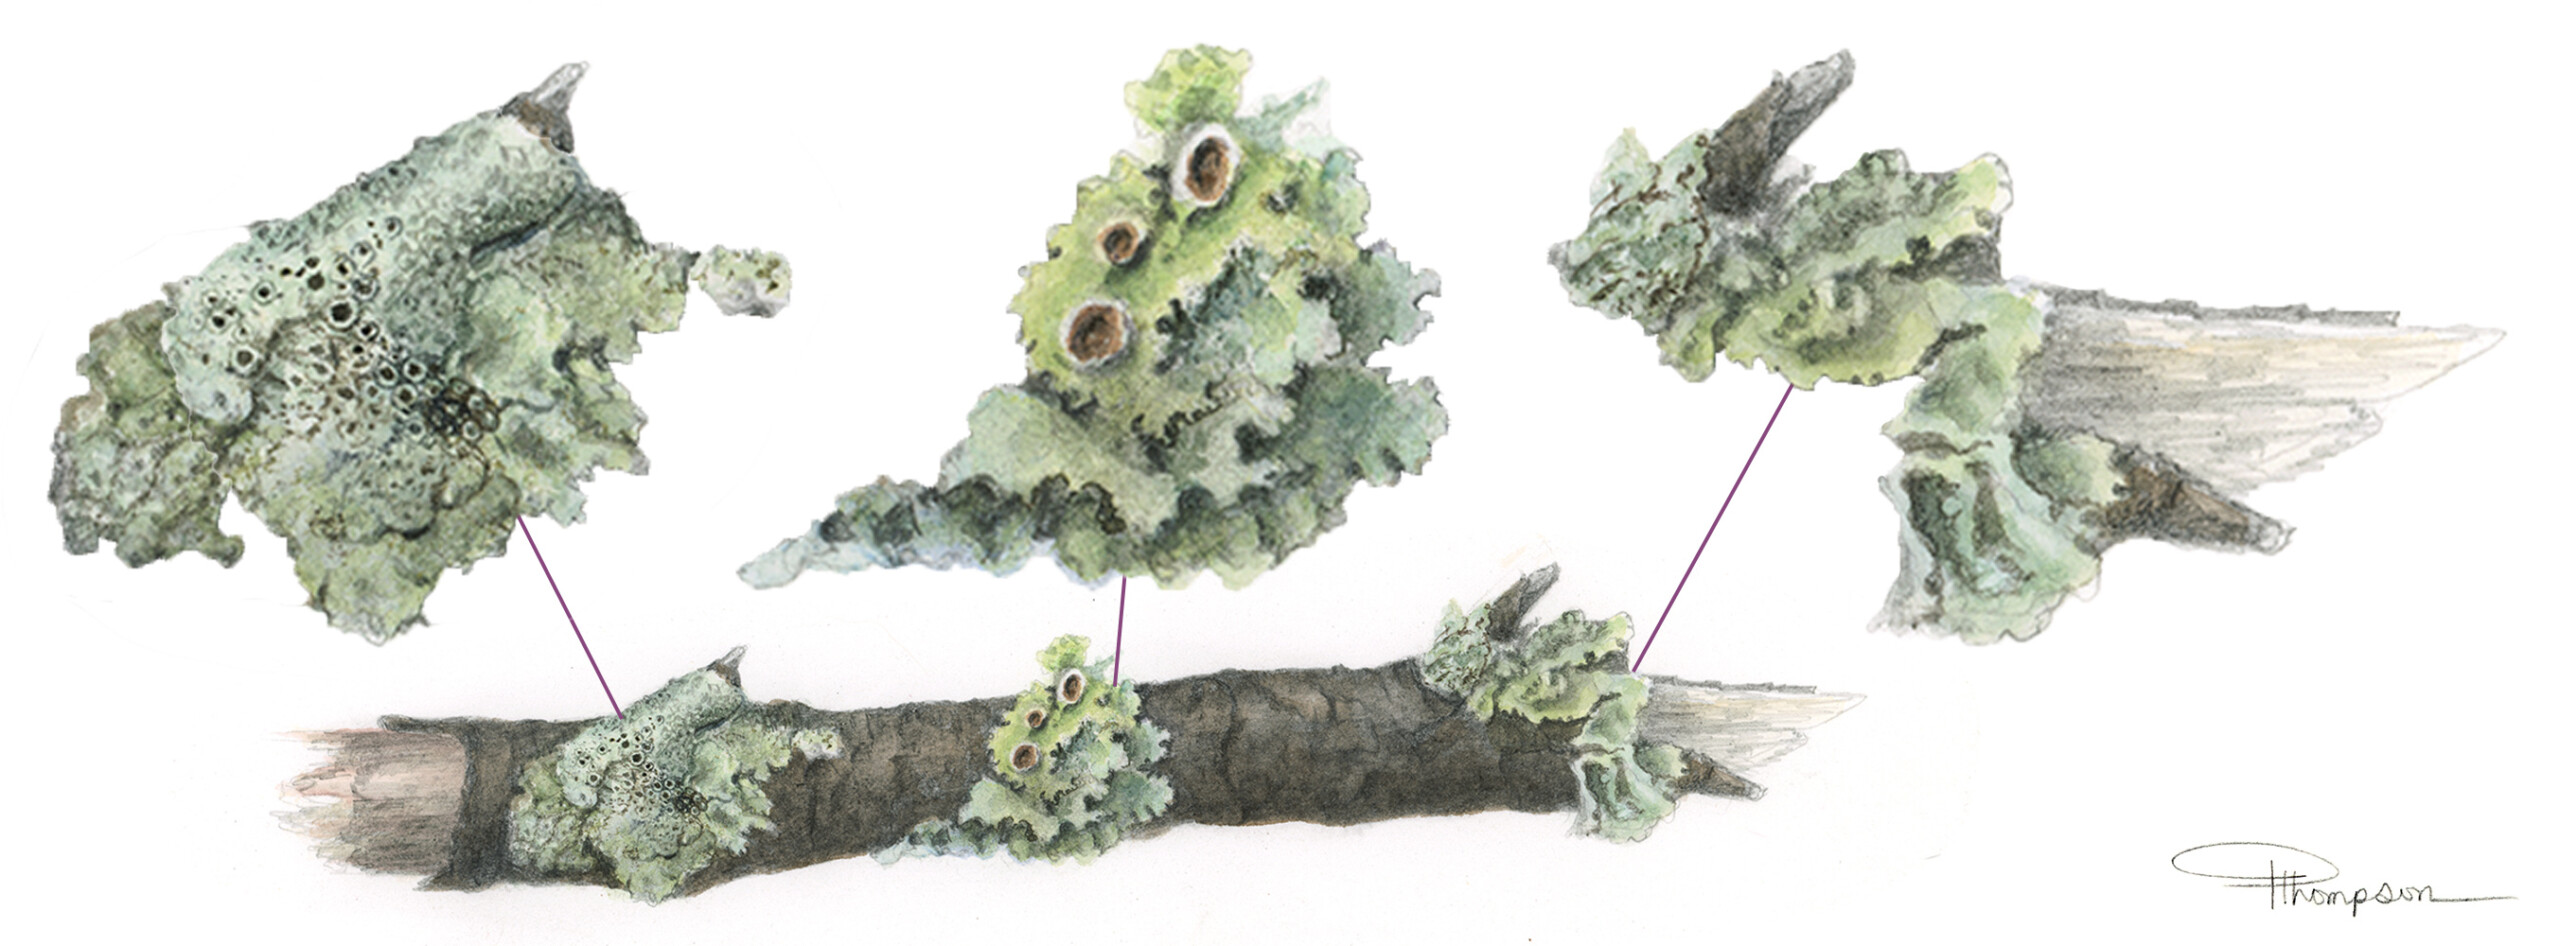
For example, when I draw (what some might call) a basic branch, my favorite part is painting the smallest details of the lichens and mosses who call that branch home. From a distance, they blend in so naturally you can hardly see them, but when you zoom in closer, you see all of their interesting intricacies! I hope you enjoy this post that will explore what mosses and lichens are and provide tips for how to use watercolor and colored pencil to create realistic illustrations of lichen and moss.

What are Lichens?
Fungi-Algae Power Couples
A Lichen is NOT a Plant?! 🤯
Imagine two or more different living things, like a fungus and an alga (or a special kind of bacteria called cyanobacteria), deciding to team up and become one! That’s exactly what a lichen is, a positive partnership where everyone helps each other out. The fungus acts like a super helpful host, creating a cozy body for the lichen and even providing shade from the sun, keeping it hydrated, and regulating its temperature and humidity. In return, the alga or cyanobacterium feeds the structure-building team through photosynthesis. It’s a true natural wonder of cooperation!
For more lichen botanical descriptions, I recommend these very cool videos:
– Lichen: Science Friday by Ohio Plants Online (Tannersville Cranberry Bog in PA)
– Lichen Biology in 3 minutes by Harvard Museum of Natural History
– Discover Lichens with James Lendemer, Ph.D. by Discover Life in America
– Urban Lichens 1-Hour Talk with James Lendemer, Ph.D. by NYC H20, especially good if you live in an urban area around NYC
What is Moss?
A Rootless, Flowerless, Non-Vascular Plant
Beth Watson said it best, “Often overlooked, moss is a silent hero in the plant kingdom, offering beauty, ecological benefits, and even a touch of ancient mystique.”
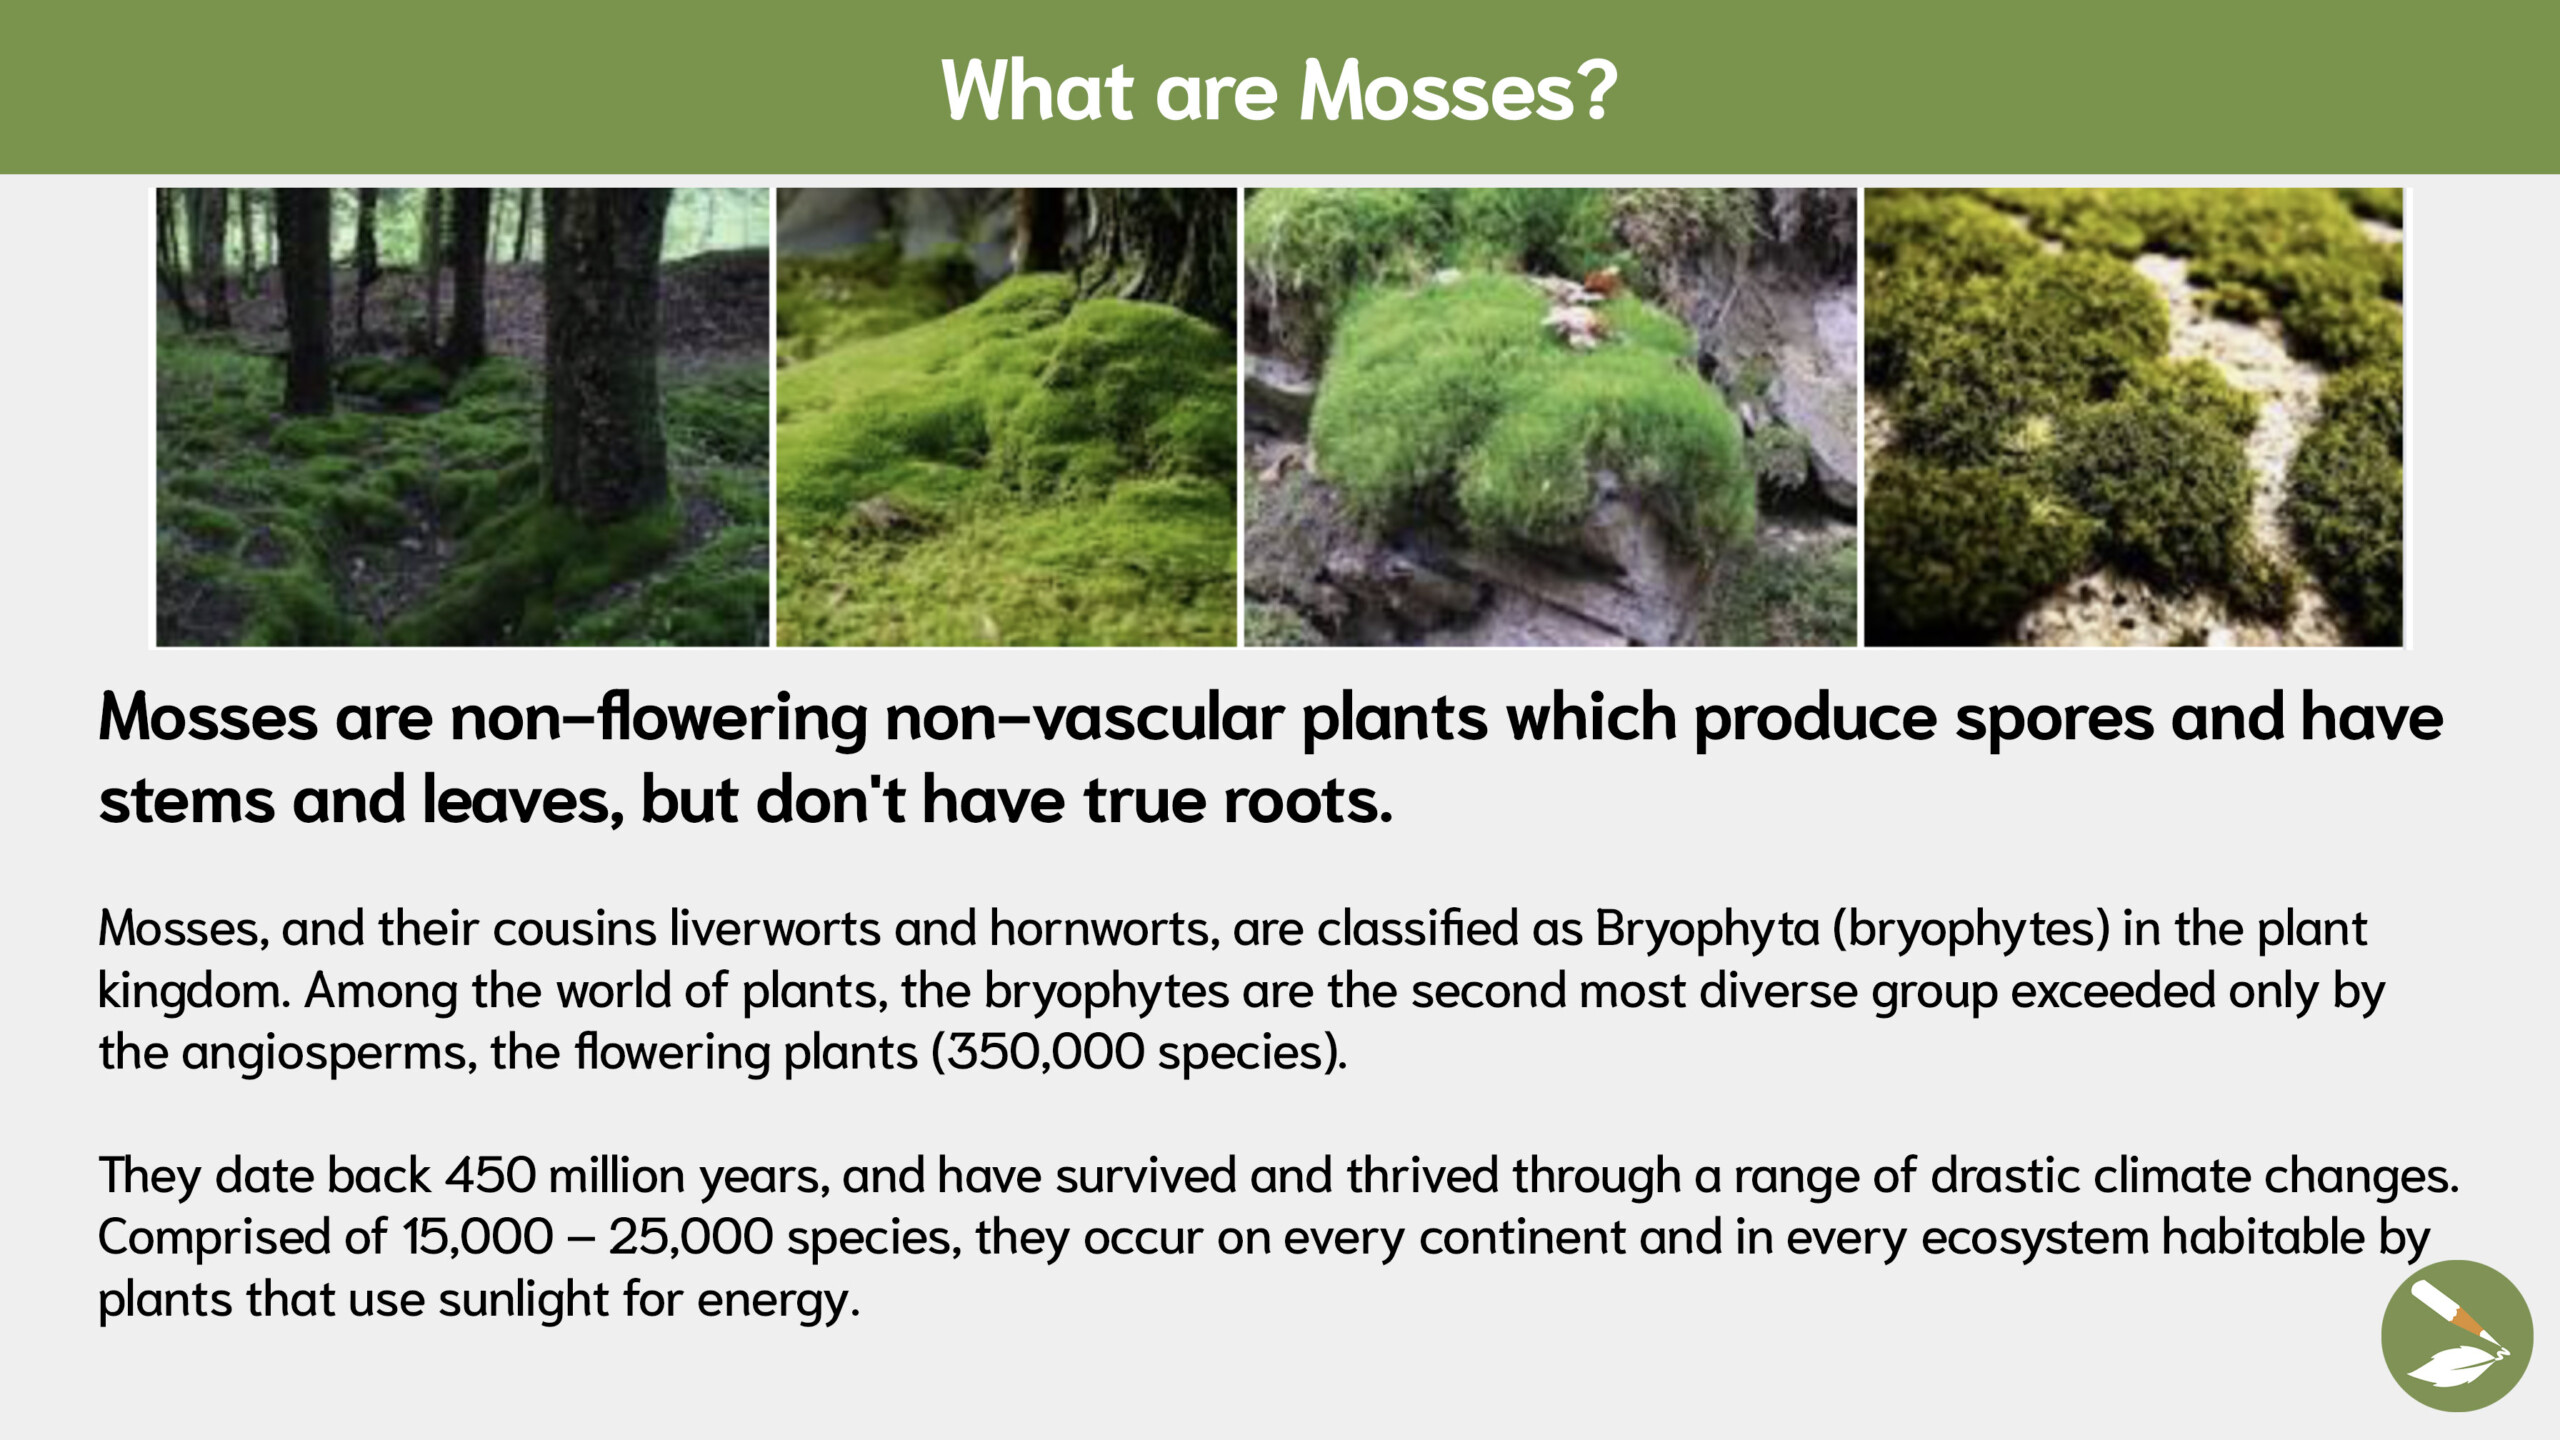
Mosses are so old. (How old are they?) Mosses are so old that they were one of the first primitive plants to appear on land over 450 million years ago! They went beyond surviving to thrive and spread far and wide to every continent on this earth and every ecosystem habitable by photosynthesizing plants that use sunlight for energy.
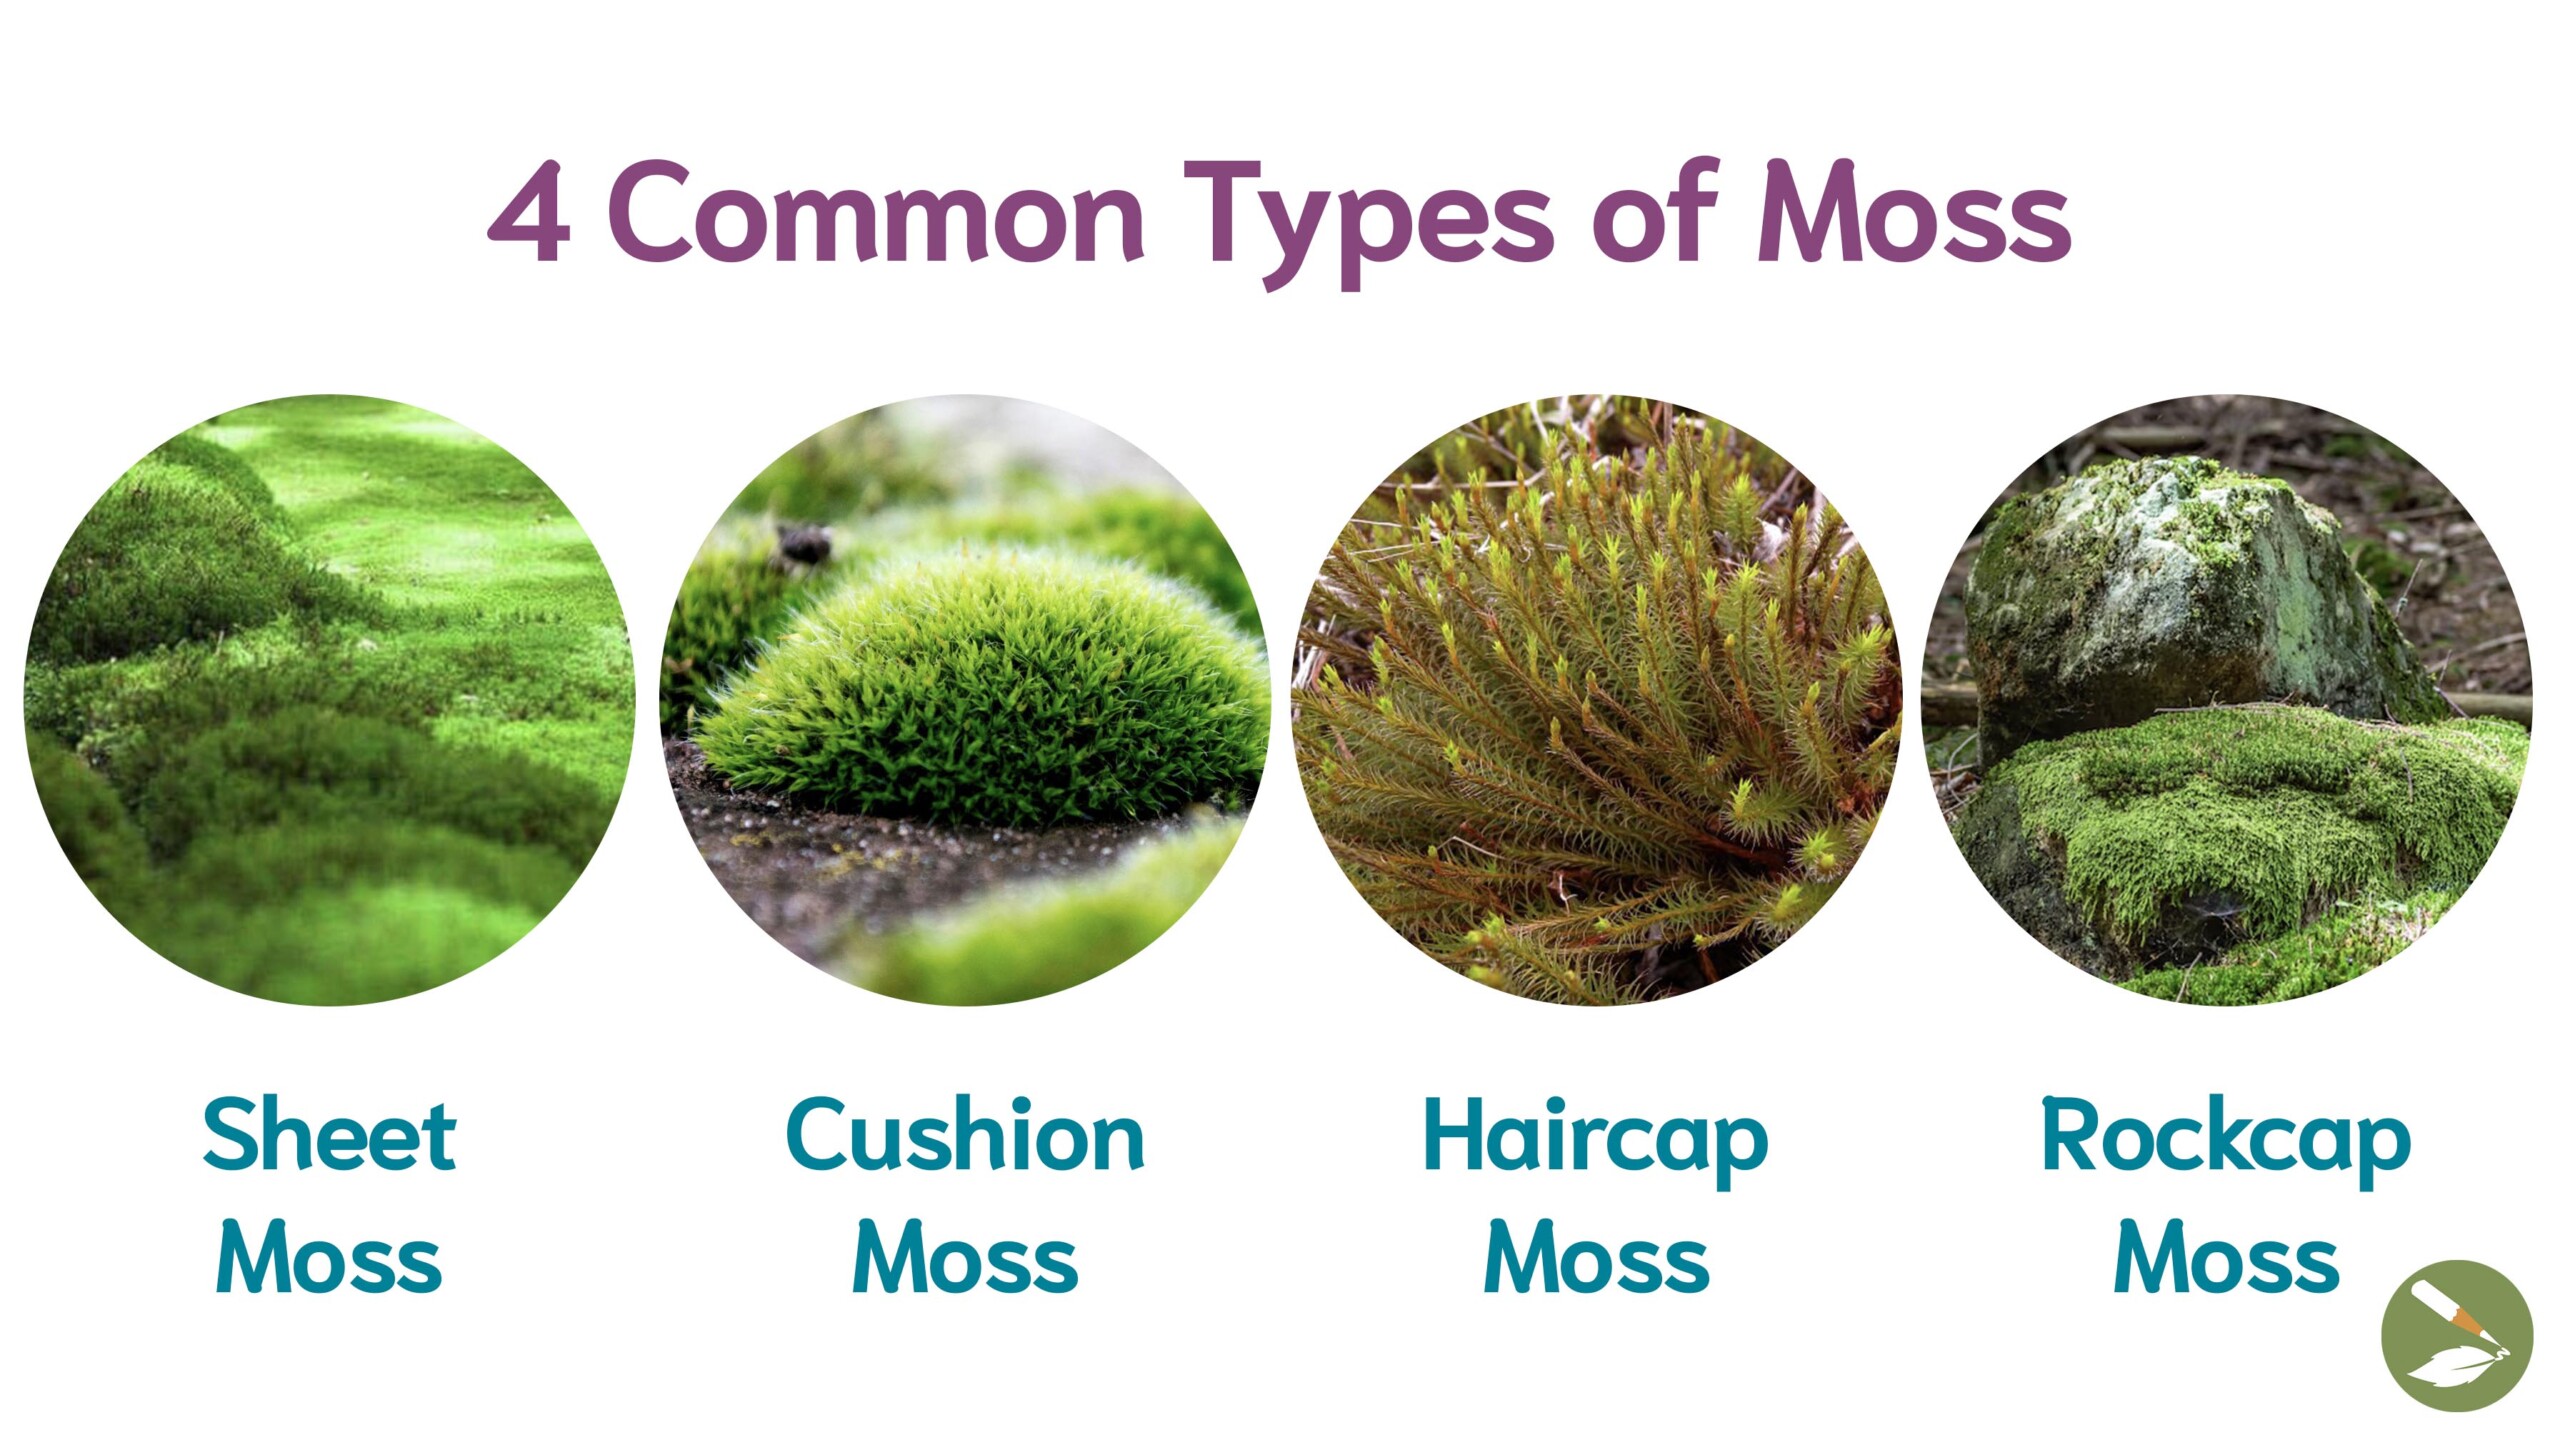
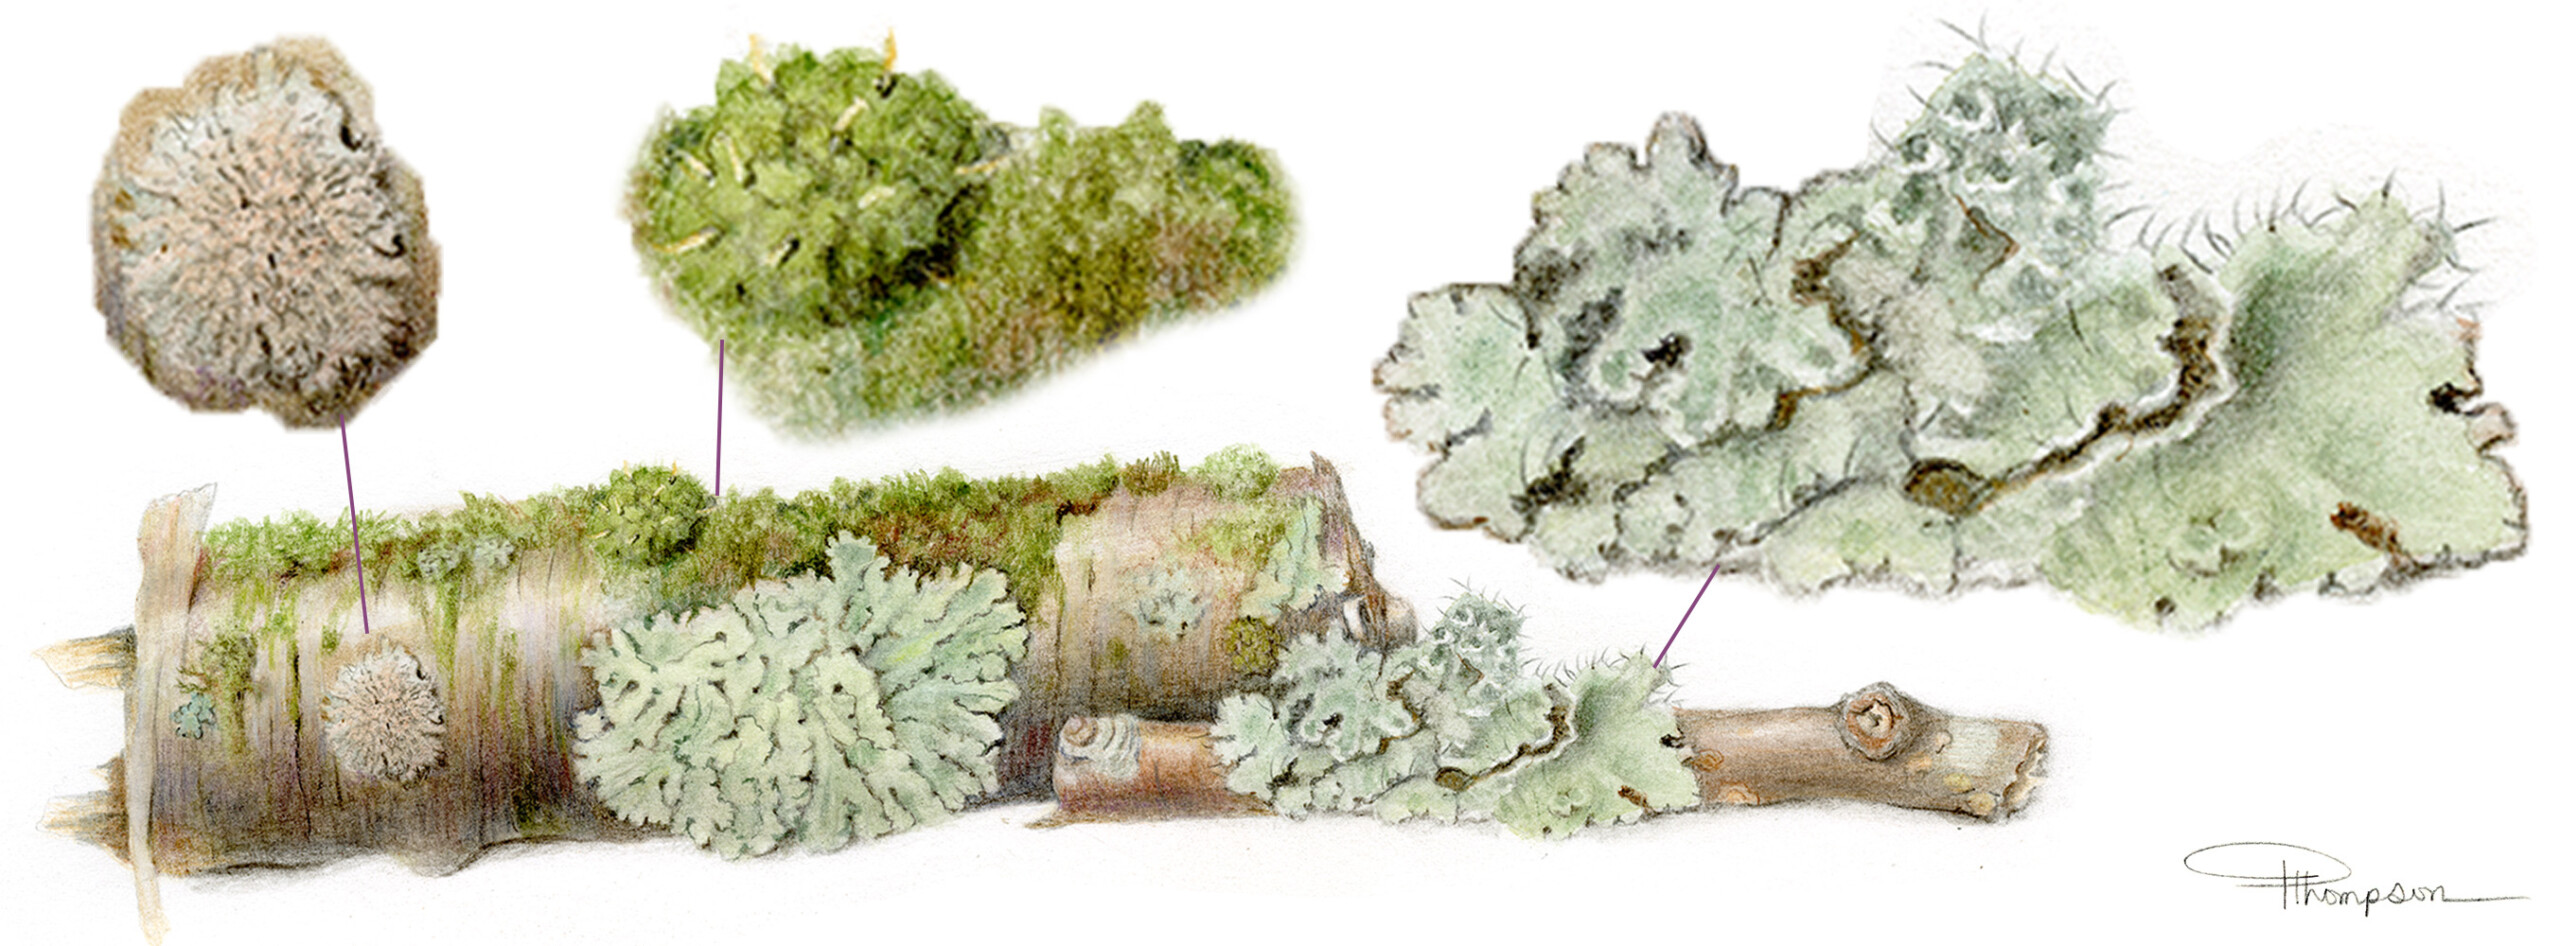
One reason moss has been so successful is because of the diversity in the bryophytes group. (Read more here about how nature teaches us to support one another because of our differences, not in spite of them.) See the image above for close up photos of these 4 common types of moss:
– Sheet Moss – For the science of sheet moss, click here
– Cushion Moss – Learn more about cushion moss here
– Haircap Moss – Here is some more info about haircap moss
– Rock Cap Moss – Click here to read more about rock cap moss
If you’re interested in Moss Identification and Basic Information for 9 Most Common Mosses, click here.

Learn How to Draw Lichen & Moss
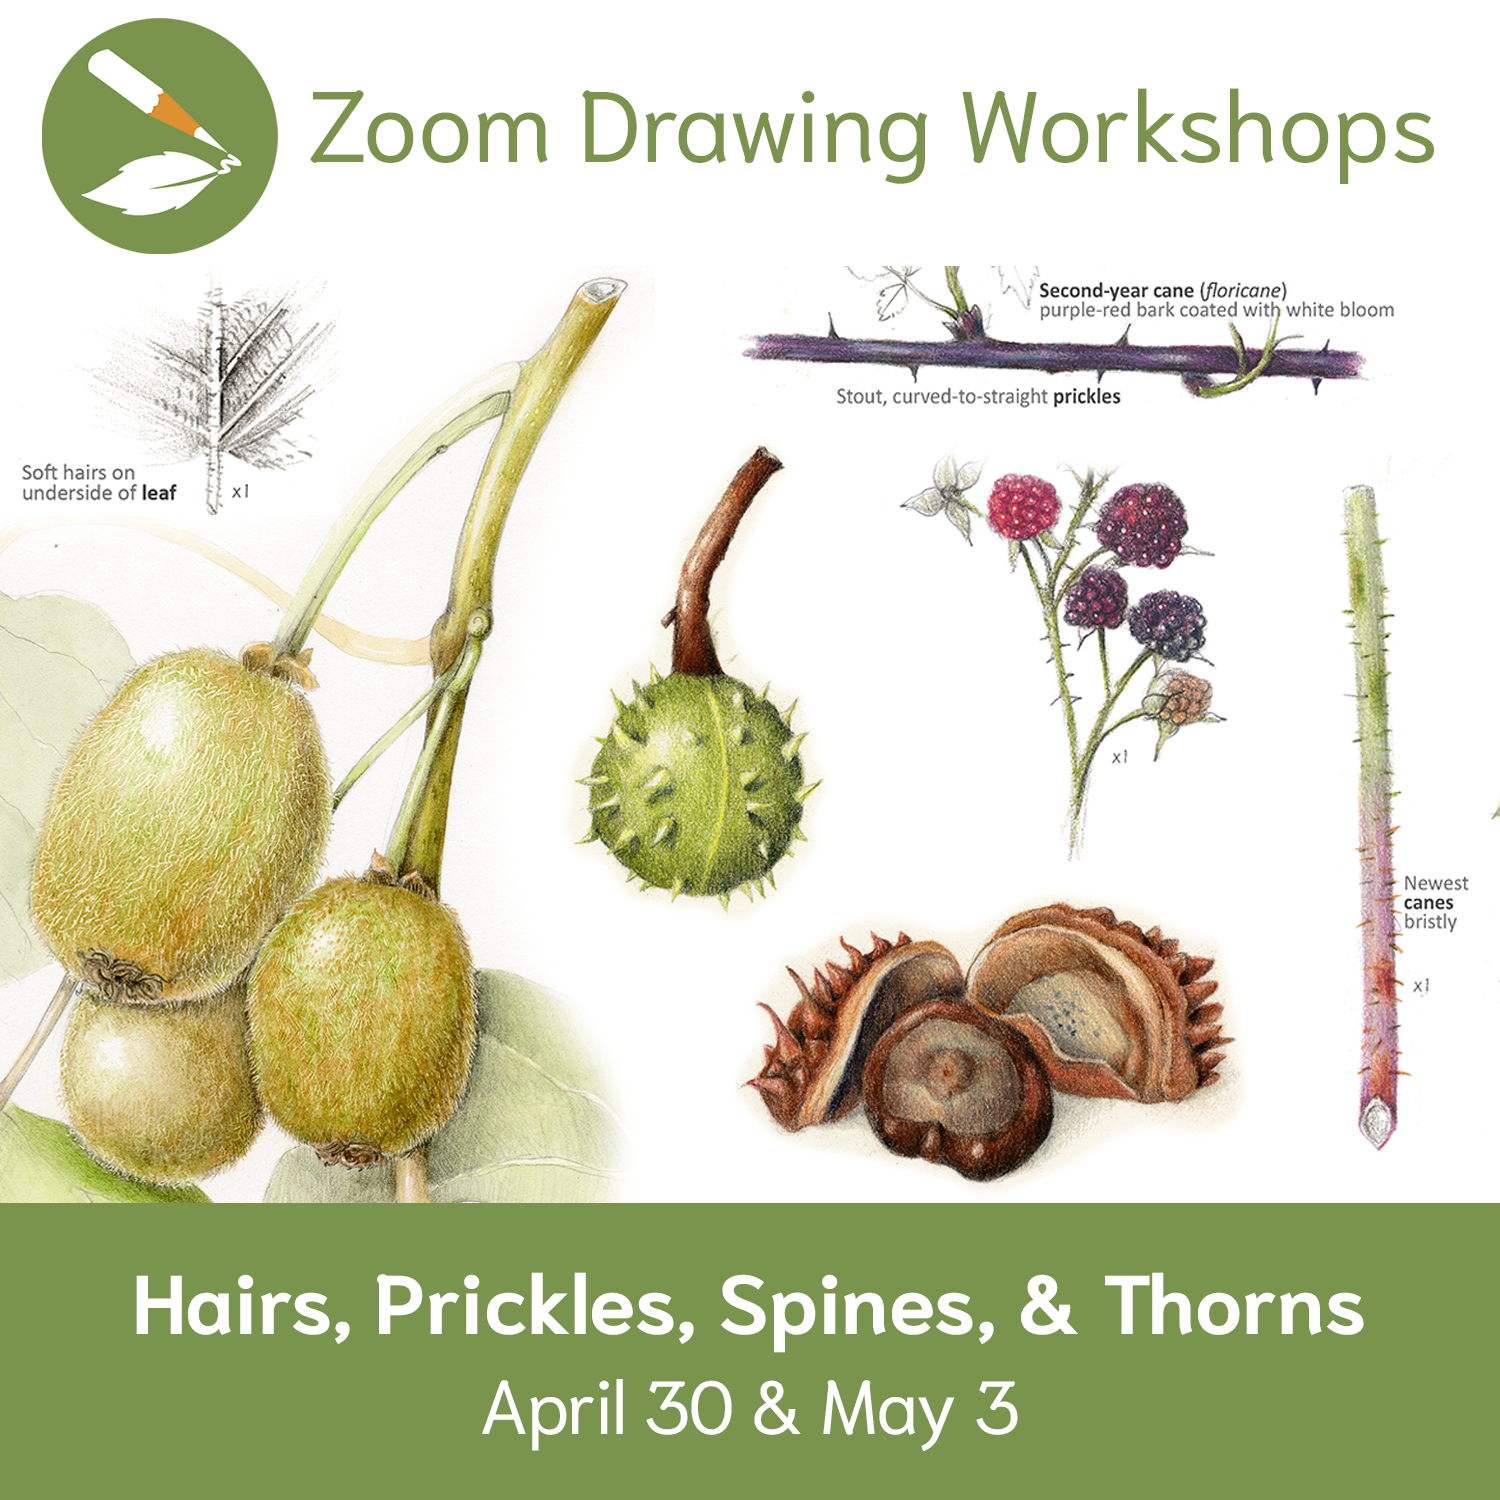
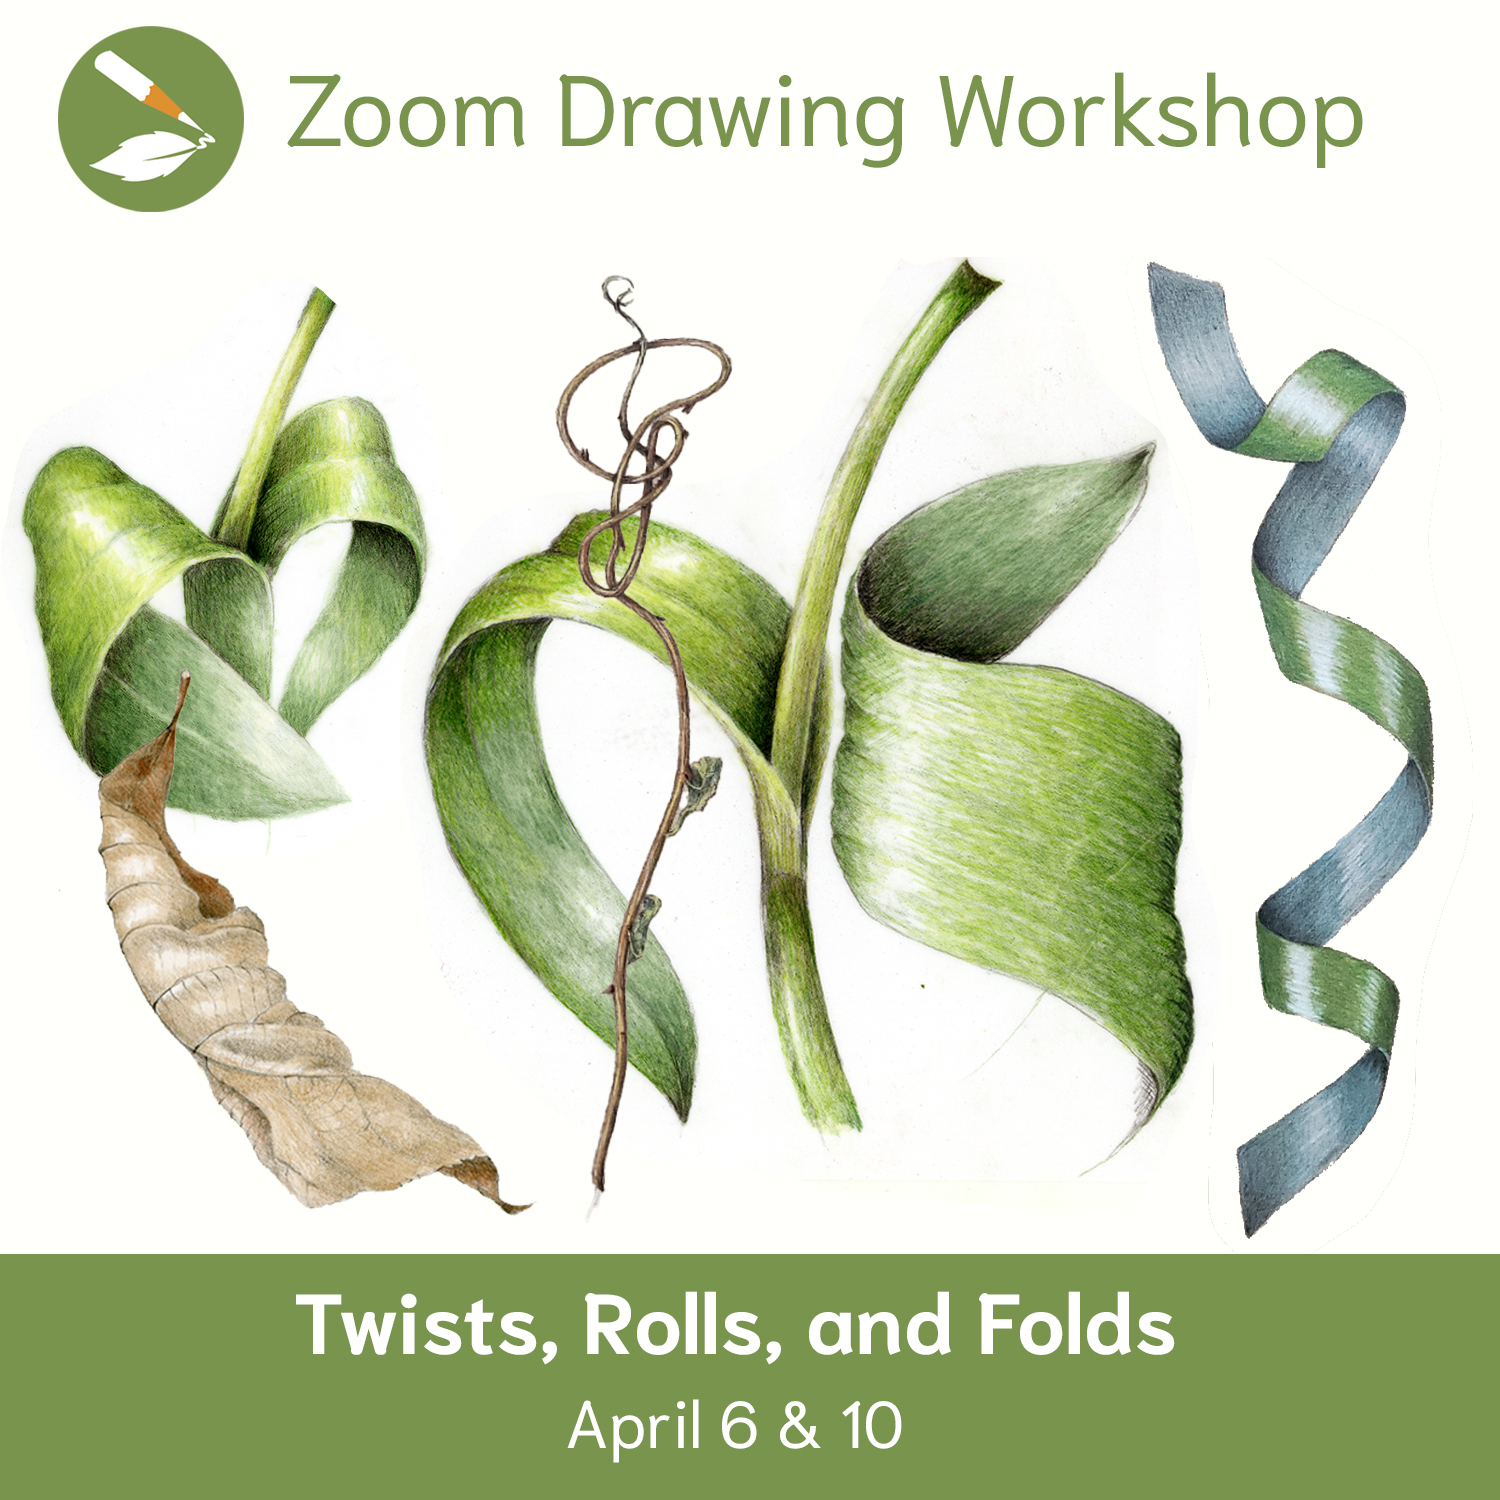
Lichens can be crusty, leafy, shrubby, powdery, scaly… Mosses can be spongy, soft, bristly, feathery, fibrous… So many textures, so little time! Our last Lichen & Moss Workshop was so popular (and so much fun!) that we can’t wait to do it again. (Here’s the Lichen & Moss Recording from 2024.)
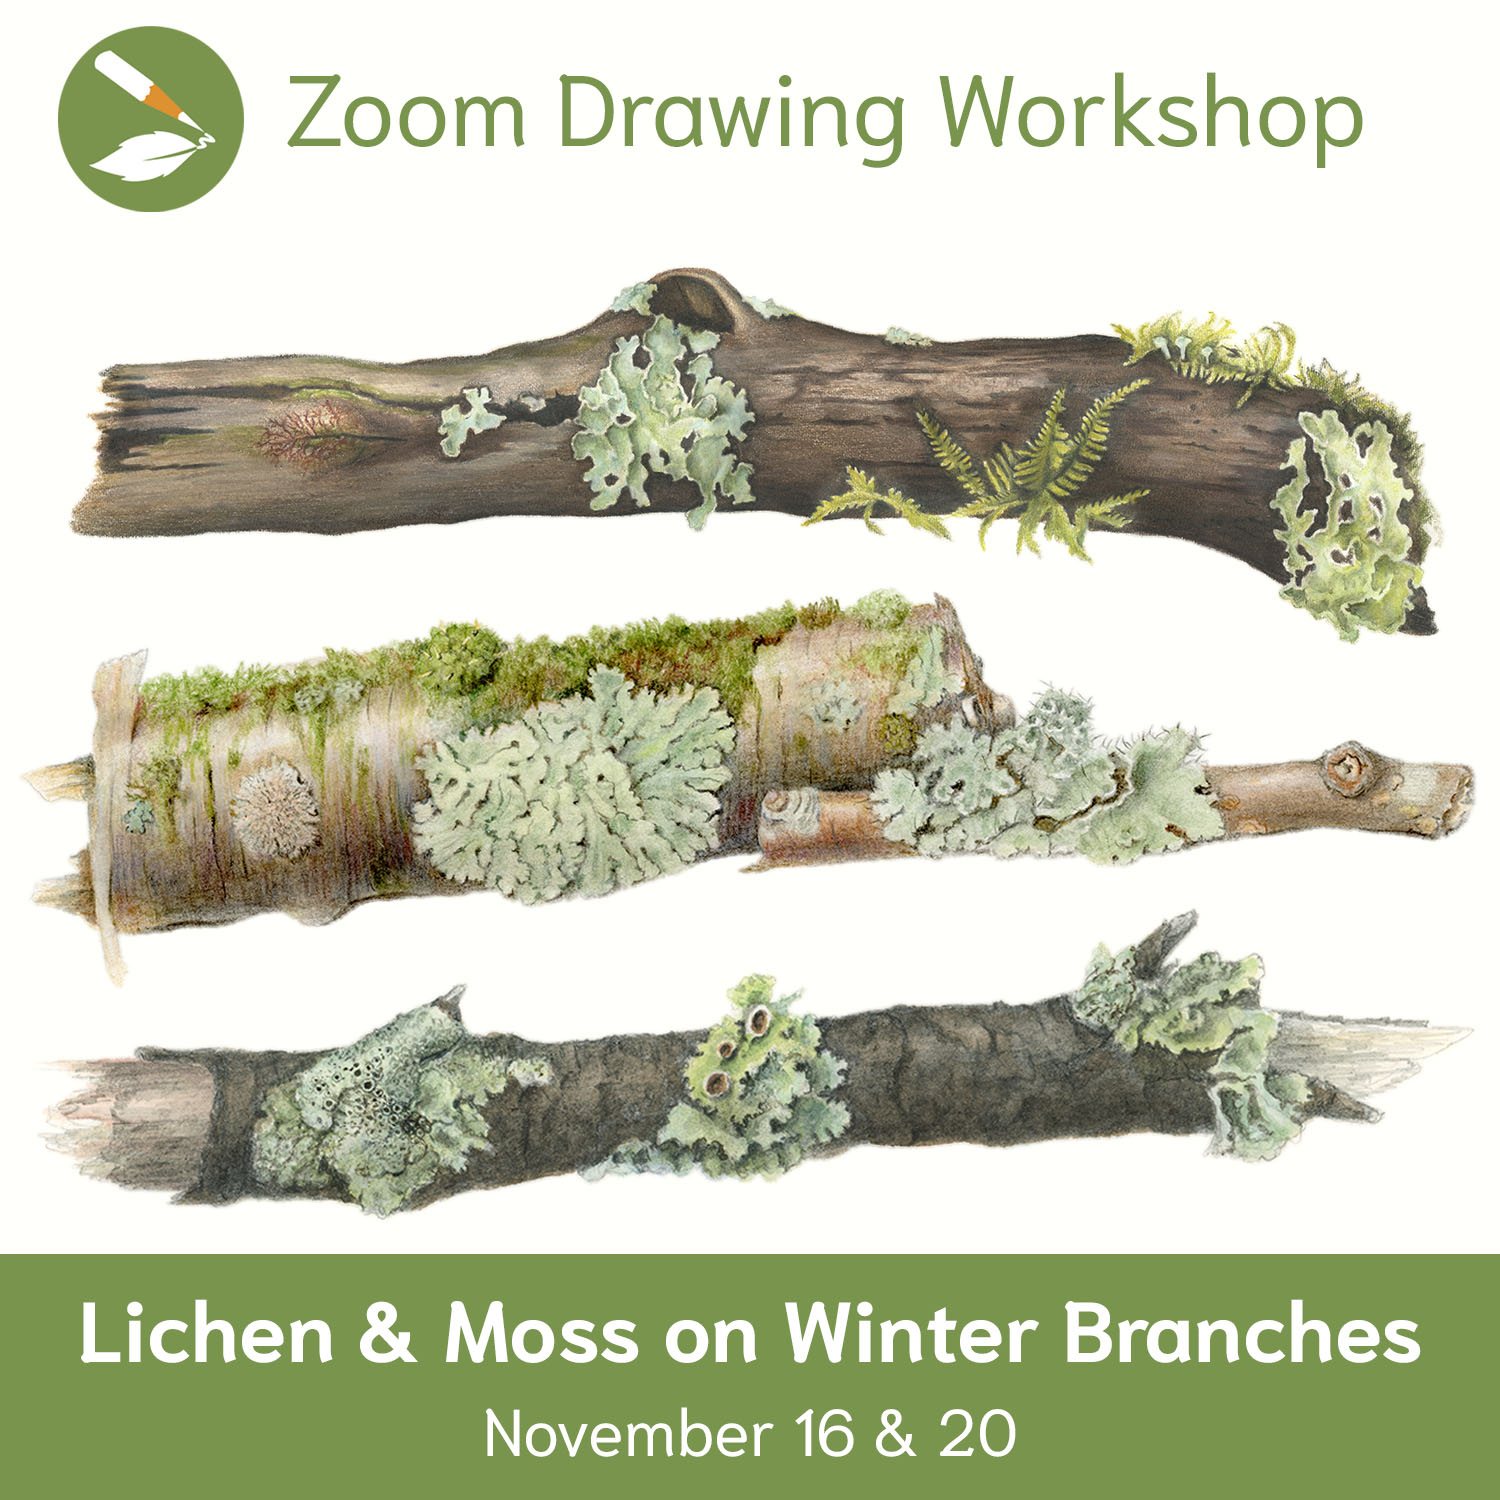
If you find a lichen and/or moss-covered branch in your backyard and want to improve your realistic colored pencil drawing and watercolor painting, you won’t want to miss this workshop where we will walk you through the whole step by step process. Ask questions as they come up, and send in photos of your progress to get positive and constructive feedback. Join Vern and Sam for this live 2-day Zoom Drawing Workshop on November 16 & 20, 2025 and leave with new textural skills in your botanical illustration toolkit.
A few hours after each session, you’ll receive that day’s class recording, which you can watch whenever (no expiration date!). Send in progress or final photos any time (even after the workshop!), and one of our instructors will reply with answers to your questions, compliments that make you smile, and constructive criticism that helps you improve your artwork. (This is true for ALL of our Zoom Workshops! See our upcoming workshops here, and browse past workshop recordings here.)
Register for Lichen & Moss on Winter Branches Zoom Workshop 2025
Real Reviews From Students Like You
“The online courses I have taken through Draw Botanical, taught by Pam and Sam, have been totally relaxing experiences that help each student attain their highest goals in painting and drawing. The easy going interactions between student and teacher puts everyone at ease and creates a comfortable learning environment. You can participate and ask questions as often as you want, or you can largely sit back and listen. Watching the teachers draw a particular subject and demonstrate a particular technique is mesmerizing in and of itself as the blank piece of paper begins to take on a perfectly accurate representation of the subject.
The point is, the classes are fun, immensely educational, and you’re guaranteed to come out a better artist.” -Joseph Bailey
“I am predominantly a watercolor painter and I thought Draw Botanical would focus more on colored pencil technique; however, that is not the case at all. Pam and Sam approach painting subjects with consideration of both the watercolor artist and the colored pencil artist in mind… I learned from their instruction that you can utilize both mediums in your painting to create the effect you want, thereby greatly enhancing your final artwork.” -Joseph Bailey
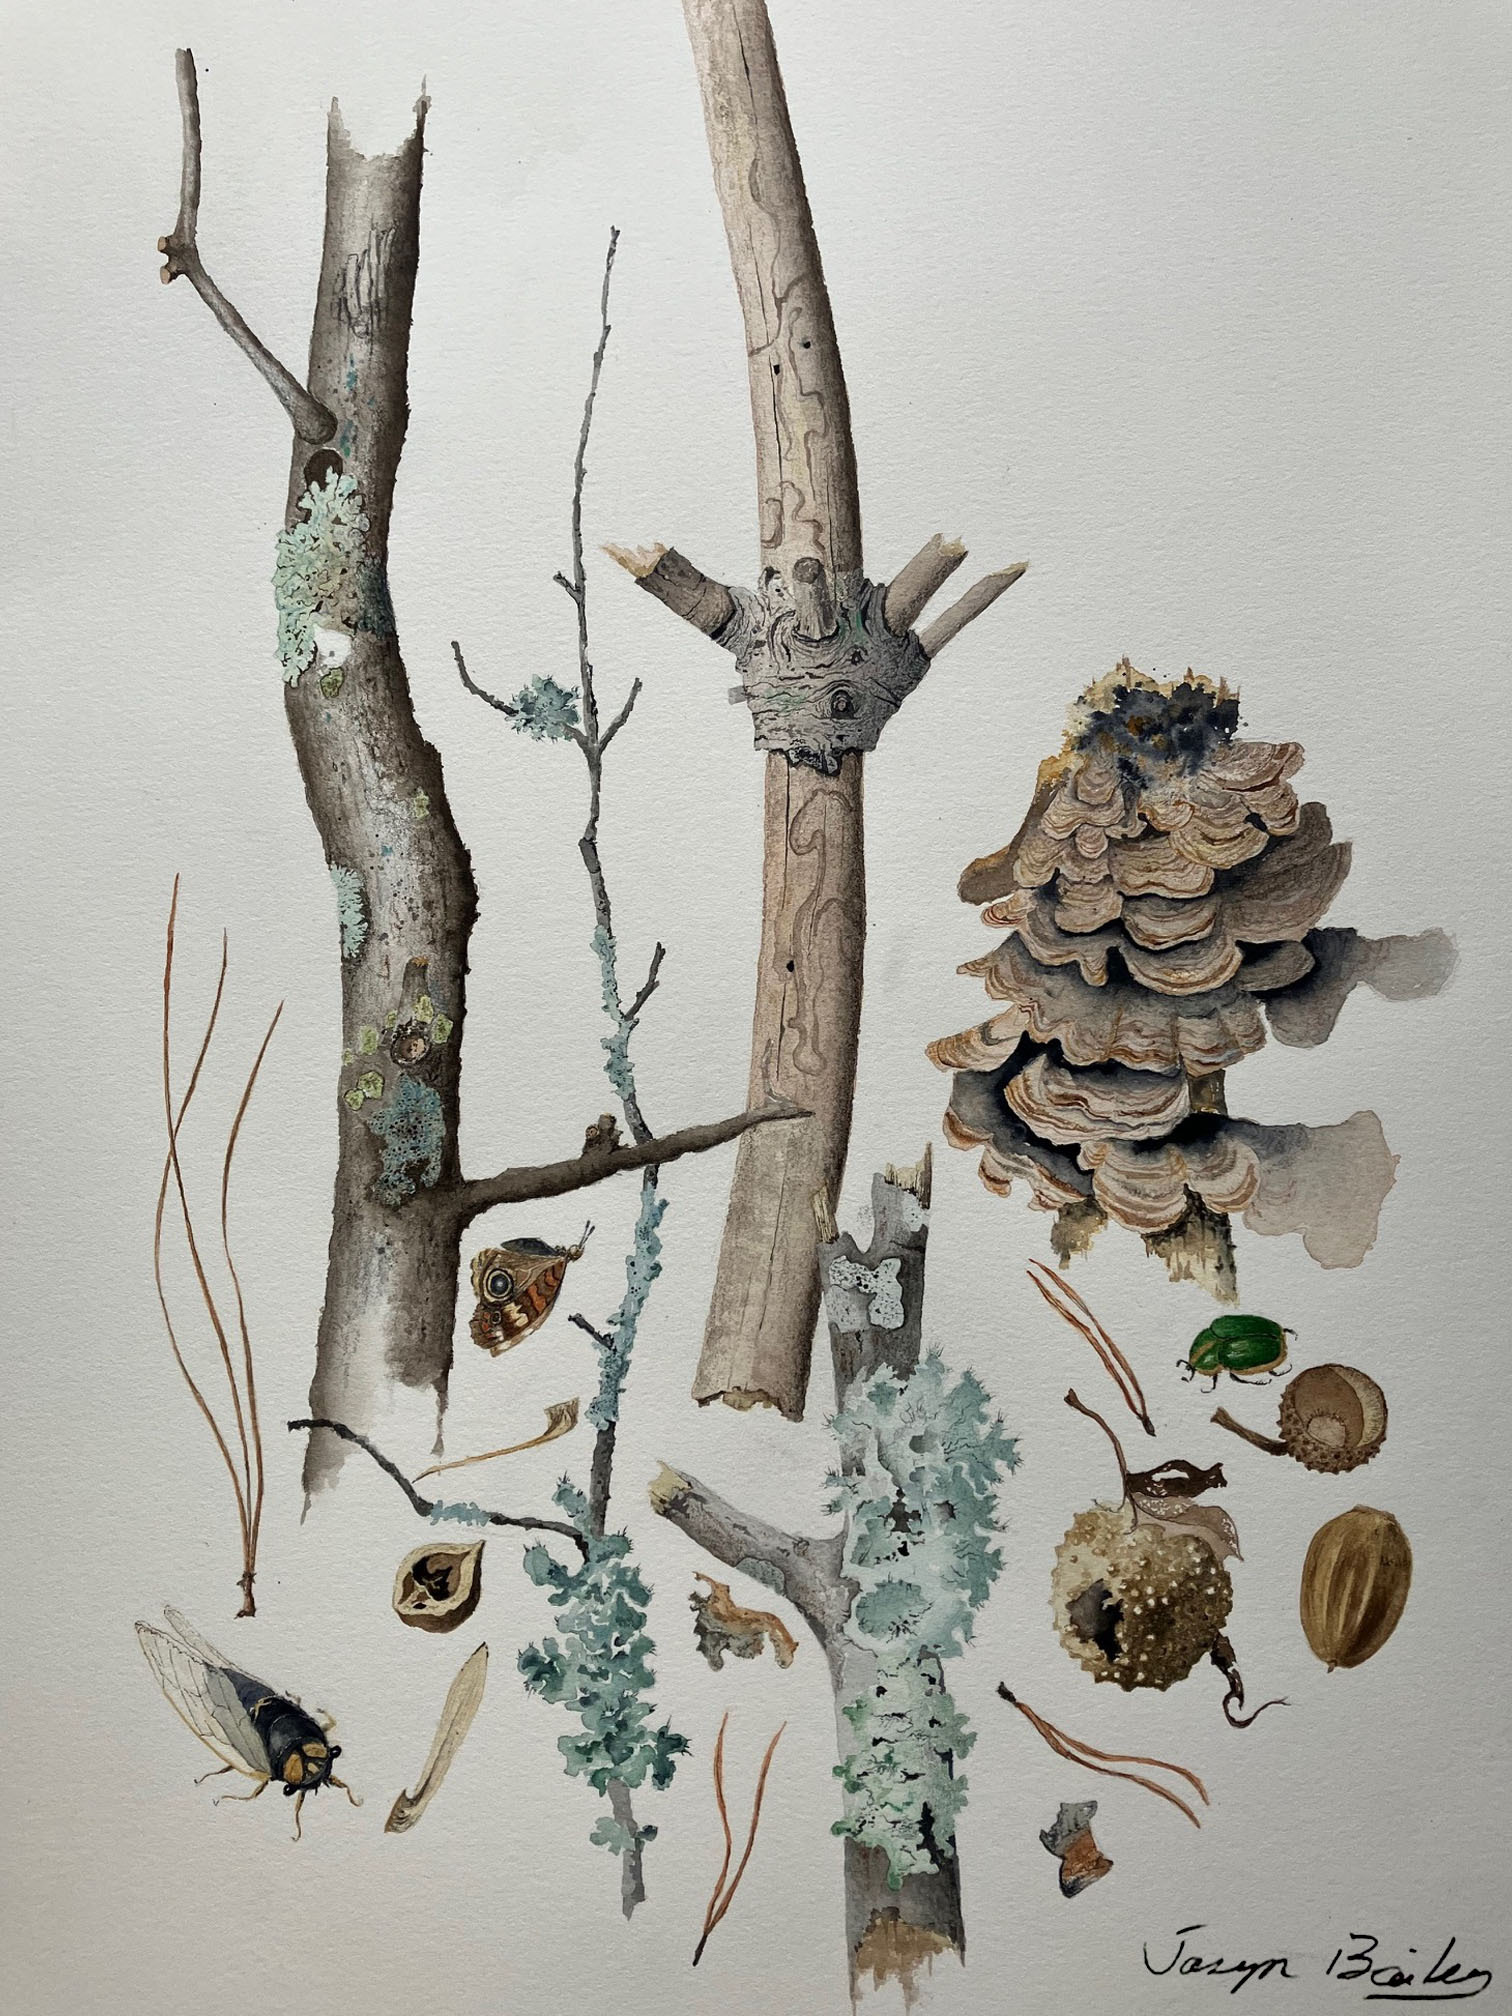
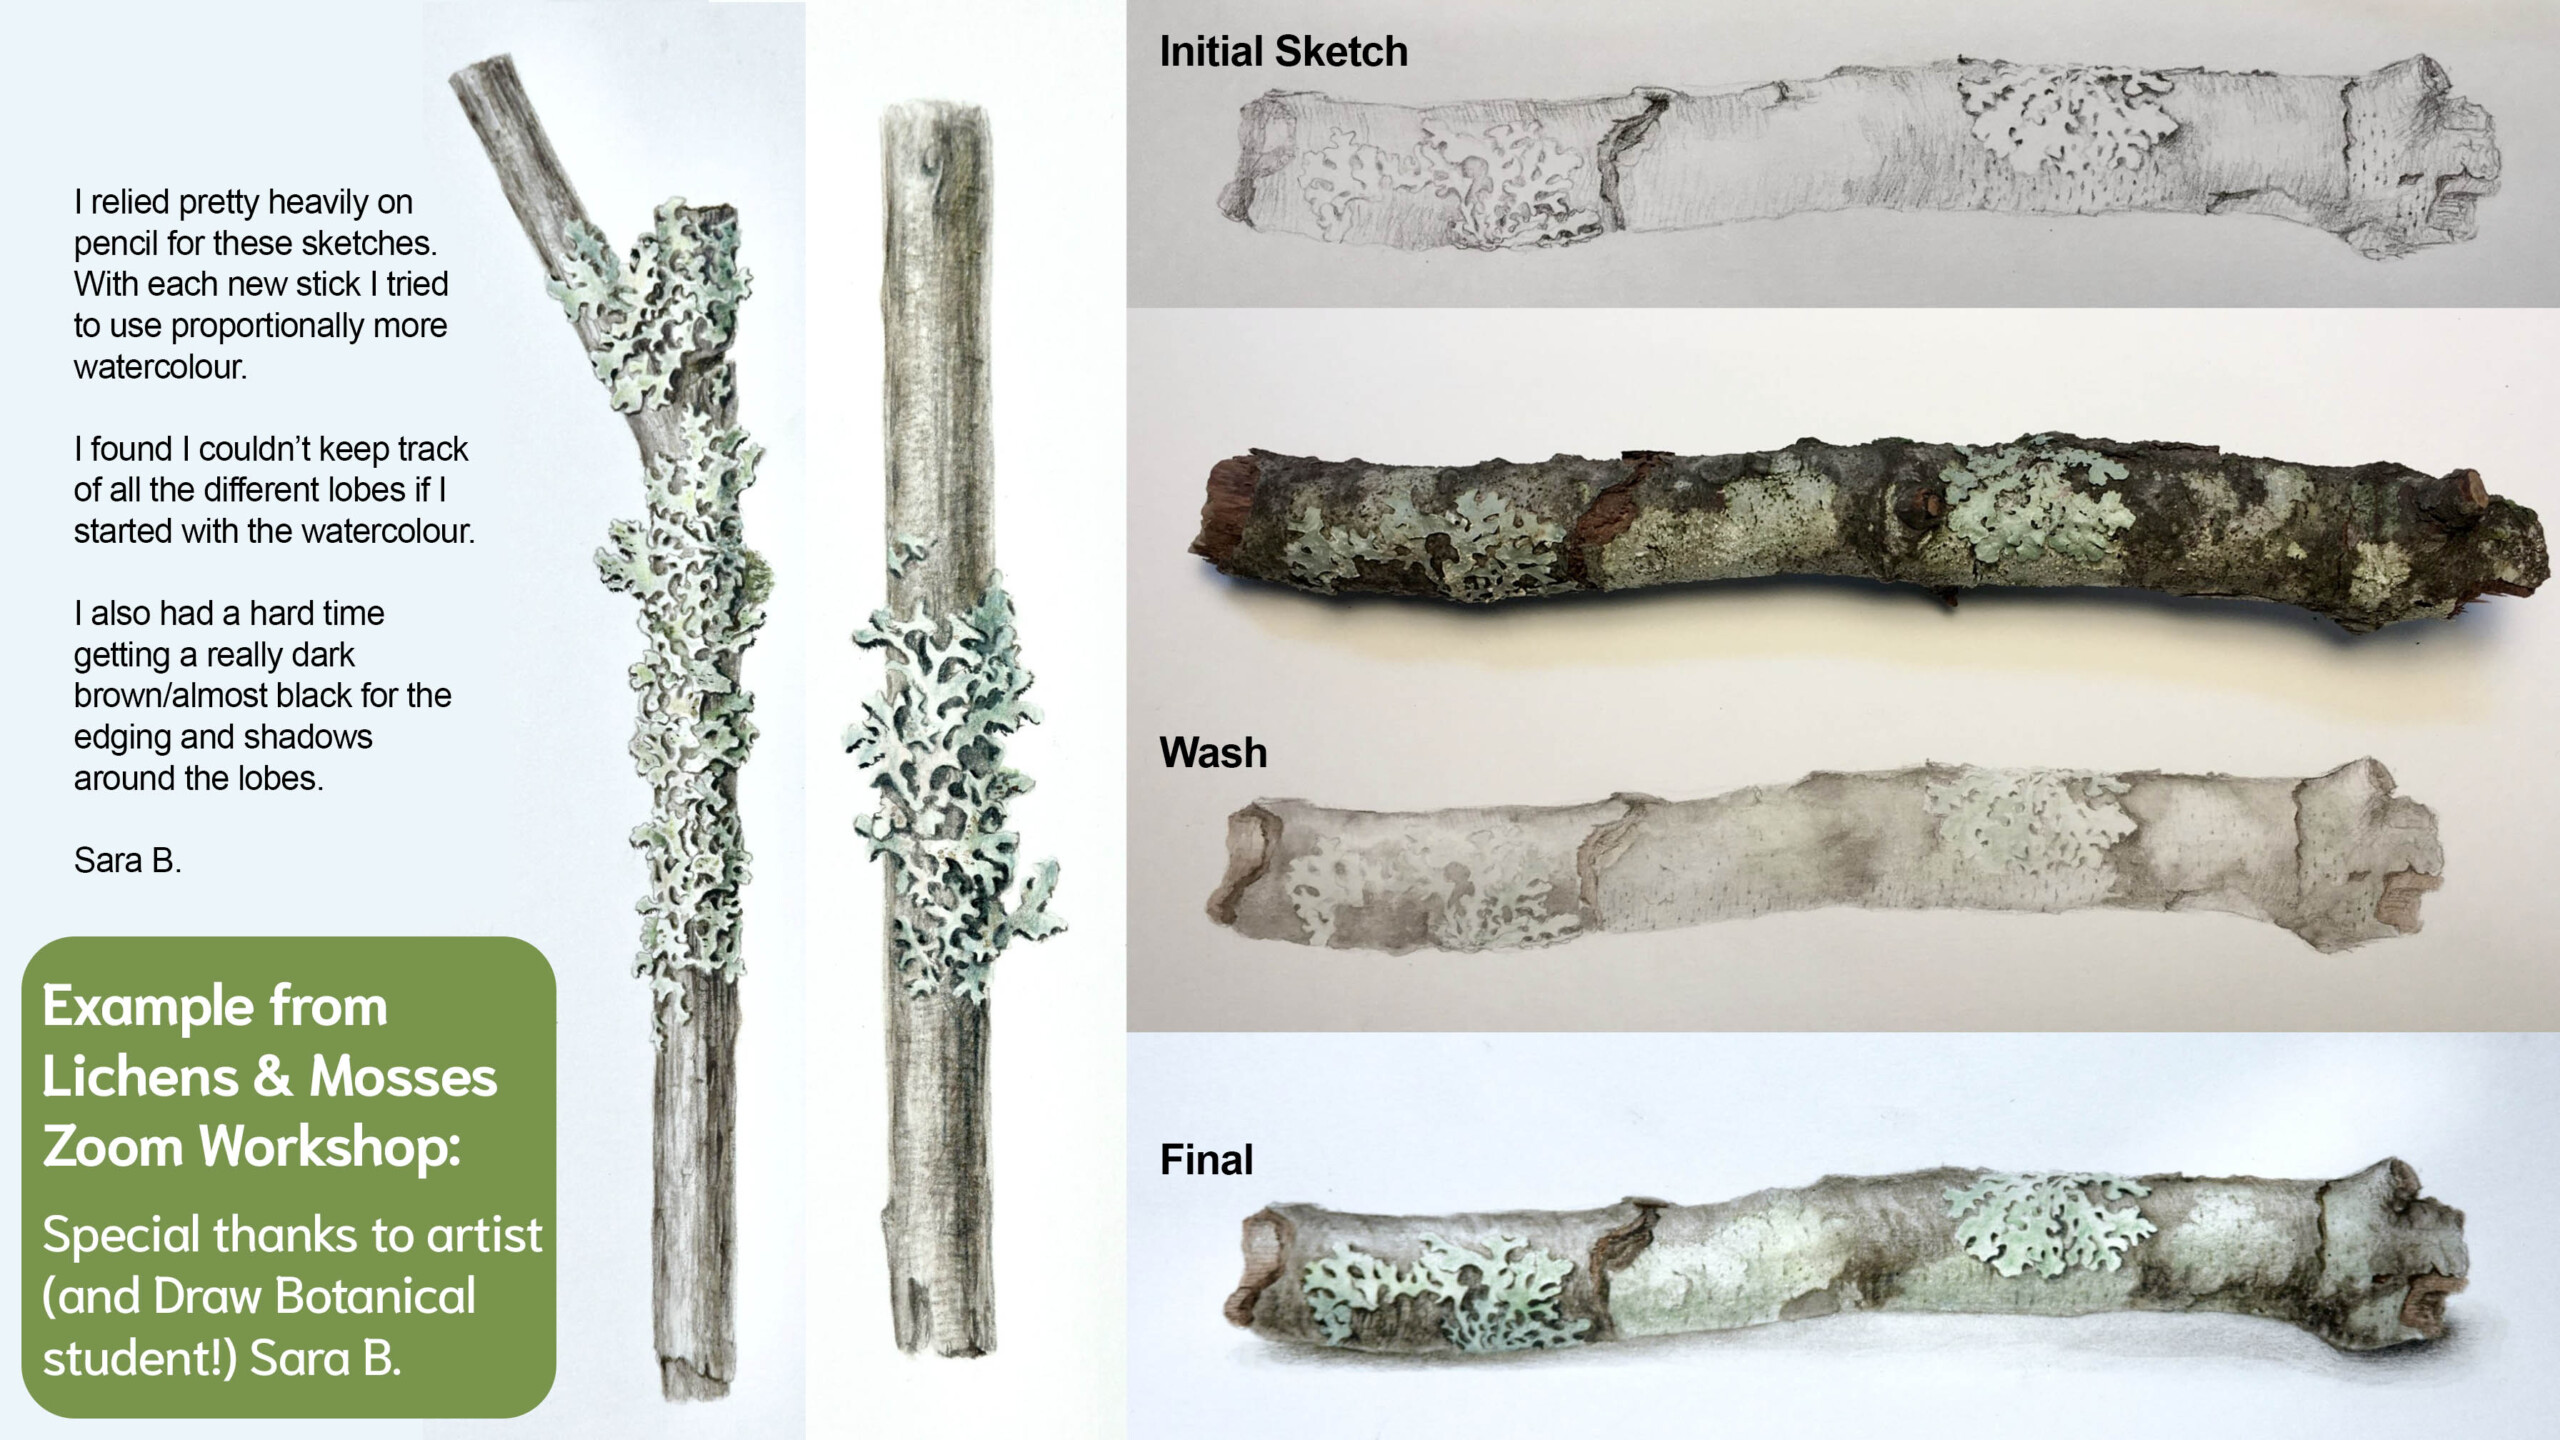
“I started the painting above in a winter class focusing on winter twigs and branches. It was perfect to help pass the bleak, cold winter days. Using watercolor washes and highlights of colored pencils helped achieve the worn look of the lichen covered branches. I completed the two large main branches in class, and after the class, I continued to work on the painting adding more and more bits and pieces to it to make a final composition rather than a study.
Much to my delight, the painting won third place award at a local juried show. Many thanks to the encouragement and guidance from Draw Botanical!” -Joseph Bailey
Click here for more student success stories, like how I began teaching at Draw Botanical by first learning how to draw a mushroom with Wendy.
Technique Tips to Improve Lichen & Moss Illustrations
Learn Botanical Drawing with Colored Pencil and Paint with Watercolor
1. Start with the Big Picture Before the Tiny Details
When drawing lichen or moss, it’s tempting to dive right into all the intricate textures—but resist the urge! Begin by sketching the overall shape and structure, then put down a light layer of grisaille toning. This foundation ensures the depth and dimension of your drawing doesn’t get lost in your subject’s intoxicating details.

2. Build a Base Layer with Watercolor
A watercolor wash is a great way to cover large areas with color quickly. This method saves time and lets you take advantage of watercolor’s fluid, organic look—perfect for the wavy, blotchy surfaces of moss and lichen. Once your base layer is completely dry, use colored pencils to start adding in smaller details.
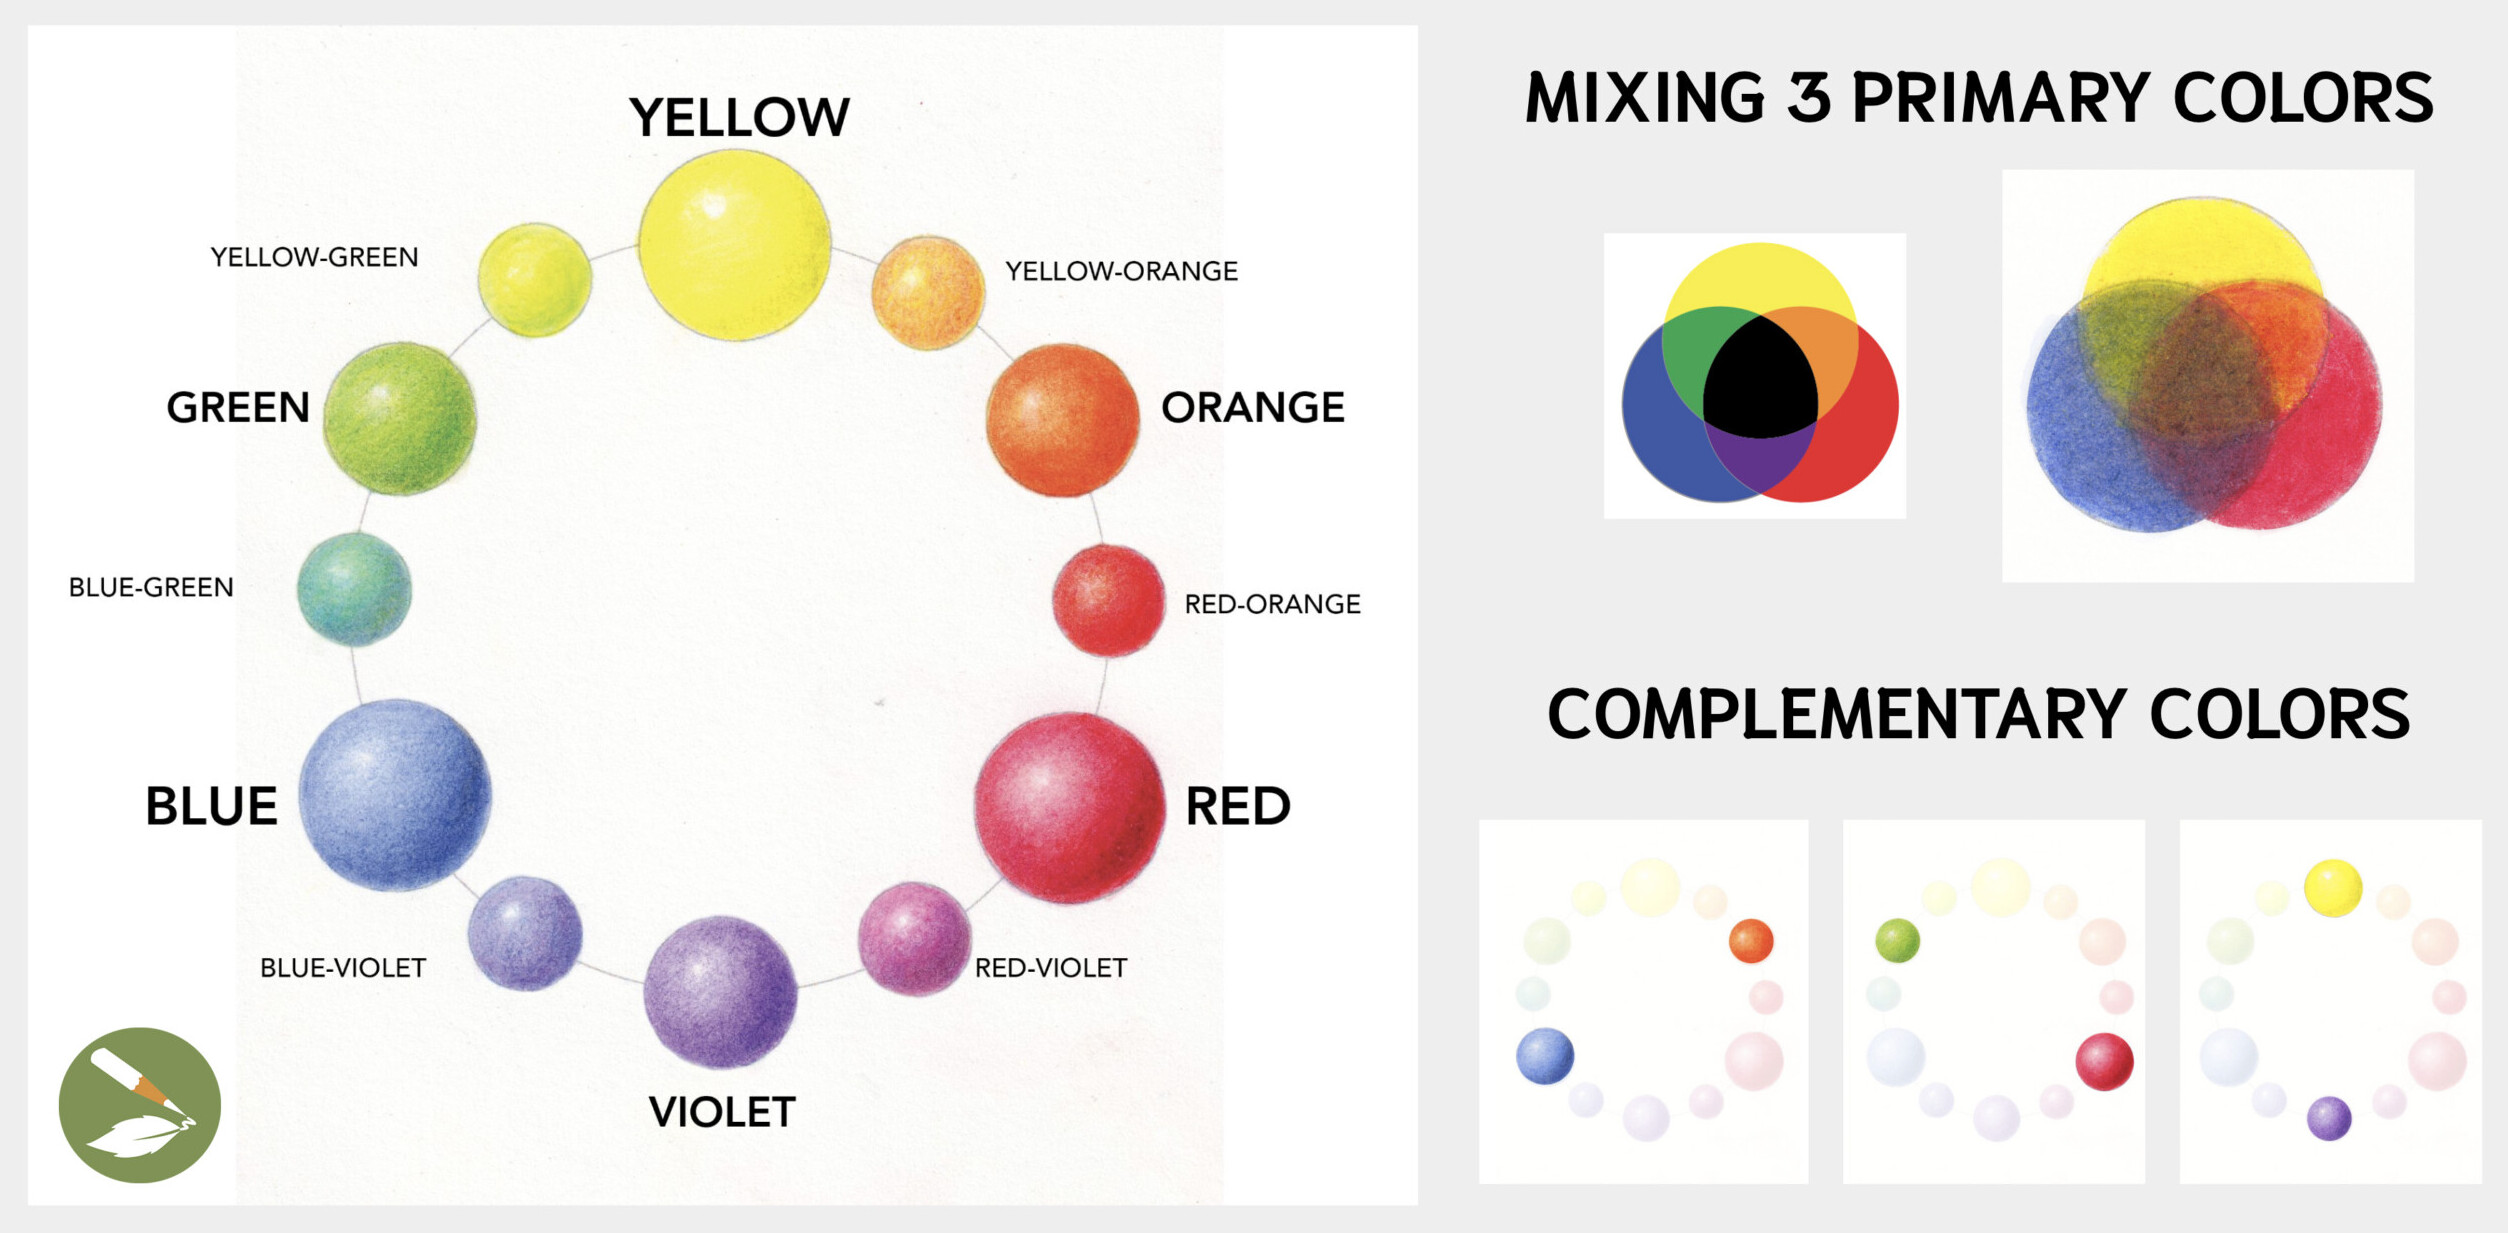
3. Mix Natural Greens by Adjusting with Complements
Moss and lichen often feature muted green or blue-green hues. Start by mixing yellow and blue to match your subject’s local color (base tone), then add a touch of red (green’s complement) to dull the color slightly. This creates realistic, earthy greens instead of artificial, bright tones. Learn more about color theory here.
4. Use Wet-in-Wet Techniques for Organic Texture
To mimic the irregular patterns of lichen and moss, drop darker watercolor into damp areas while leaving some spots lighter. This simple wet-in-wet technique naturally creates soft edges and varied textures that resemble real growth patterns. Find more tips on watercolor techniques here.
5. Let Watercolor Dry FULLY Before Adding Colored Pencil
Patience pays off—make sure your watercolor layer is completely dry before moving on to colored pencils. Working on a dry surface keeps your pencils sharp and prevents damaging the paper.
6. Model Light and Shadow Like a Cylinder
As you add detail with colored pencils, think about how light falls on rounded forms. Practice shading curves, folds, and uneven surfaces as if they were cylinders. This technique brings volume to hills, valleys, and lobes, making your moss or lichen feel three-dimensional. Click here to learn more about light source.
7. Preserve Tiny Highlights with Embossing Tools
For delicate features like the edges of foliose lichen lobes or fine hairs, use an embossing tool before applying color. This creates crisp, light lines that remain untouched by pencil—perfect for subtle textures and tiny highlights. Find more tips on textures here.
8. Adjust Overall Color with Light Watercolor Glazes
If your green looks too vibrant, too yellow, or too blue, you can fine-tune it by applying a glaze that is very dilute, more water than pigment.
Too vibrant? Add a thin red glaze to neutralize it.
Too yellow? Add a soft blue glaze.
Too blue? Add a soft yellow glaze.
These subtle adjustments can shift the entire drawing toward a more natural palette. Learn more about color theory here.
9. Add the Darkest Darks for Depth and Contrast
Near the end of your illustration, deepen the shadows in the crevices and recesses. Adding those darkest darks creates strong contrast, helping your subject pop off the page. Verithin colored pencils are excellent for reaching into tight, intricate spaces. Make sure you have a good pencil sharpener to get the finest details.
10. Step Back and Assess the Whole Drawing
Before calling it finished, take a step back and view your work from a distance. Check that your colors are balanced, textures read well, and highlights and shadows create believable depth. Ask yourself these 10 questions every artist should ask while drawing. Sometimes small tweaks at this stage make the biggest difference.
Here are 8 tips to help you evaluate when your art is complete.
Drawing lichen and moss is like uncovering a tiny, hidden world—each texture, curve, and shade of green has a story to tell. With thoughtful watercolor washes and layers of colored pencil details, these often-overlooked organisms can take center stage in your botanical art.
So grab those brushes, sharpen those pencils, and let your curiosity and creativity play together! Whether you’re sketching the soft, spongy folds of moss or the crusty, leafy lobes of lichen, remember: it’s not about perfection, it’s about observation, layering, and a sense of wonder.
Frequently Asked Questions about Drawing Lichen & Moss
Quick Answers to FAQs
Q: Where can I find lichen and moss to draw?
A: Lichen and moss grow all around the world—in forests, gardens, parks, mountains, and even city streets. Look for them on tree bark, rocks, old fences, or damp shady spots. Just remember to observe and photograph in place rather than collecting from protected habitats.
Q: What’s the best season to observe and draw mosses and lichens?
A: Mosses and lichens can be drawn year-round, but they’re often most vibrant and hydrated in cooler, wetter months—typically fall through spring. Seasonal changes can offer different textures and colors to study.
Q: How do I capture the subtle, dull greens of moss and lichen accurately?
A: Mix yellow and blue to match your subject’s local color (base hue), then add a touch of red to mute the color naturally. If your green ends up too vibrant, glaze with a diluted red wash. For overly yellow or blue tones, adjust with light glazes of the complementary primary.
Q: The colors of my greens look way too bright, artificial, and flat–what do I do?
A: Layer slowly and avoid using a single flat green. Build depth by glazing transparent watercolor layers and overlaying different pencil greens with touches of complementary colors. Natural greens usually have subtle variations rather than uniform tones.
Q: How can I make moss and lichen look three-dimensional on paper?
A: Think of the surface like a series of small hills and valleys. Use the “light on a cylinder” shading model—adding soft gradations of tone to show curved forms. Deepen shadows in recesses and leave subtle highlights on raised areas to create depth.
Q: How can I make my painting of lichen or moss look less flat?
A: If you couldn’t help but start your drawing with the fascinating details of your lichen or moss, you may have forgotten to shade the overall form of your subject. Tone first, color second, details third.
Q: What’s the best way to suggest texture without overworking the drawing?
A: Focus on strategic detail. Use watercolor’s natural blotchiness to your advantage, then apply colored pencil in selective areas to suggest hairs, lobes, or scales. Embossing fine lines early can preserve light textures without adding clutter later.
Q: What’s a good way to finish a lichen or moss illustration?
A: Toward the end, add your darkest darks into the deepest recesses to bring the piece to life. Step back to assess overall contrast, adjust glazes if needed, and refine only where necessary—resisting the urge to over-detail every surface.