How to Draw a Rose Tutorial
A Botanical Illustration Guide using Watercolor & Colored Pencil
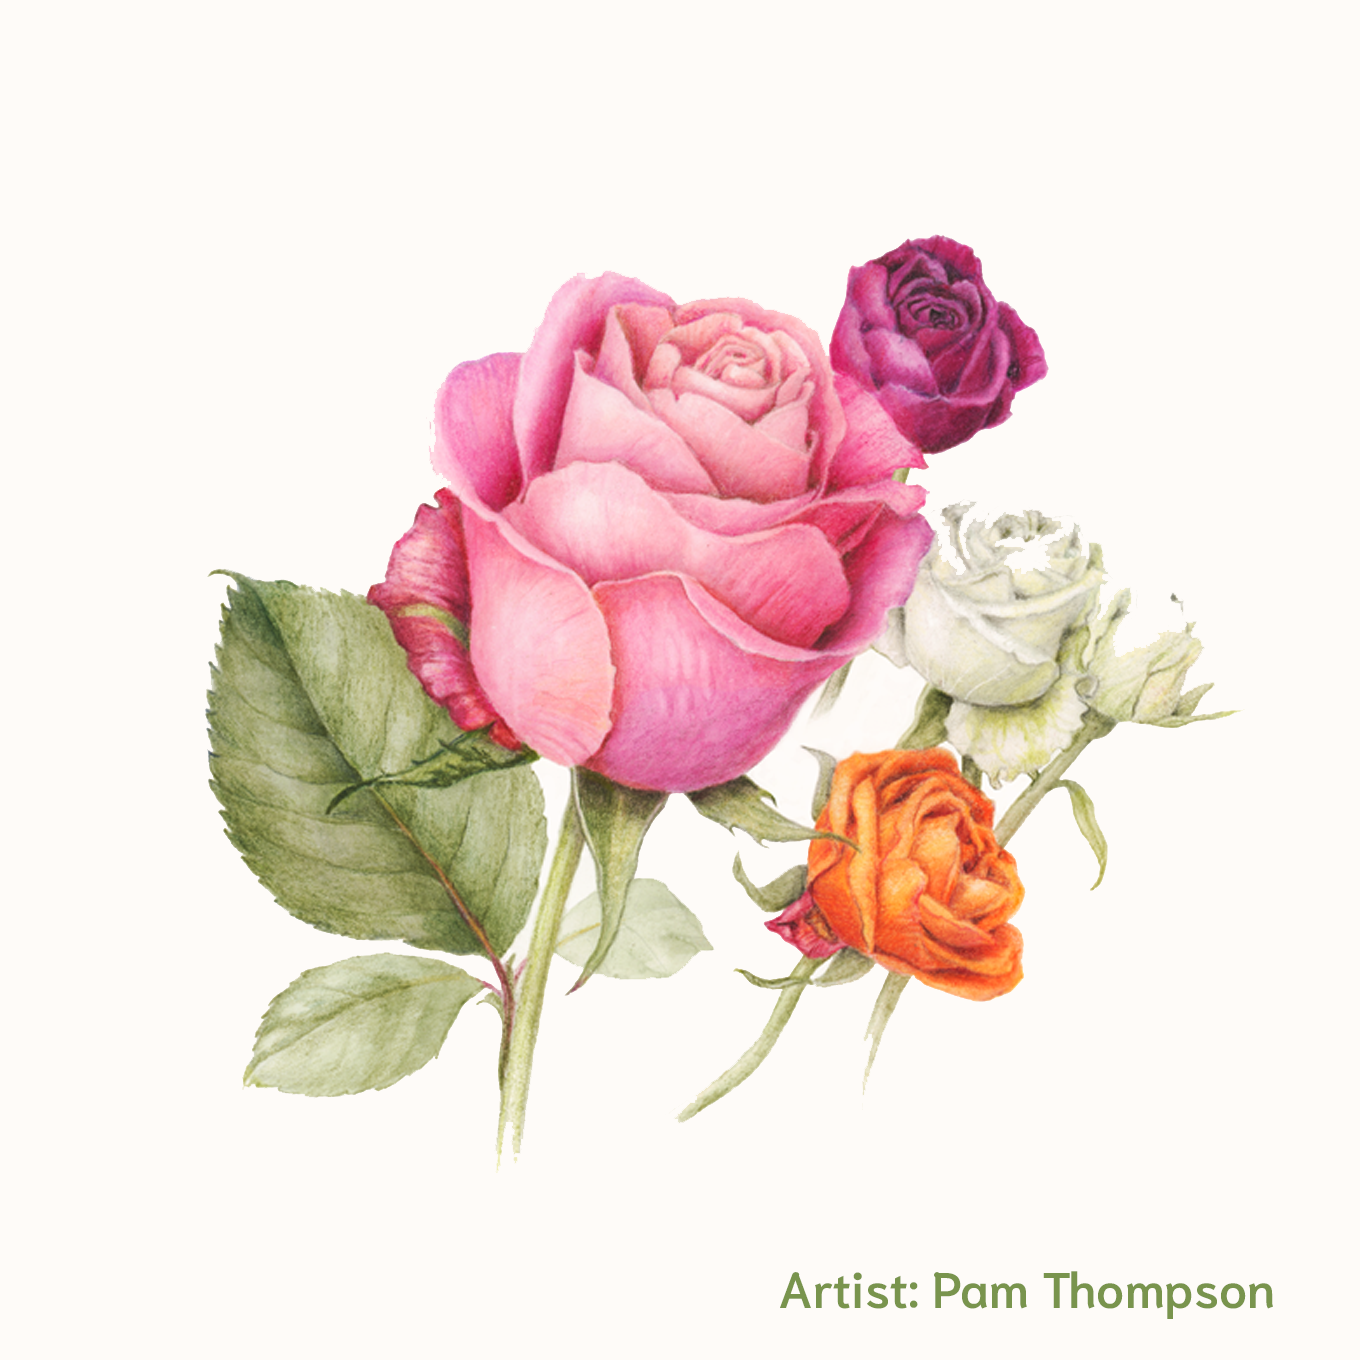
By the Draw Botanical Instructor Team

Roses have been drawn, painted, admired, and studied for centuries, and it’s easy to see why. Their layered petals, luminous color, and sculptural form make them endlessly fascinating subjects for botanical artists. Learning how to draw a rose isn’t something you do once and master forever. It’s a lifelong practice, one that deepens each time you slow down, observe closely, and—yes—remember to smell the roses along the way.
In this guide, we’ll walk you through how to draw a rose step by step using a combination of watercolor and colored pencil. This is the same approach we use in our botanical illustration practice, the Draw Botanical Method. Everyone develops their own style over time, so treat this as a rose drawing tutorial meant to support and inspire, not a rigid formula to follow exactly.
Whether you’re searching for how to draw a rose easy or you’re ready to dive deeper into realism, you’re in the right place.

Quick Botany Lesson
Understanding Rose Structure
Before pencil touches paper, it helps to understand what you’re actually drawing.
A rose is more than a swirl of petals; it’s a carefully organized structure:
• Petals grow in layers, spiraling outward from the center
• The bud forms a tight, cupped shape before opening
• Petal bases overlap and tuck into one another, creating depth
• Sepals protect the bud early on (often visible beneath the bloom
• Leaves are typically shiny, serrated, and compound, with strong midribs
When you understand how these parts connect, drawing becomes far less overwhelming. Instead of “too many petals,” you begin to see repeating shapes—curves, cylinders, and overlapping planes—that you can describe with light and shadow. To help with curvy petals, here are 4 Tips for Drawing Twists, Rolls, and Folds.
Choose a Rose & Set up for Success
The Power of Preparation & Perspective
If drawing a rose feels intimidating, you’re not alone. Roses can be dizzying! Our advice: start simple.
• Beginners: choose a tightly budded rose
• More experienced artists: pick any rose that sparks curiosity
• Collect several roses so you can gently deconstruct one and study individual petals
Position your rose with a strong, single light source. Lighting changes everything! It’s what turns a flat drawing into a three-dimensional wonder. To better understand how shadows and highlights create form, we recommend reviewing this foundational resource on light source and shading.
Before you begin, take time to set up your materials (we recommend these art supplies) and get your hand ready to go. There’s real power in preparation. If you’d like to loosen up first, try these gentle drawing warm-ups.
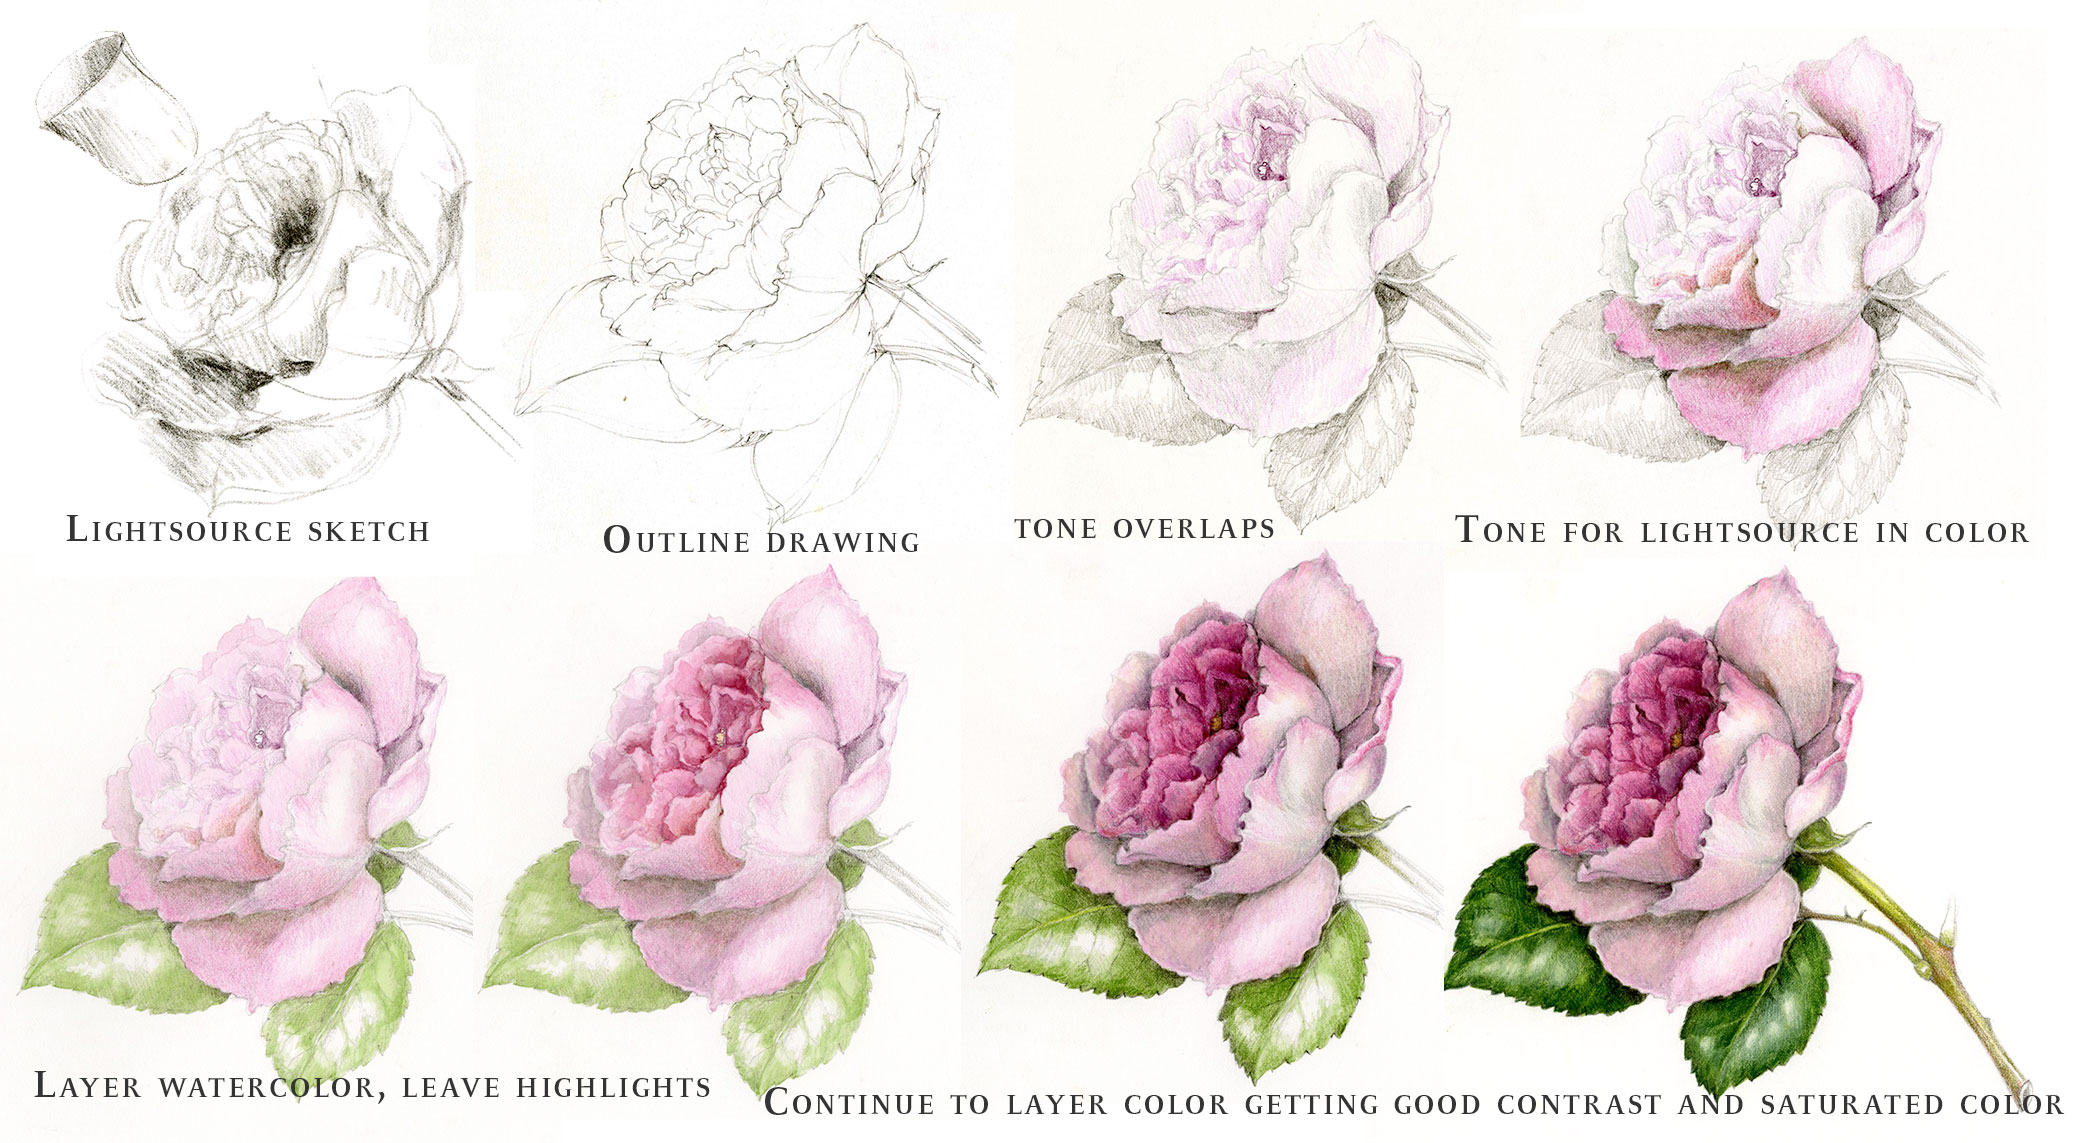
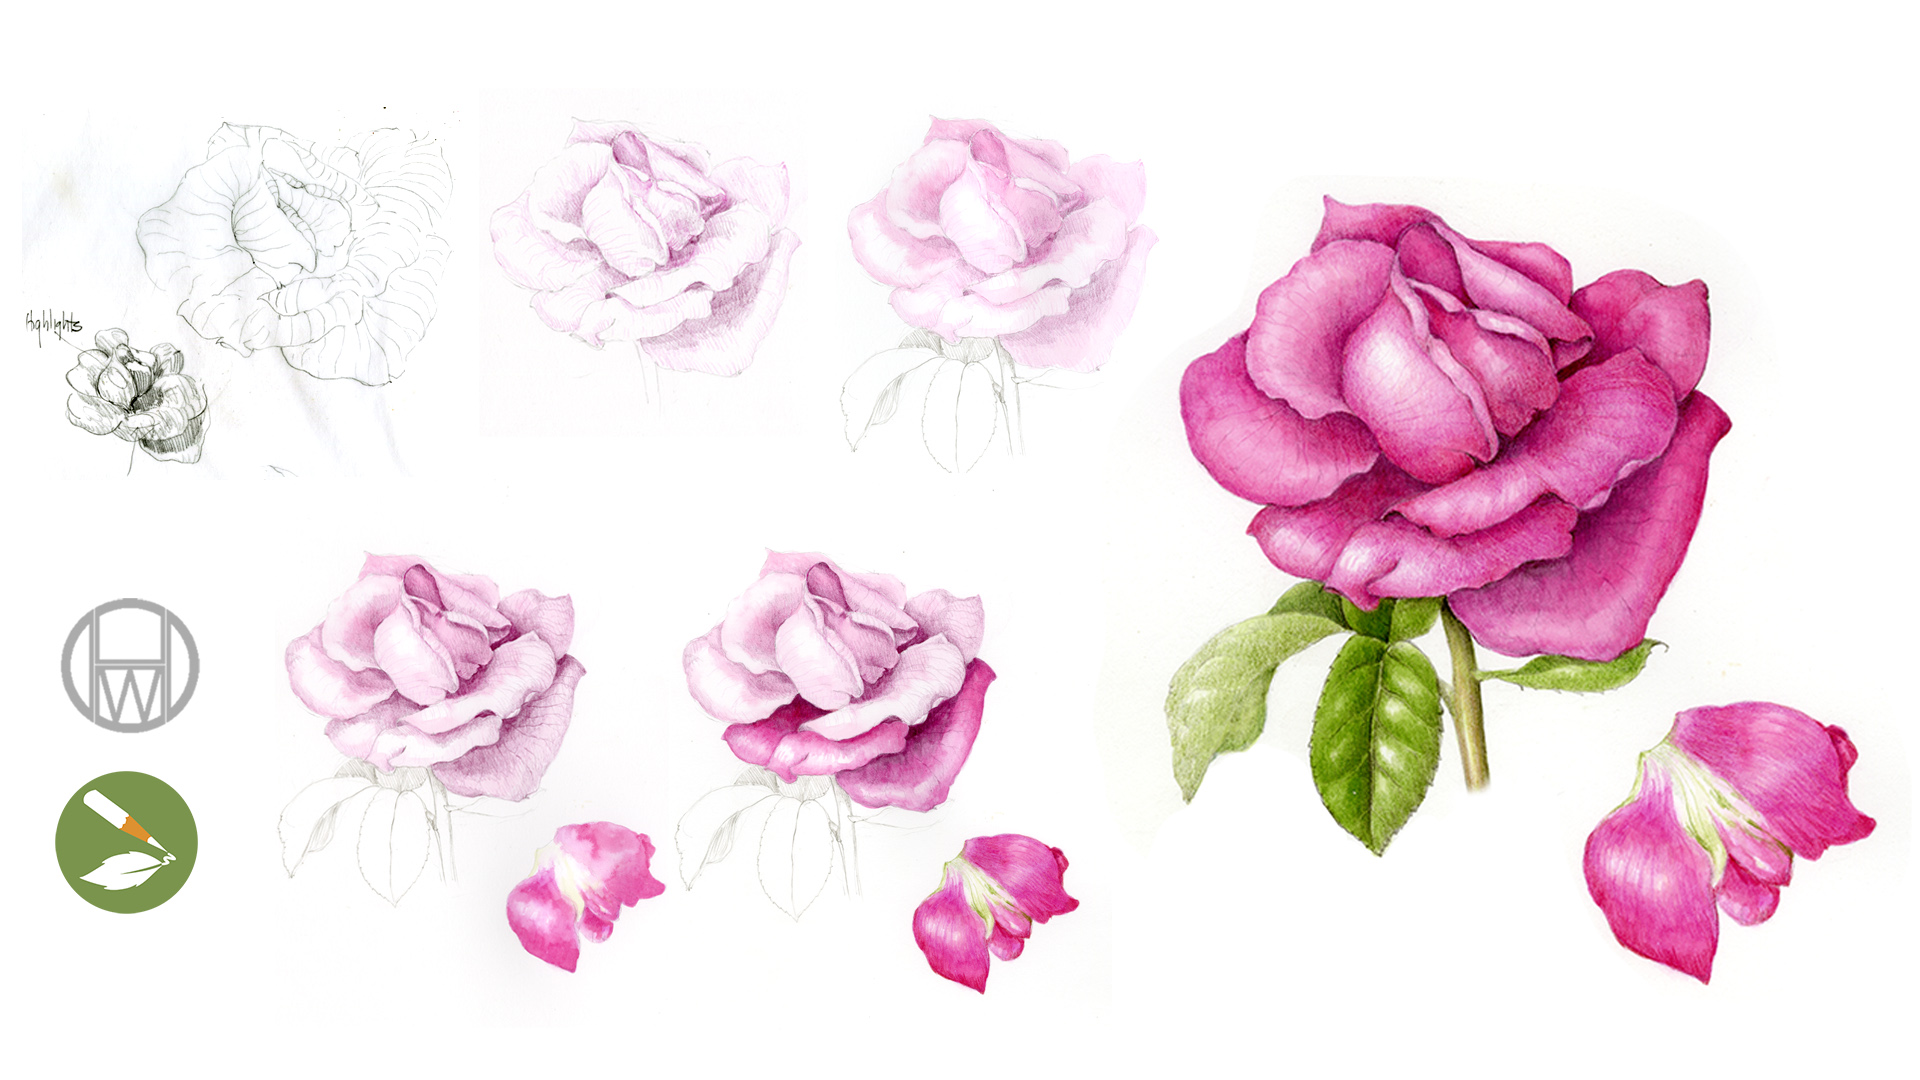
How to Draw a Rose Step by Step
The Draw Botanical Method for Realistic Nature Illustrations
Everyone has their own way to draw and paint. These are simply the steps we use when creating a realistic botanical illustration of a rose using watercolor and colored pencil. Feel free to adapt them to suit your style.
Botanical illustration, botanical art, flower painting, and plant portraiture may seem interchangeable, but there are actually some distinct differences between the terms. Uncover their distinguishing details here.
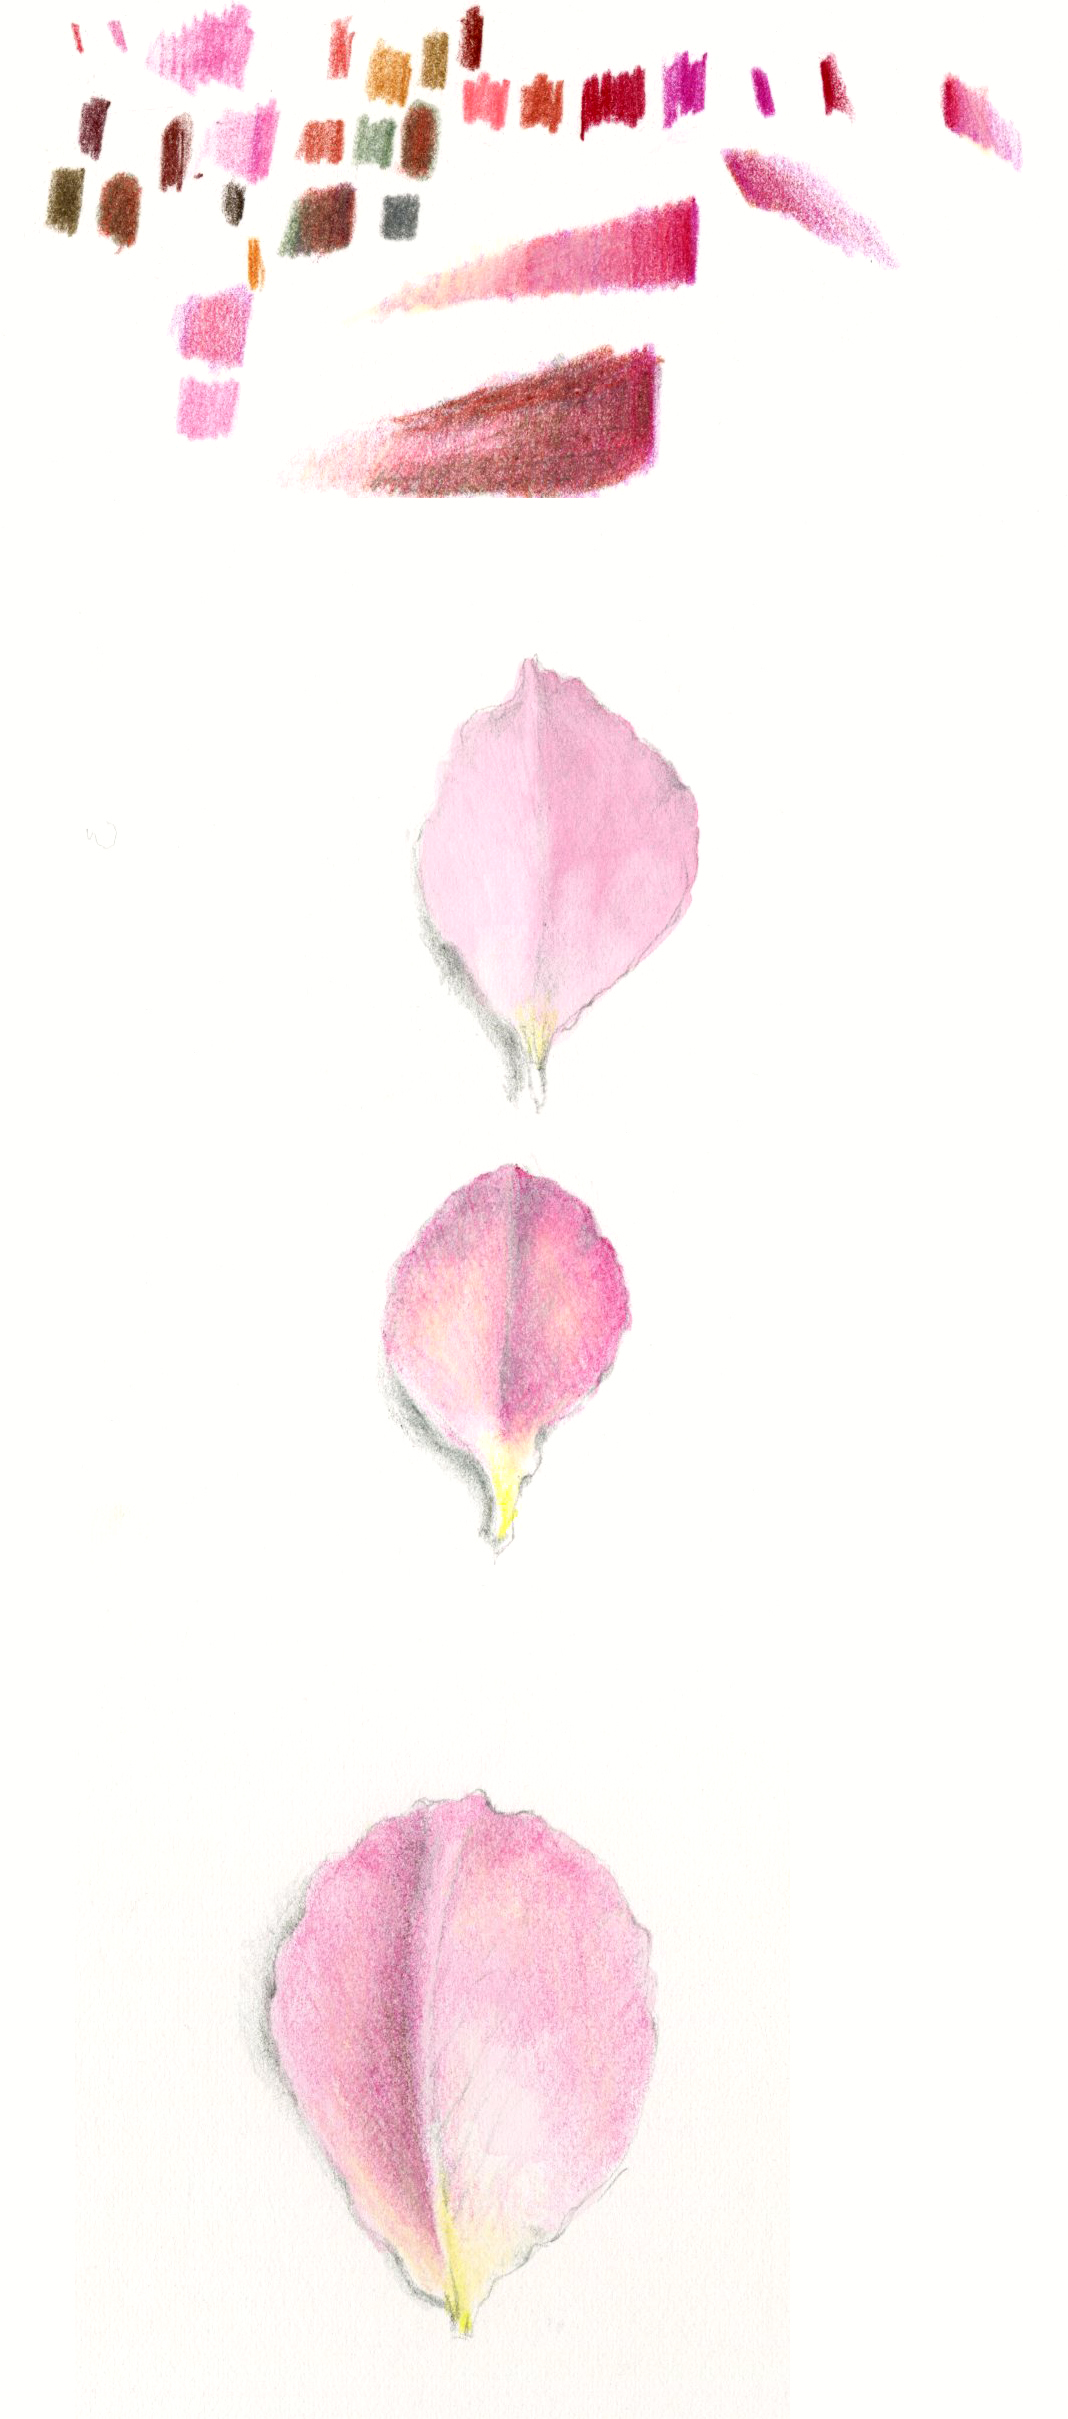
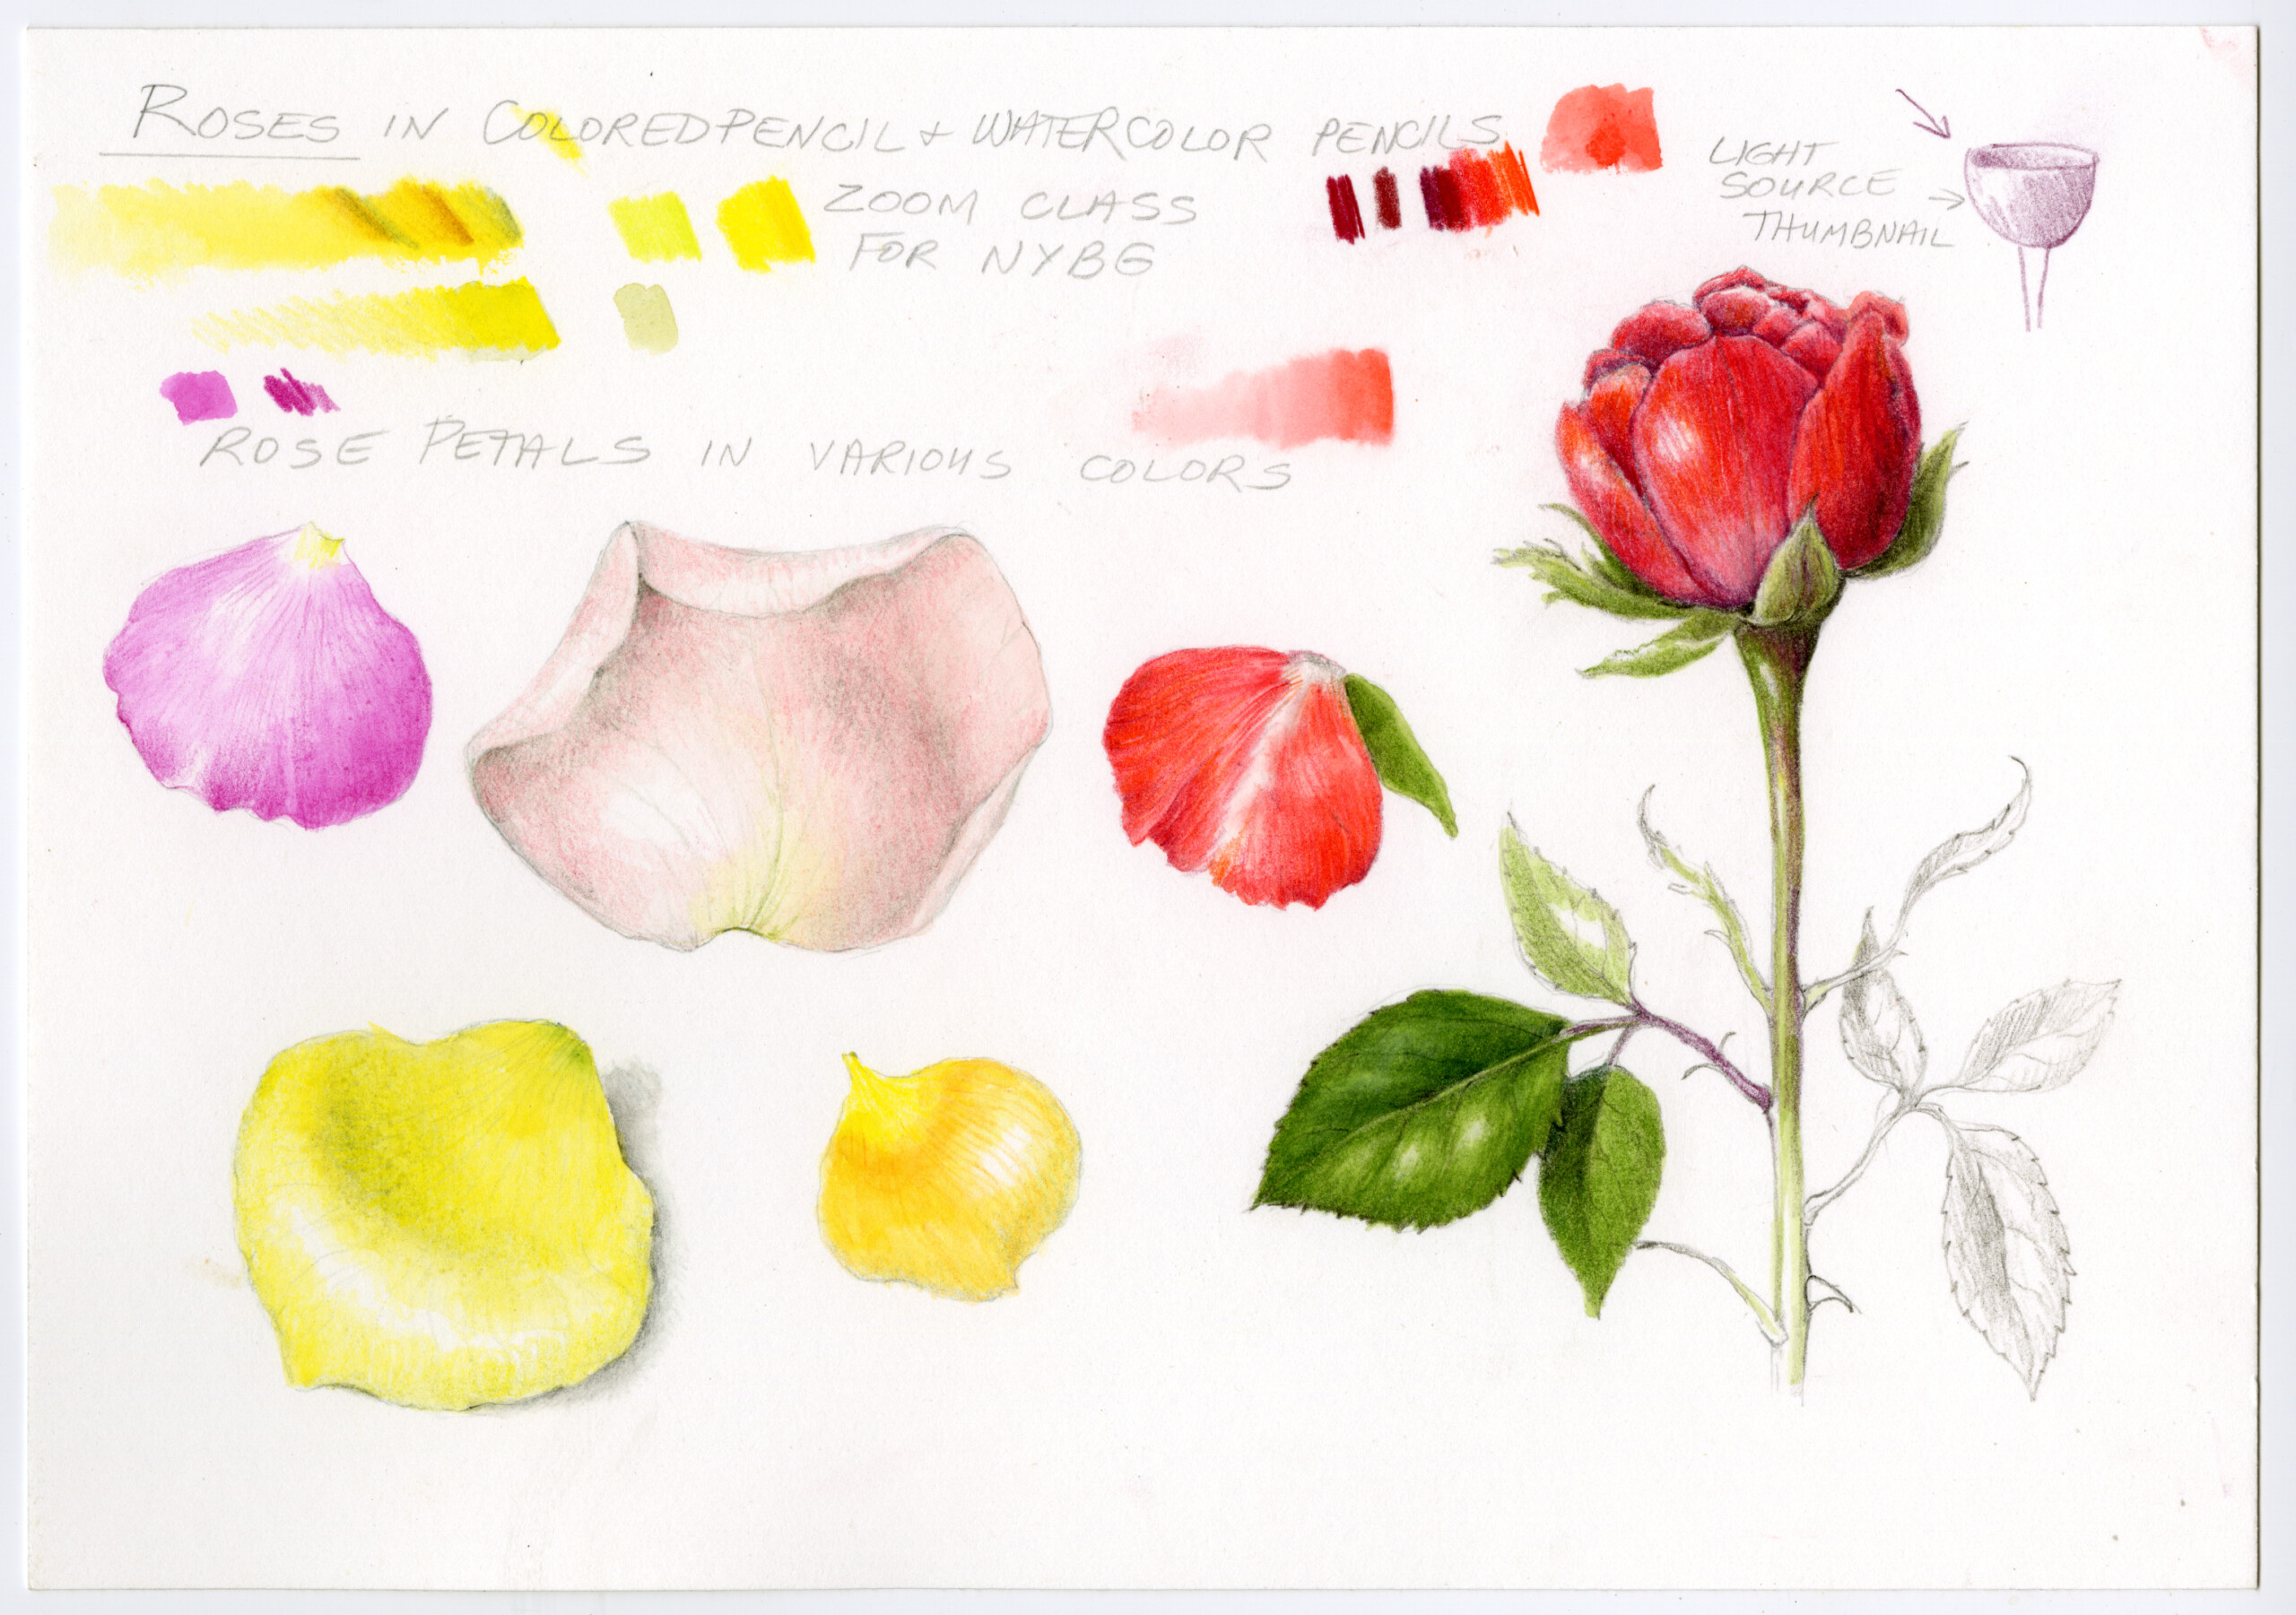
Step 1: Practice Petals First
Before tackling the whole flower, practice drawing and painting individual petals to build confidence fast and warm up.
• Match the overall shape and color
• Observe irregular edges and subtle curves
• Focus on how light falls across the petal surface
Try this Single Petal Practice with your rose petal to get started.
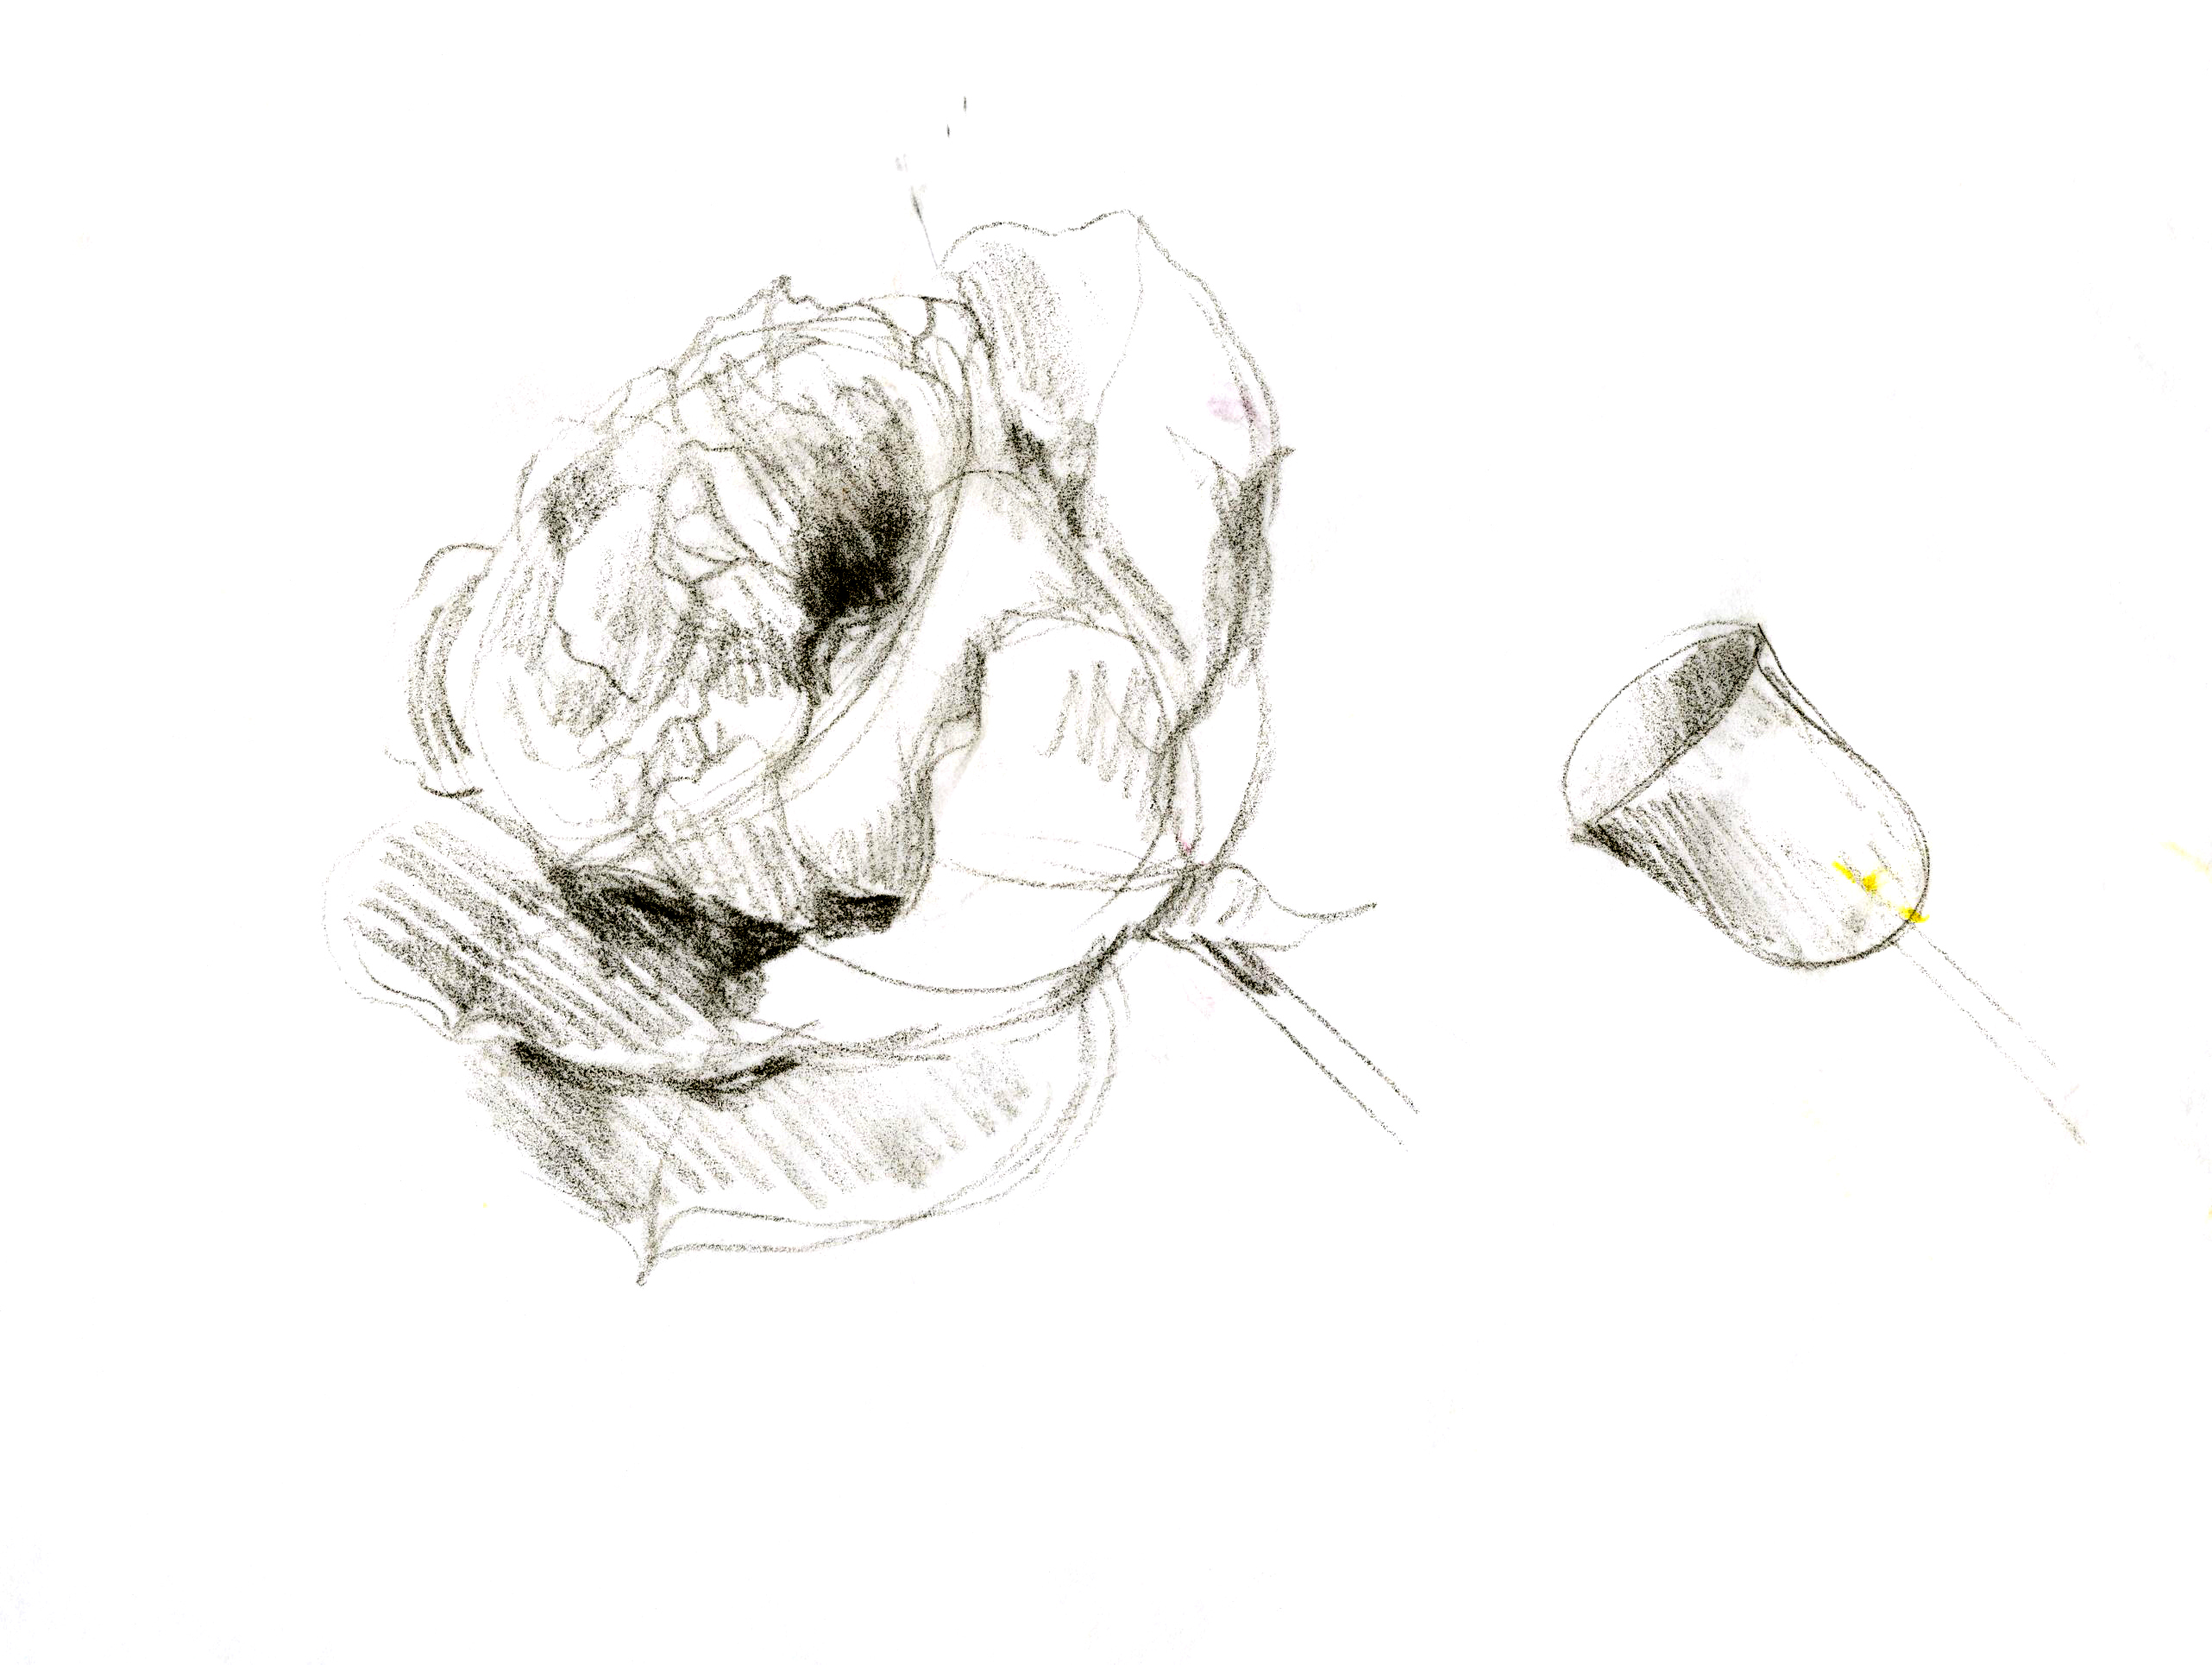
Step 2: Create Concept Drawings
Make a few loose concept sketches to explore:
• Overall shape
• Light source direction
• Tonal variation
These quick drawings help you choose the most compelling view before committing to the final composition.
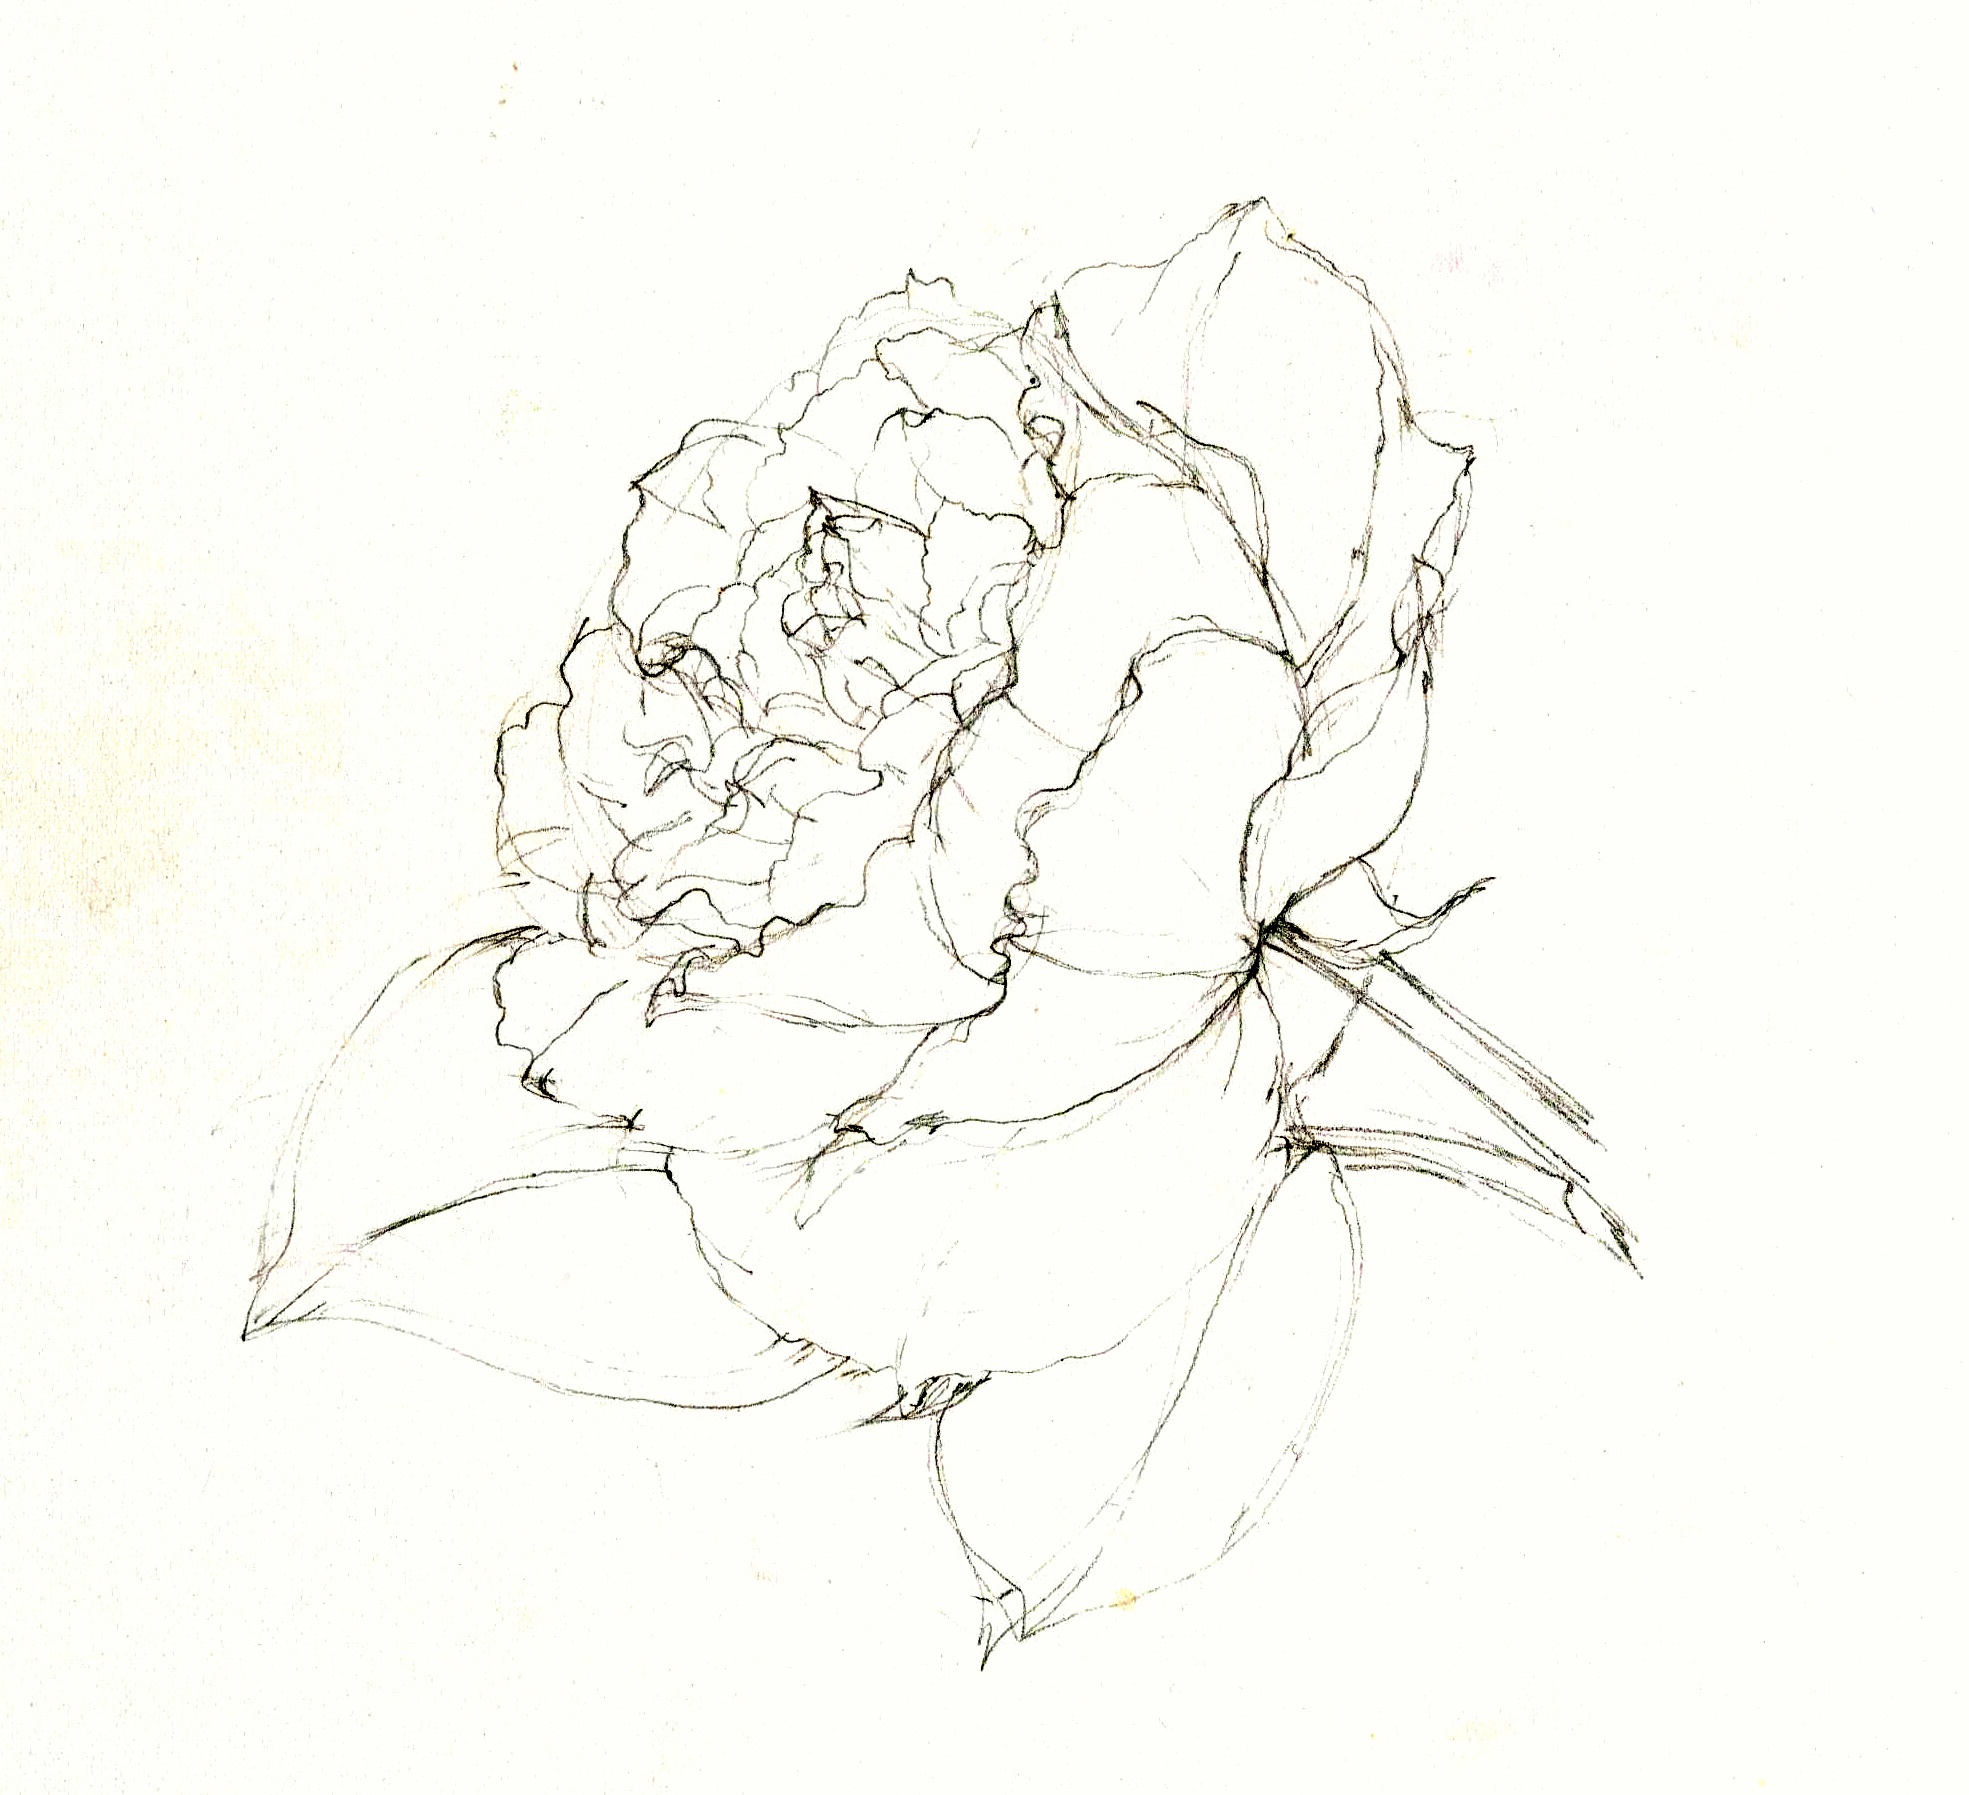
Step 3: Measure Accurately
Using graphite pencil, measure and lightly outline the full rose. It’s much easier to correct mistakes in this stage, so don’t be afraid to use your erasers and redraw your lines as many times as you need.
Accurate measuring is essential for botanical realism because it keeps proportions believable and prevents distortion. If you’d like more guidance, check out this video on measuring and flower shapes!
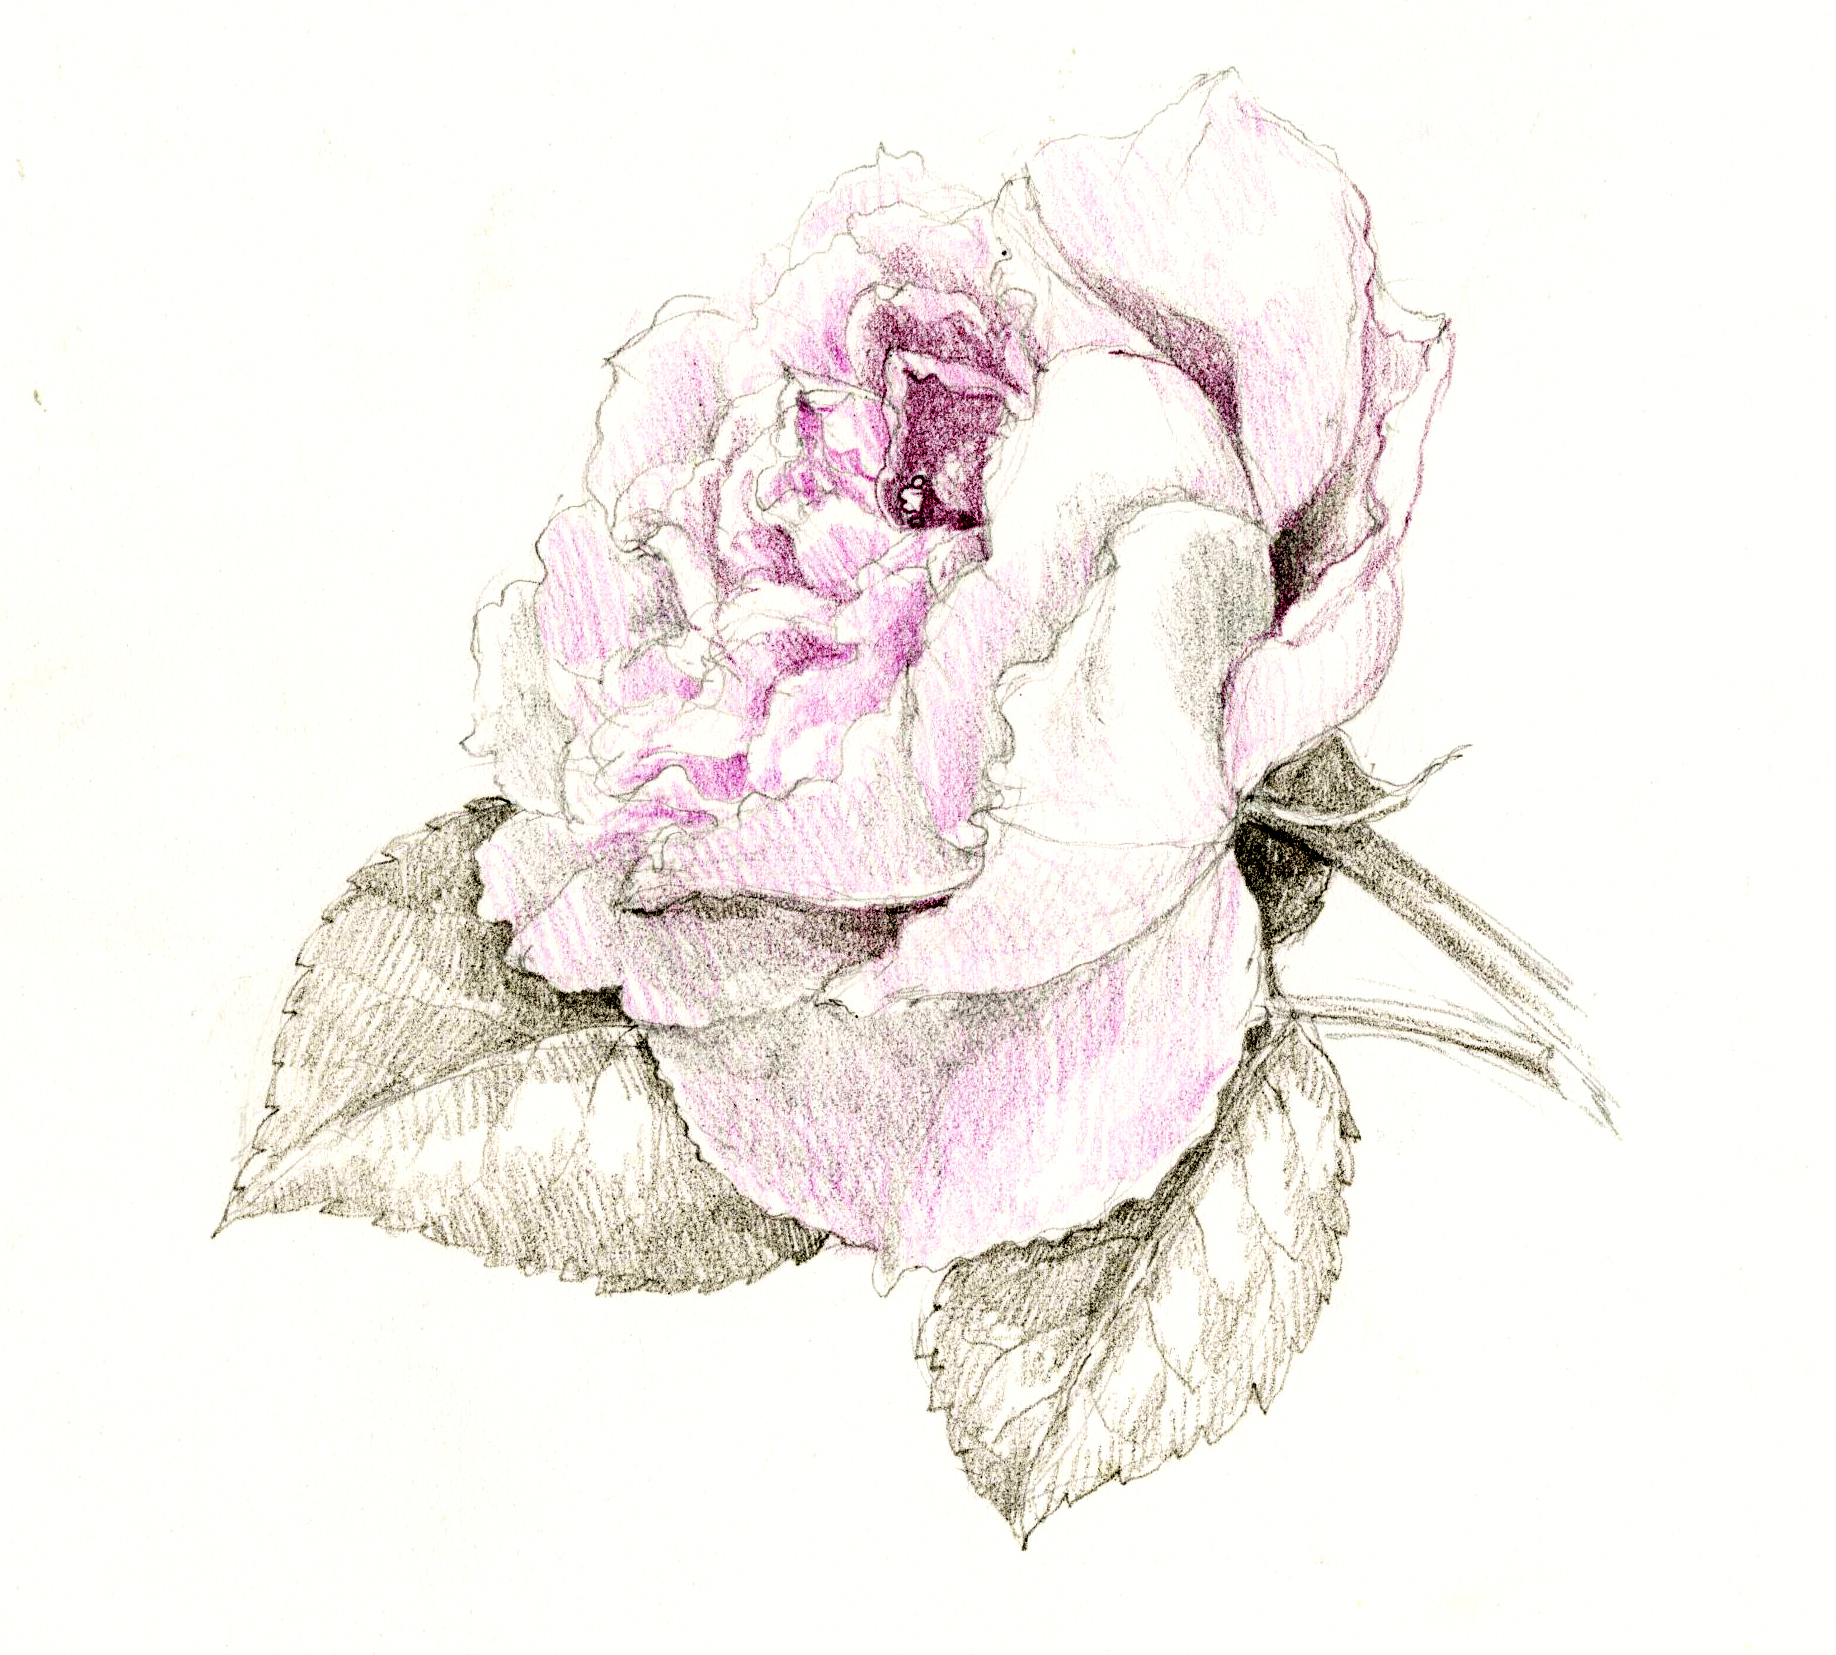
Step 4: Render a Grisaille (Toning) Layer
Create a light tonal underpainting (grisaille) to describe form and overlapping petals.
• Emphasize depth where petals tuck under one another
• For pale roses, keep this layer very light to keep your colors fresh (not muddy)
This stage sets the foundation for everything that follows.
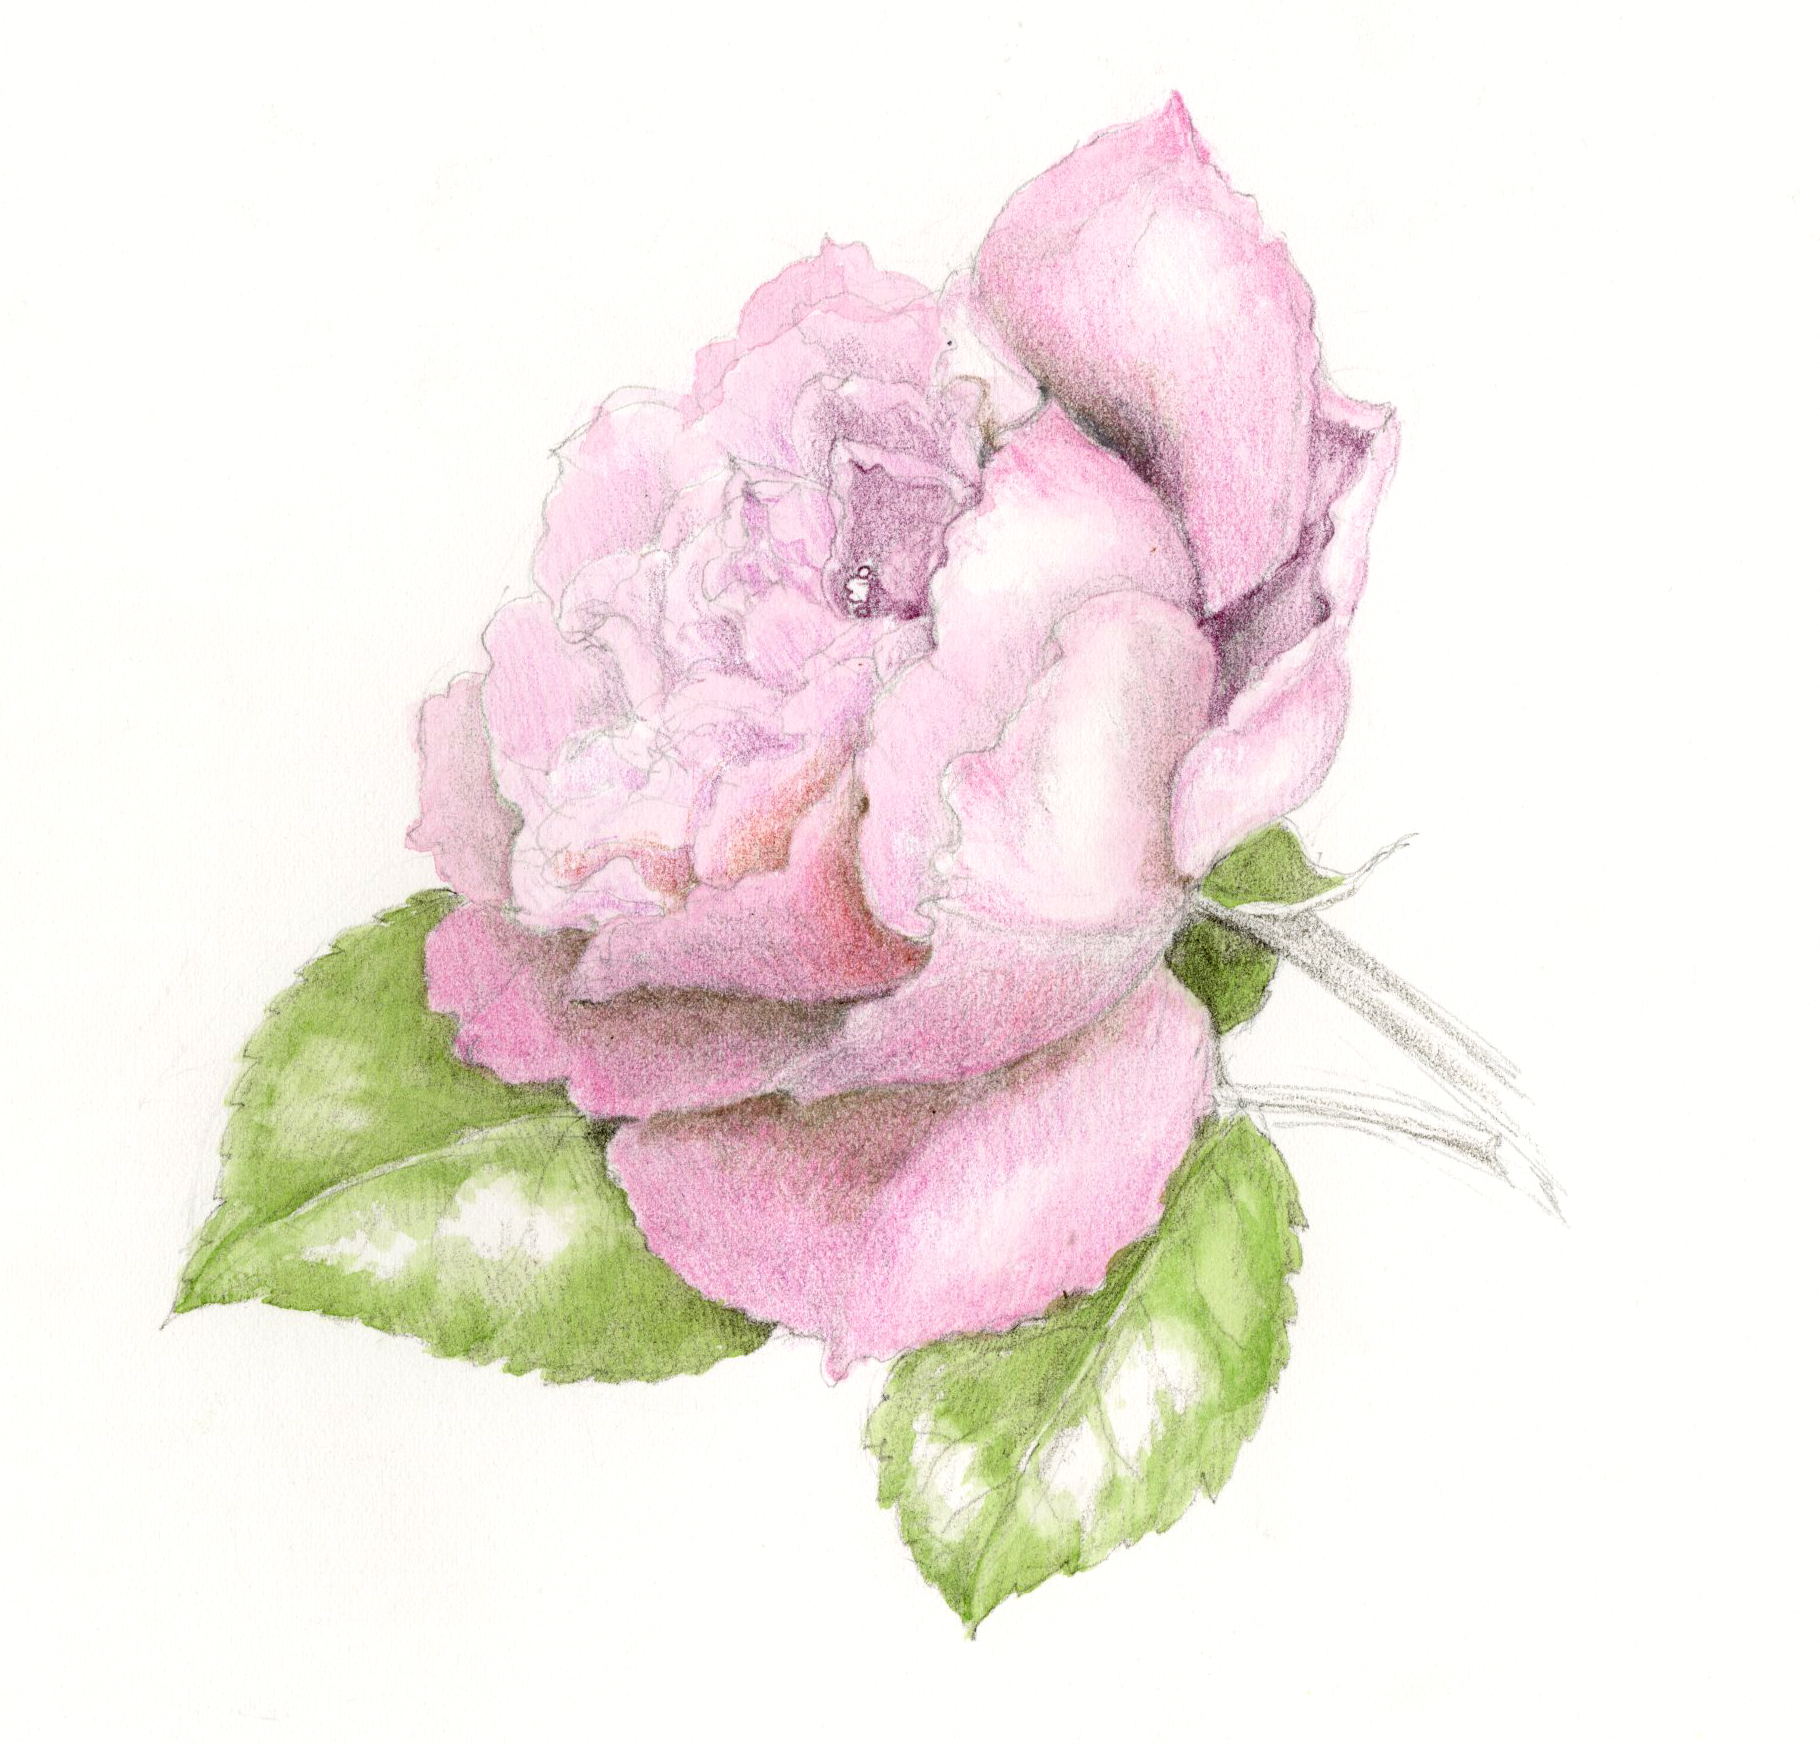
Step 5: Apply a Watercolor Layer
Once the grisaille is dry, apply watercolor to establish color.
• Work from dark to light
• Preserve highlights by leaving areas of white paper
• Let the paint fully dry before adding on top
The secret to producing the watercolor painting of your dreams is… PATIENCE! Wait for it to dry completely between layers. Click here for more helpful watercolor tips from our instructors.
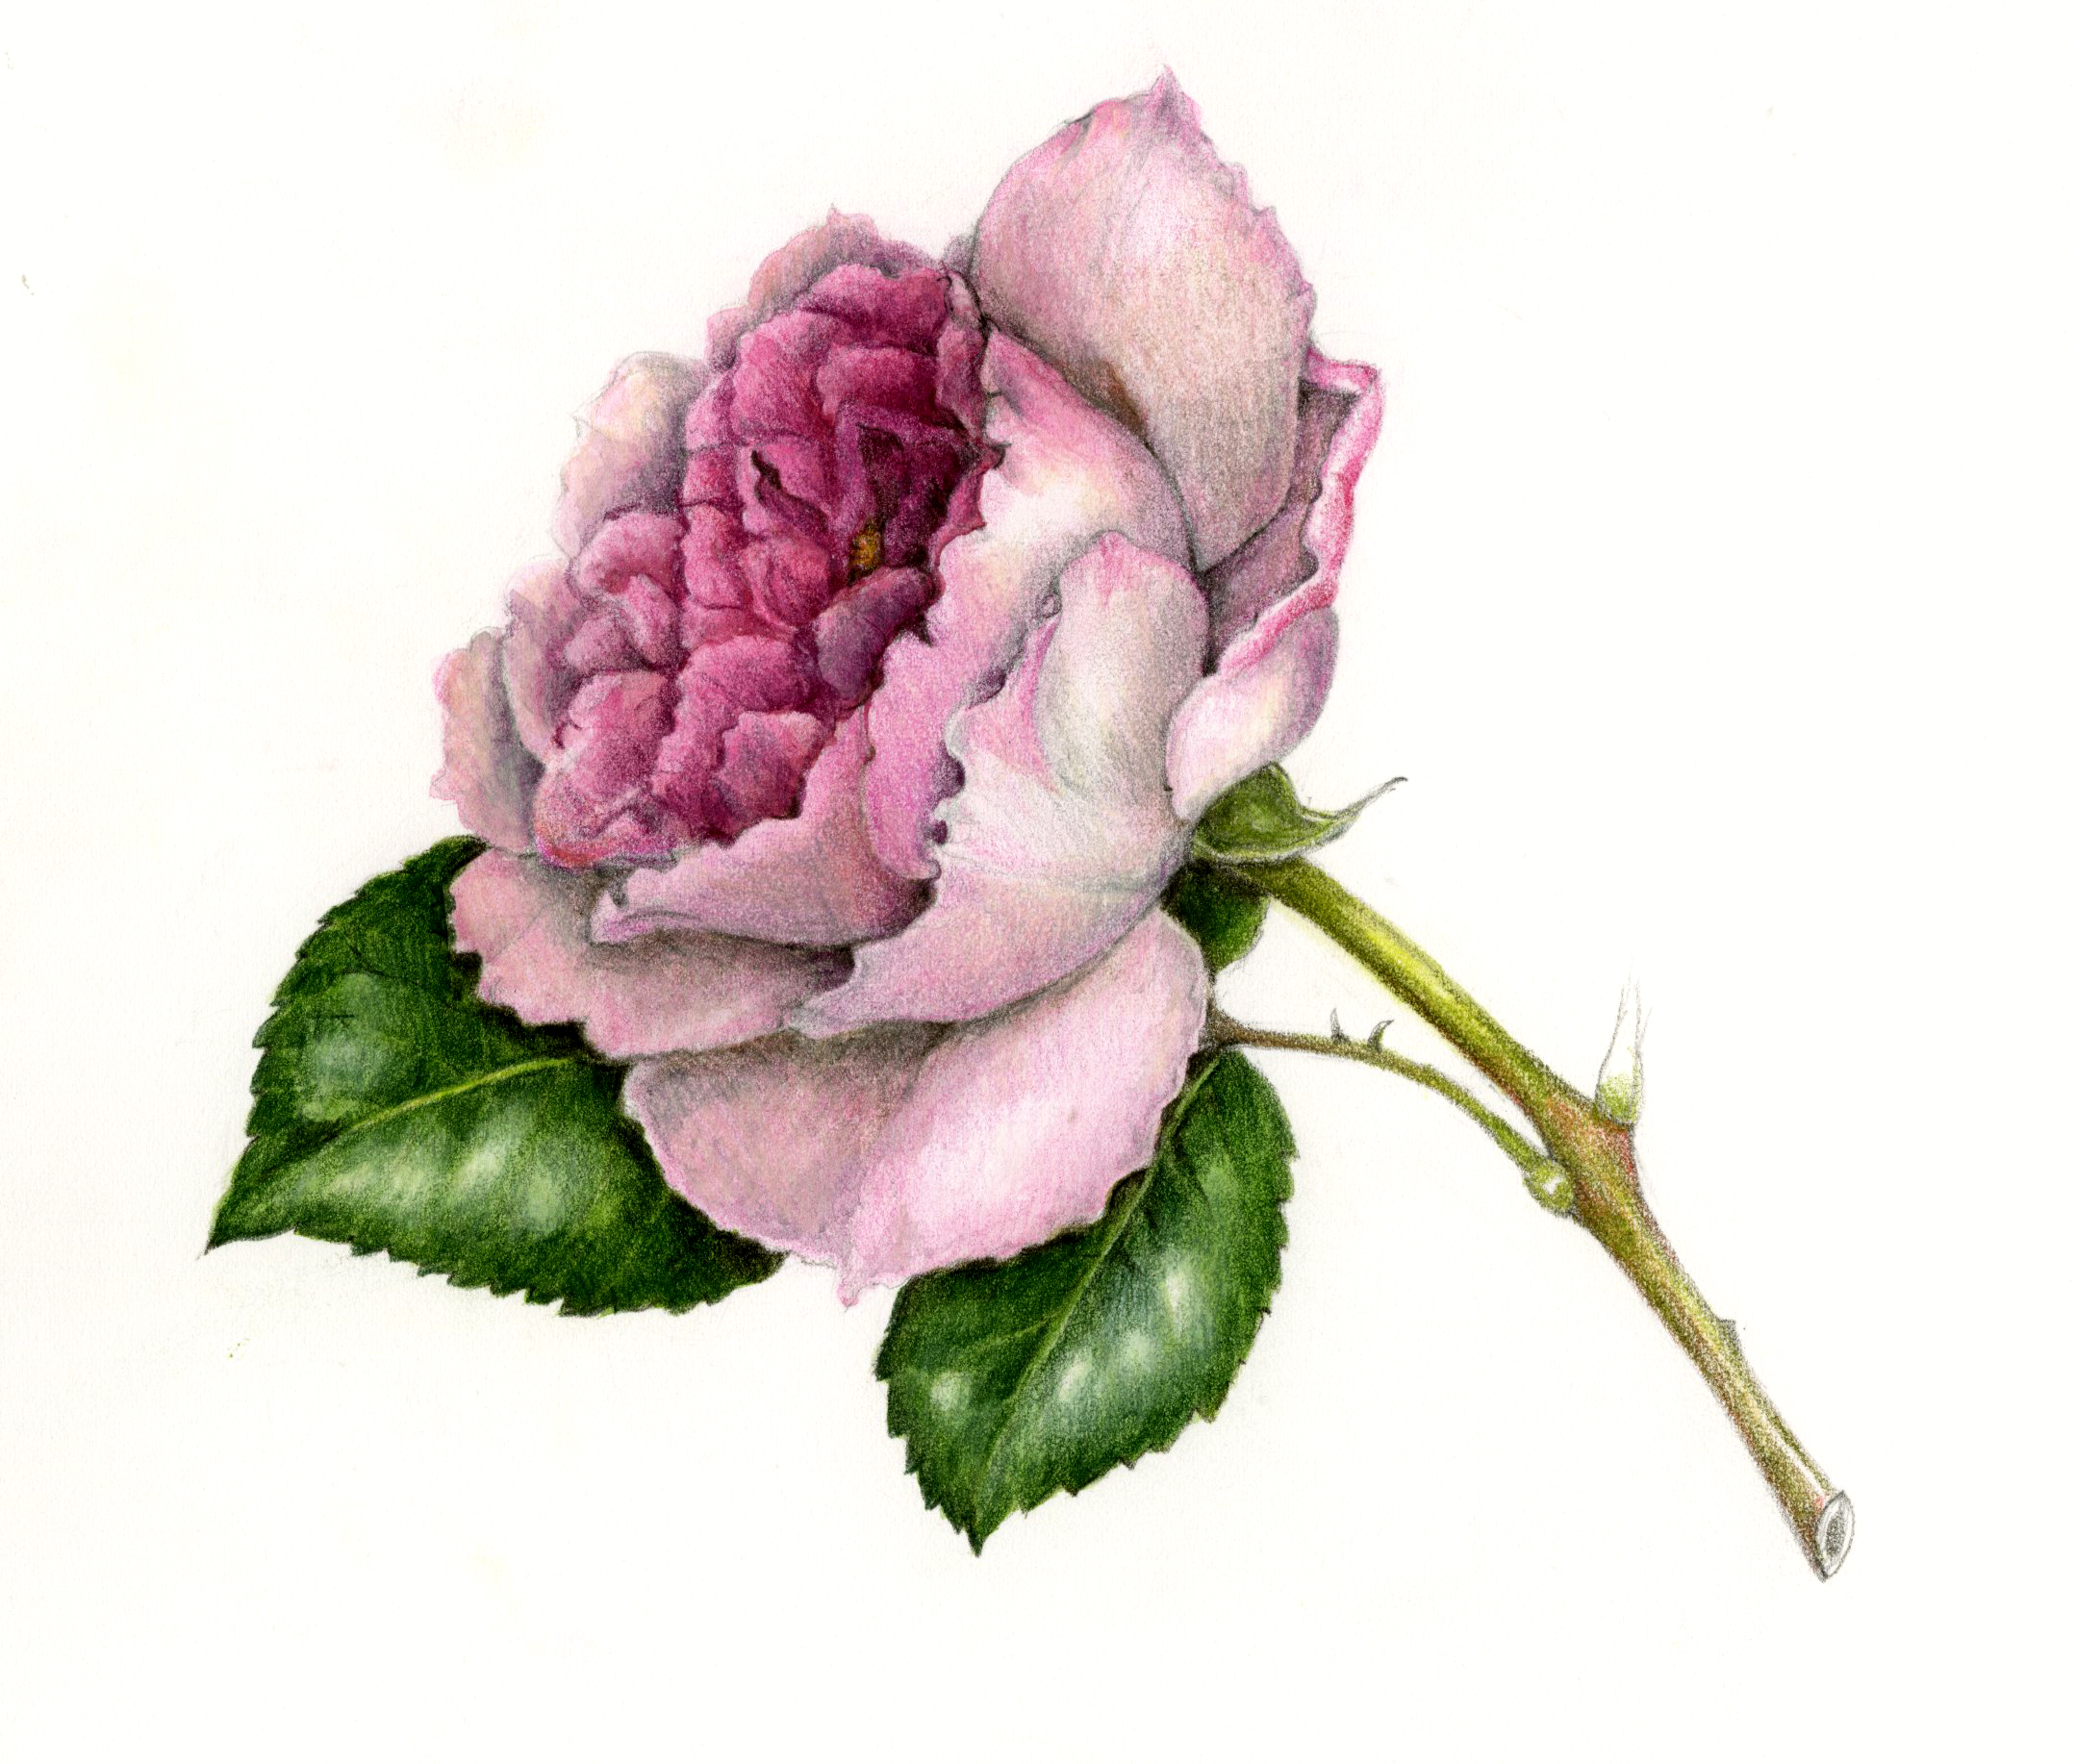
Step 6: Build Layers with Colored Pencil
Now the magic really begins.
• Alternate between watercolor and colored pencil
• Wait until watercolor is completely dry before drawing on top
• Deepen shadows and sharpen edges gradually
Notice how petals appear to roll and how the flower maintains an overall cup shape. To make a pale rose glow, emphasize contrast in the dark, shiny, serrated leaves. For help drawing shiny leaves, click here.
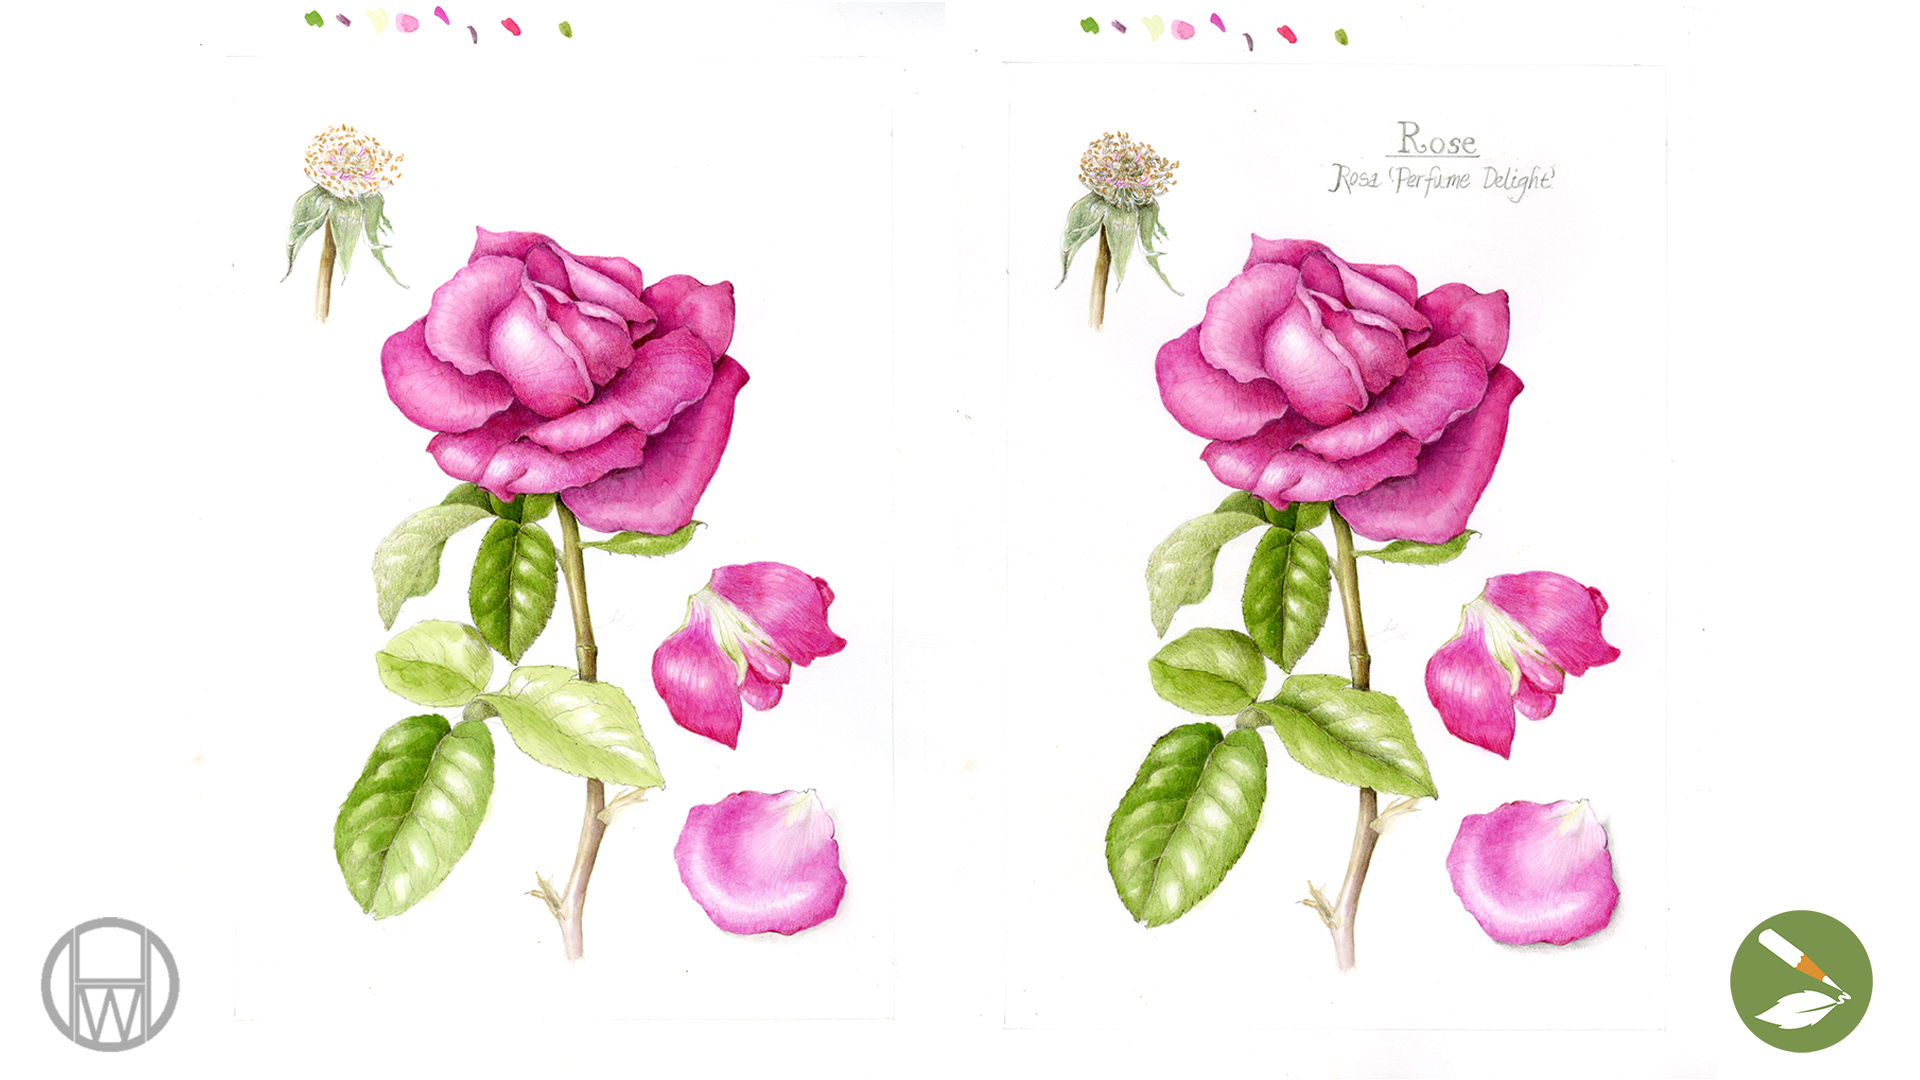
Step 7: Finishing Touches
When we look at our own work, our first thoughts are often critical, focusing on how we could make it better. That can be helpful when you’re asking yourself these questions while drawing, but it can be hard to know when your work is truly complete. Evaluate these 8 areas, and you’ll finish up your stunning composition.
Take Time to Smell the Roses
A rose drawing can take hours or even days. Roses continue to open as you work, so storing your subject in the refrigerator can help slow the process.
If frustration creeps in while waiting for paint to dry, step away briefly or try some of these techniques to keep yourself occupied. Most importantly—slow down. Enjoy the scent. Observe closely. Drawing a rose is as much about presence as it is about technique.
Dive Deeper, Explore Further
List of Resources to Continue Learning How to Draw a Rose
We offer many ways to learn to draw, so you can choose the styles that work best for you – workshops (live and recordings), online courses, individual videos, and more free lessons on our blog. Check out these resources to learn more about drawing roses.
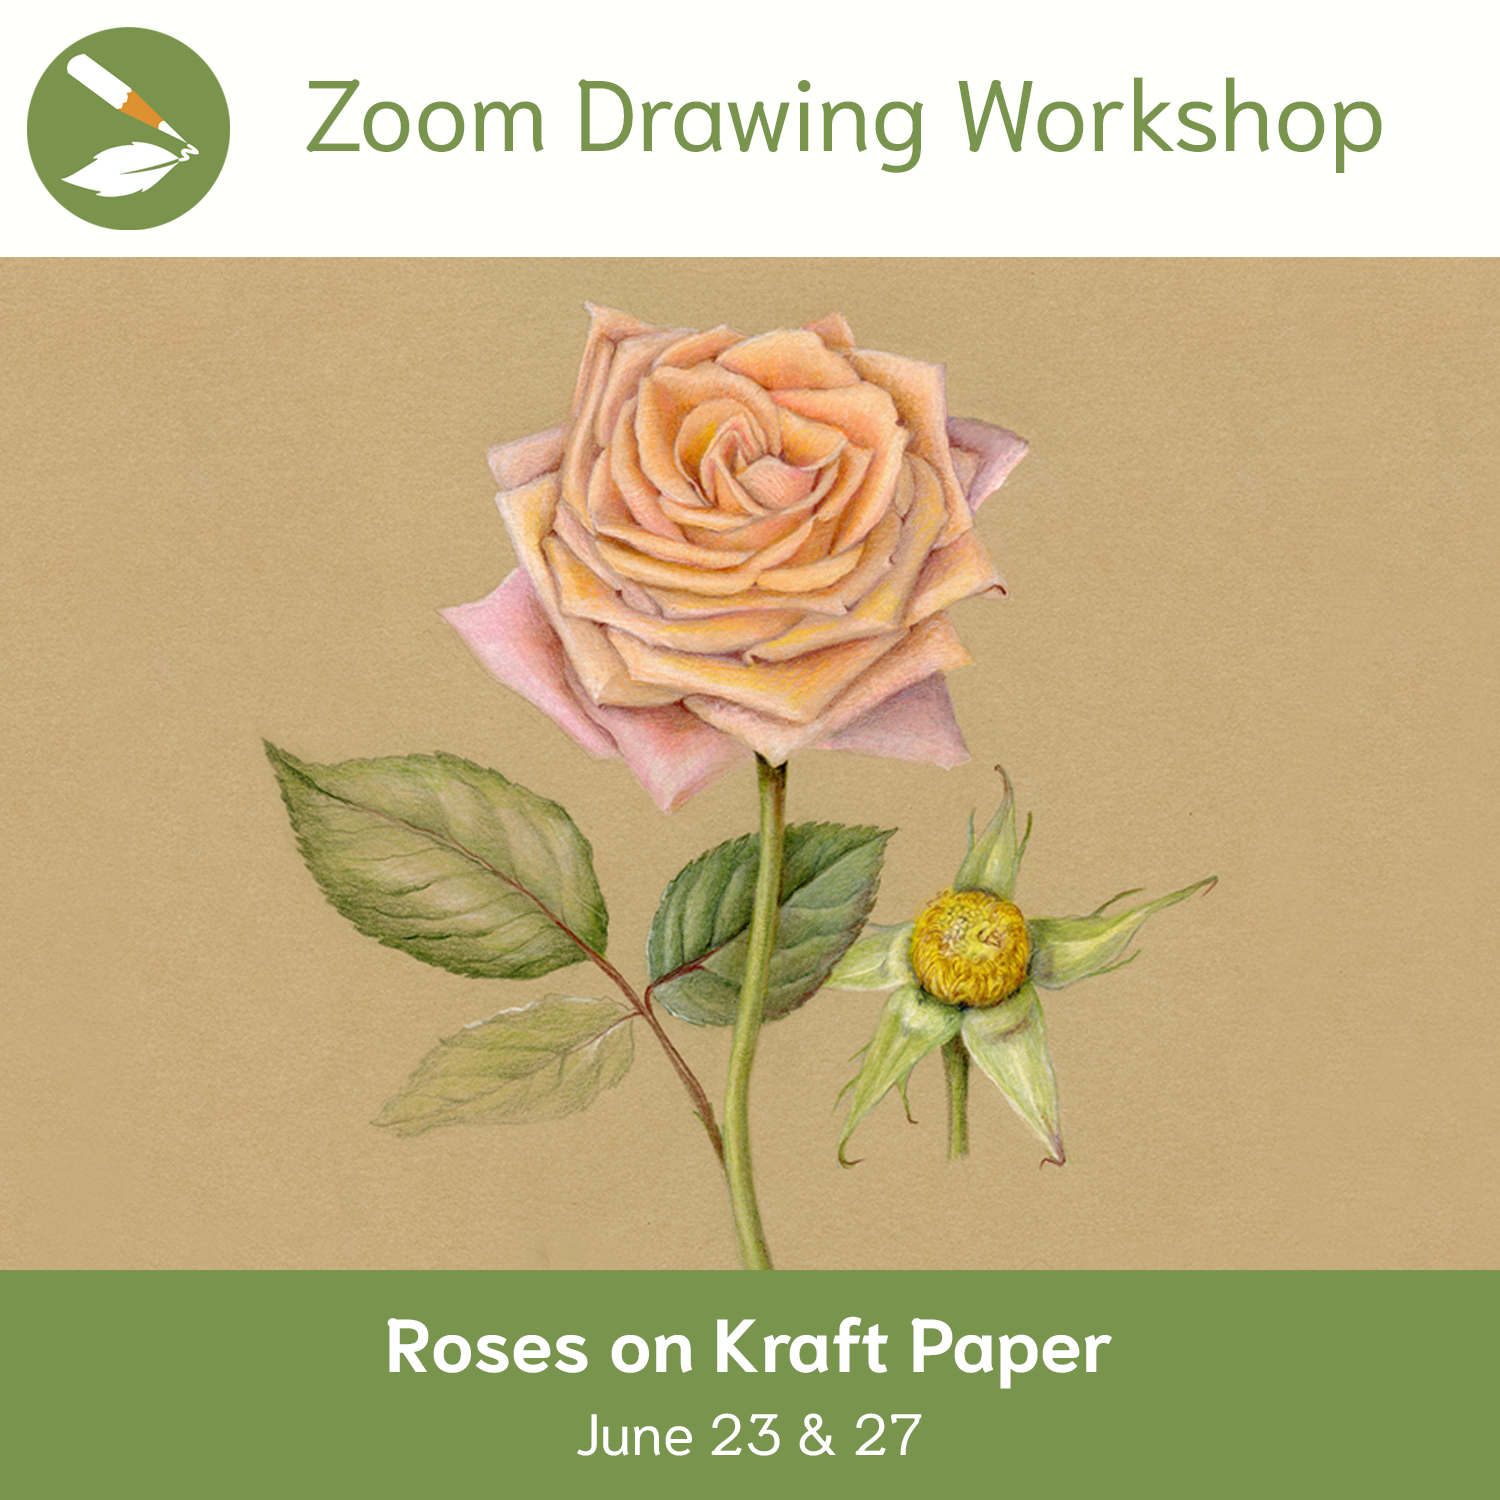
- Recording of Zoom Workshop: Romantic Roses (white paper)
- Recording of Zoom Workshop: Roses on Kraft Paper (tan paper)
- Online Course: The Practice of Botanical Drawing (lesson 6)
- Book: The Practice of Botanical Drawing (printed book and pdf) (lesson 6)
- Individual Video: Draw a Rose (companion to the book, The Joy of Botanical Drawing)
- Blog Post: How to Draw Flowers That Feel Real
- Blog Post: Understanding Flowers

Frequently Asked Questions – FAQs
How do you draw a rose easy if you’re a beginner?
Start with a tightly budded rose, focus on big shapes first, and practice single petals before attempting the full flower. Keeping things simple builds confidence quickly. Begin with basics here.
Is this a step-by-step rose drawing tutorial for realism?
Yes, this guide outlines how to draw a rose step by step using botanical illustration methods, while encouraging you to adapt the process to your own style. If you want more detailed instructions and helpful feedback, you’ll love the resources listed above, including this video lesson from our online course, The Practice of Botanical Drawing.
Can I use watercolor without colored pencil?
Absolutely. Watercolor alone works beautifully. Colored pencil simply allows for extra refinement, contrast, and crisp detail.
How long does it take to draw a rose flower realistically?
Anywhere from a few hours to several days. Botanical illustration values observation and patience over speed.
Drawing roses teaches us more than technique. They teach us to look carefully, to appreciate complexity, and to return again and again to the same subject with fresh eyes. We hope this tutorial encourages you to keep practicing, keep experimenting, and most of all, keep enjoying the process.