A Botanical Artists’ Guide to a Realistic Leaf Illustrations
Each leaf, with its unique shape, vein pattern, texture, and color, offers a new opportunity to observe and admire beauty in nature. Whether you’re sketching in a garden or from a specimen on your desk, embrace the joy of the drawing process over the pursuit of perfection.
🌿 Understanding Leaf Anatomy
Before putting pencil to paper*, it’s essential to understand the basic structure of leaves. Leaves can be broadly categorized into two types based on their vein patterns:
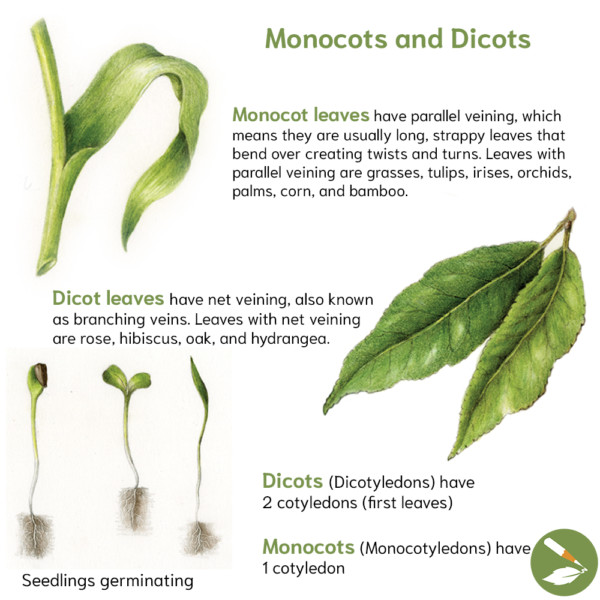
1. Monocots: These leaves have parallel veins and are typically long and narrow, like those of grasses, tulips, and lilies. They often exhibit graceful curves and twists.
2. Dicots: These leaves display a branching vein pattern, creating a network across the leaf surface. Common examples include oak, rose, and hibiscus leaves. (Check out this video on drawing a basic leaf with net veining.)
Understanding these patterns helps in accurately depicting the leaf’s structure and adds realism to your illustrations.
*Here are the materials we recommend.
Basic Drawing Steps
1. Observation is Key
Begin by studying your leaf. Note its shape, vein patterns, and any unique characteristics. This careful observation lays the foundation for an accurate illustration.
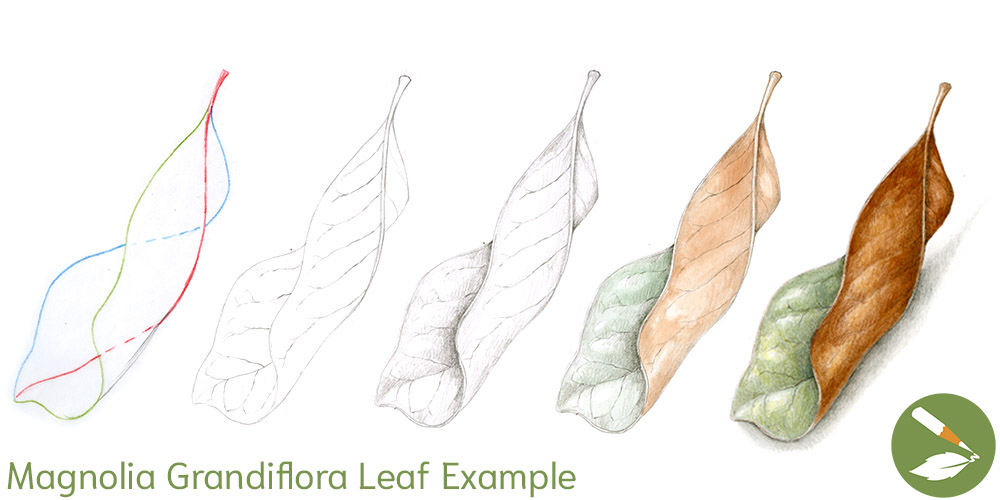
2. Sketch the Outline
Lightly draw the leaf’s outline in graphite pencil, focusing on its overall shape and paying attention to proportions. (Here are helpful tips for measuring and perspective.) Remember, symmetry is natural but nothing in nature is perfect—embrace what makes each leaf unique.
3. Add Veins and Details
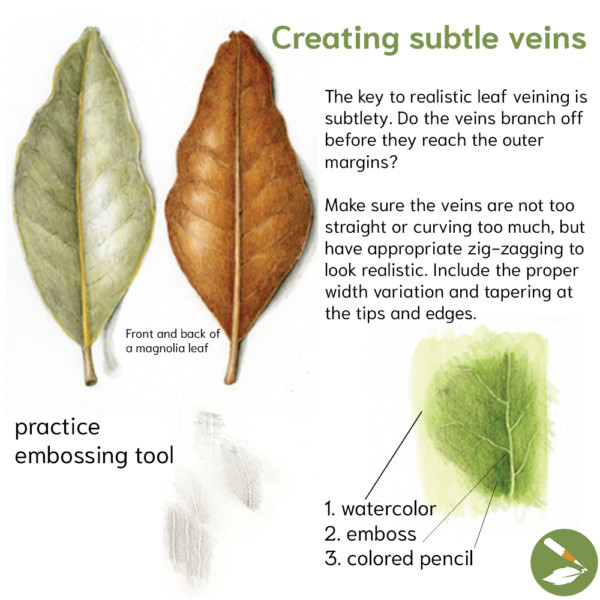
Sketch the central vein (midrib) and branching veins. The key to realistic leaf veining is subtlety. For a realistic touch, ensure the veins taper as they extend outward. Make sure the veins are not too straight or curving too much, but have appropriate zig-zagging to look realistic.
Practice, practice, practice with your embossing tools! Subtle veins can be achieved in 3 steps – 1. watercolor 2. emboss 3. colored pencil
Check out this free video on how to use embossing tools.
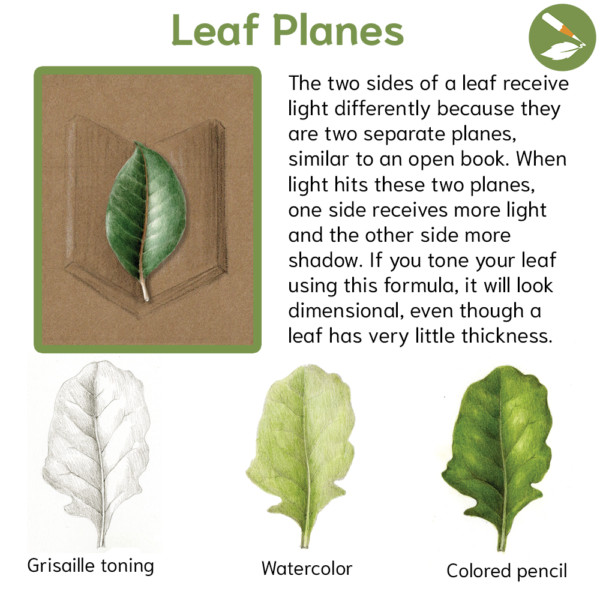
4. Introduce Light and Shadow
Think of the leaf as having two planes, like an open book. One side catches more light, while the other falls into shadow. If you tone your leaf using this formula, it will look dimensional, even though a leaf has very little thickness. Learn more about the magic of light here.
5. Refine with Color
Using a combination of colored pencil and watercolor, add hues to your leaf. Mixing greens with hints of yellow, blue, or brown can achieve a more natural look. Learn more about color theory here. Want to draw colorful autumn leaves? Check out this video!
Find more in-depth instructions to draw a leaf here.
🎨 Enhance Your Leaf Illustrations
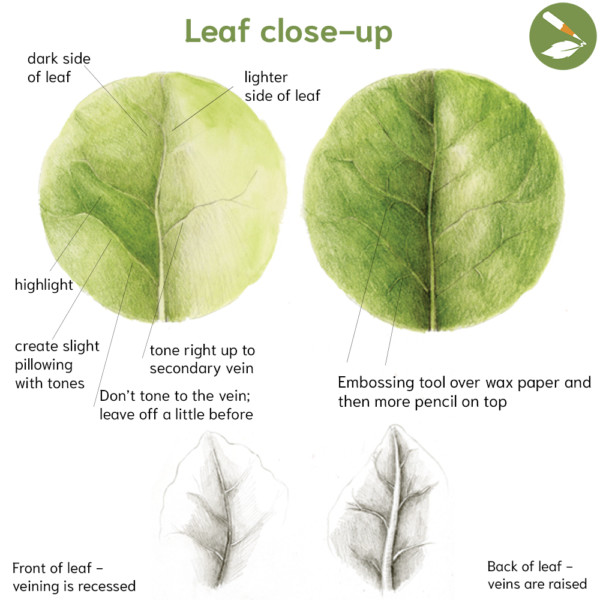
Leaf Close-Up
Take a closer look at recessed veins on the front of a leaf and the raised veins on the back. Also notice the light and dark sides, the highlight, and some tips to remember!
+ Use tones to create slight pillowing, tone right up to the secondary vein, but tone all the way to the primary vein.
+ Leaving off a little before lets our minds connect the dots.
+ Also try embossing over wax paper and then adding more pencil on top!
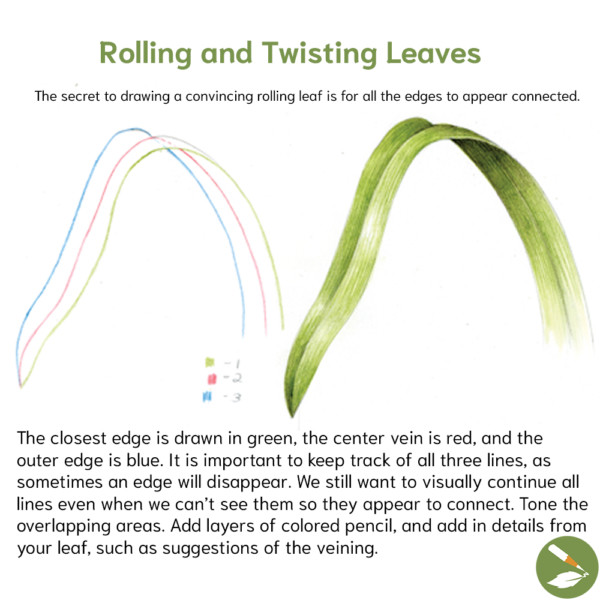
Rolling Leaves
The secret to drawing a convincing rolling or twisting leaf is for all the edges to appear connected.
The closest edge is drawn in green, the center vein is red, and the outer edge is blue. It is important to keep track of all three lines, as sometimes an edge will disappear. We still want to visually continue all lines even when we can’t see them so they appear to connect. Tone the overlapping areas. Add layers of colored pencil, and add in details from your leaf, such as suggestions of the veining.
Find 4 free tips for drawing rolls, folds, and twists here!
For a more in-depth lesson, watch this workshop recording.
Twisting Leaves
The secret to drawing a convincing rolling or twisting leaf is for all the edges to appear connected.
First, draw the entire center midvein, even if it is hidden from view, and show how it curves. I have indicated the midvein with a red pencil and used a dotted line where it is hidden from view. I have drawn all three lines with different colors in order to keep track of edges that are hidden.
Missed our live Twists, Rolls, & Folds Zoom Drawing Workshop? Catch the recording! See all of our available Zoom Workshop Recordings here.
🌱 Embrace the Journey
Botanical illustration is as much about the process as it is about the final artwork. Each leaf you draw enhances your observation skills and deepens your appreciation for nature’s intricacies. Celebrate your progress, learn from each sketch, and most importantly, enjoy the act of drawing.
Want to learn more?
Leaves are everywhere in botanical art—but how do you make them look realistic and full of life? In this beginner-friendly workshop, we’ll break down the process step by step, making it fun and easy to draw beautiful, dimensional leaves using watercolor and colored pencil... Check out the RECORDING of our Zoom Drawing Workshop: Simple Leaves
How can we draw “fuzzy,” paint “matte,”or shade “shiny”? How can we color match nature’s infinite shades of green? Join this workshop to learn how to combine watercolor and colored pencil to create realistic renderings of different leaf textures and tones so your botanical compositions represent their natural subjects with beauty and accuracy… Check out the RECORDING of our Zoom Drawing Workshop, Green Leaves: Texture and Color.
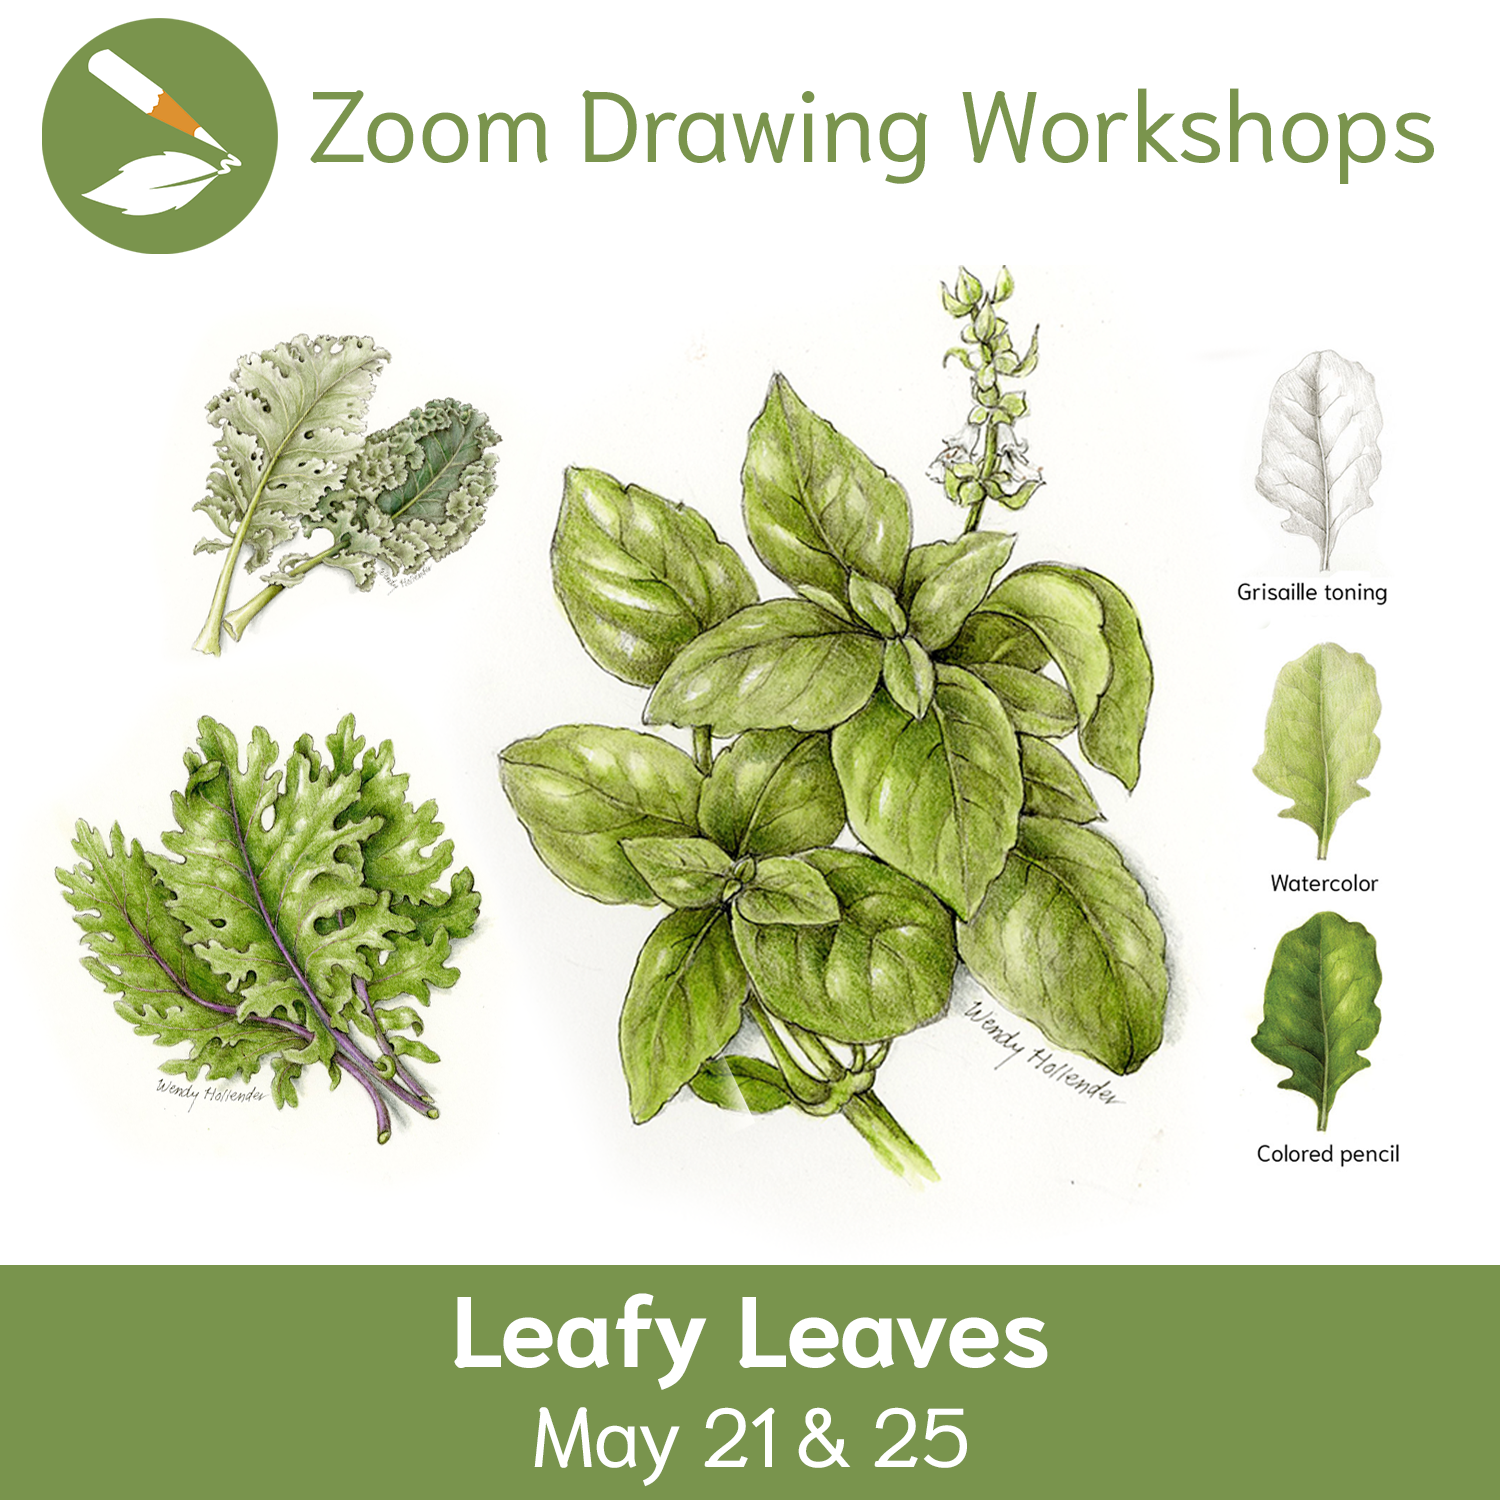
Learn how to draw leaves from different perspectives, and use watercolor and colored pencil to create three-dimensional forms with realistic details. Watch instructor demonstrations of various spring greens and learn some pro tips so your leaves will look as leafy as ever! Check out the RECORDING of our Zoom Drawing Workshop, Leafy Leaves.

Bring your sense of wonder to this workshop! A humble leaf you may overlook at the market can become a playground for the observant artist. Together, we’ll explore the rich, bumpy landscapes of complex leaves and learn, step by step, how to render them with dimension and life using watercolor and colored pencil techniques. Check out the RECORDING of our Zoom Drawing Workshop, Complex Leaves: Bumpy Texture.
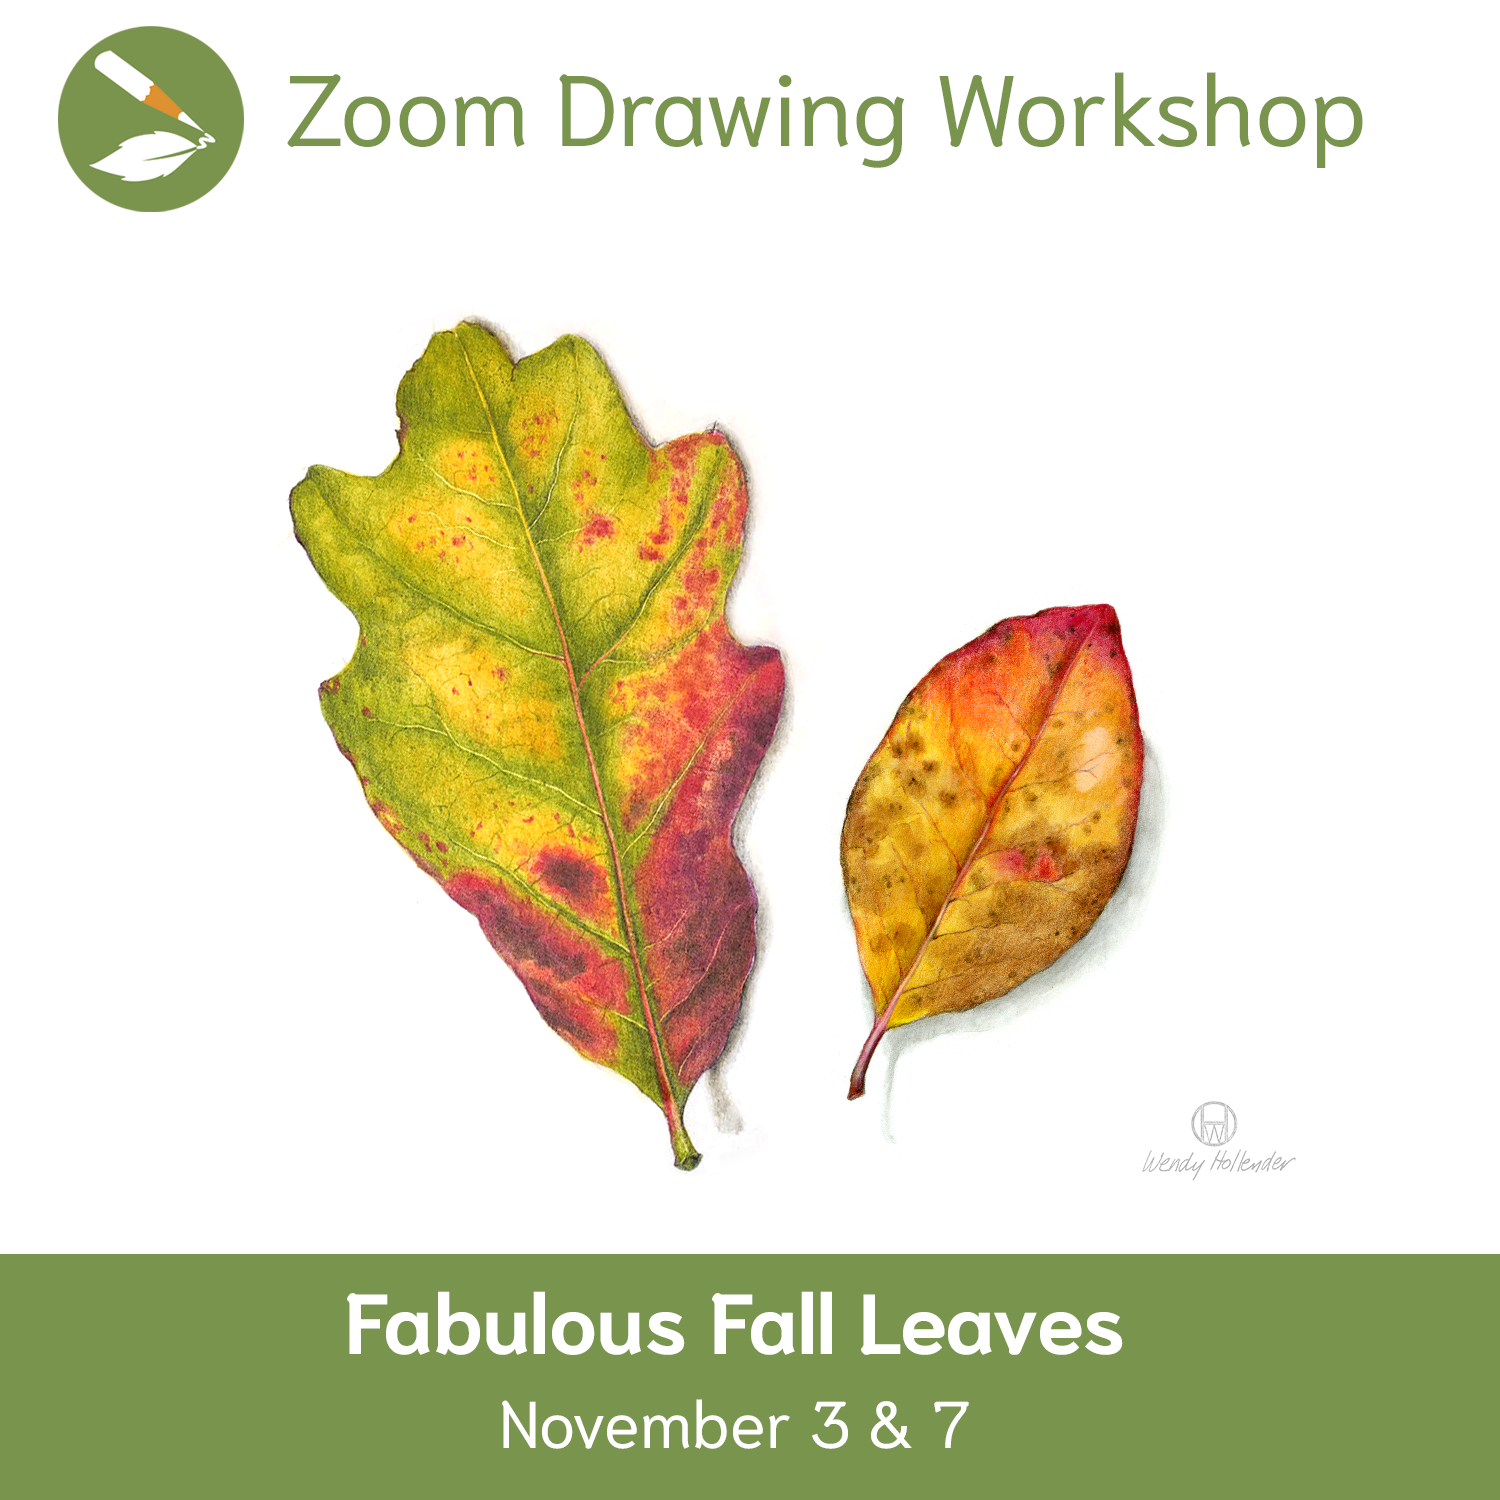
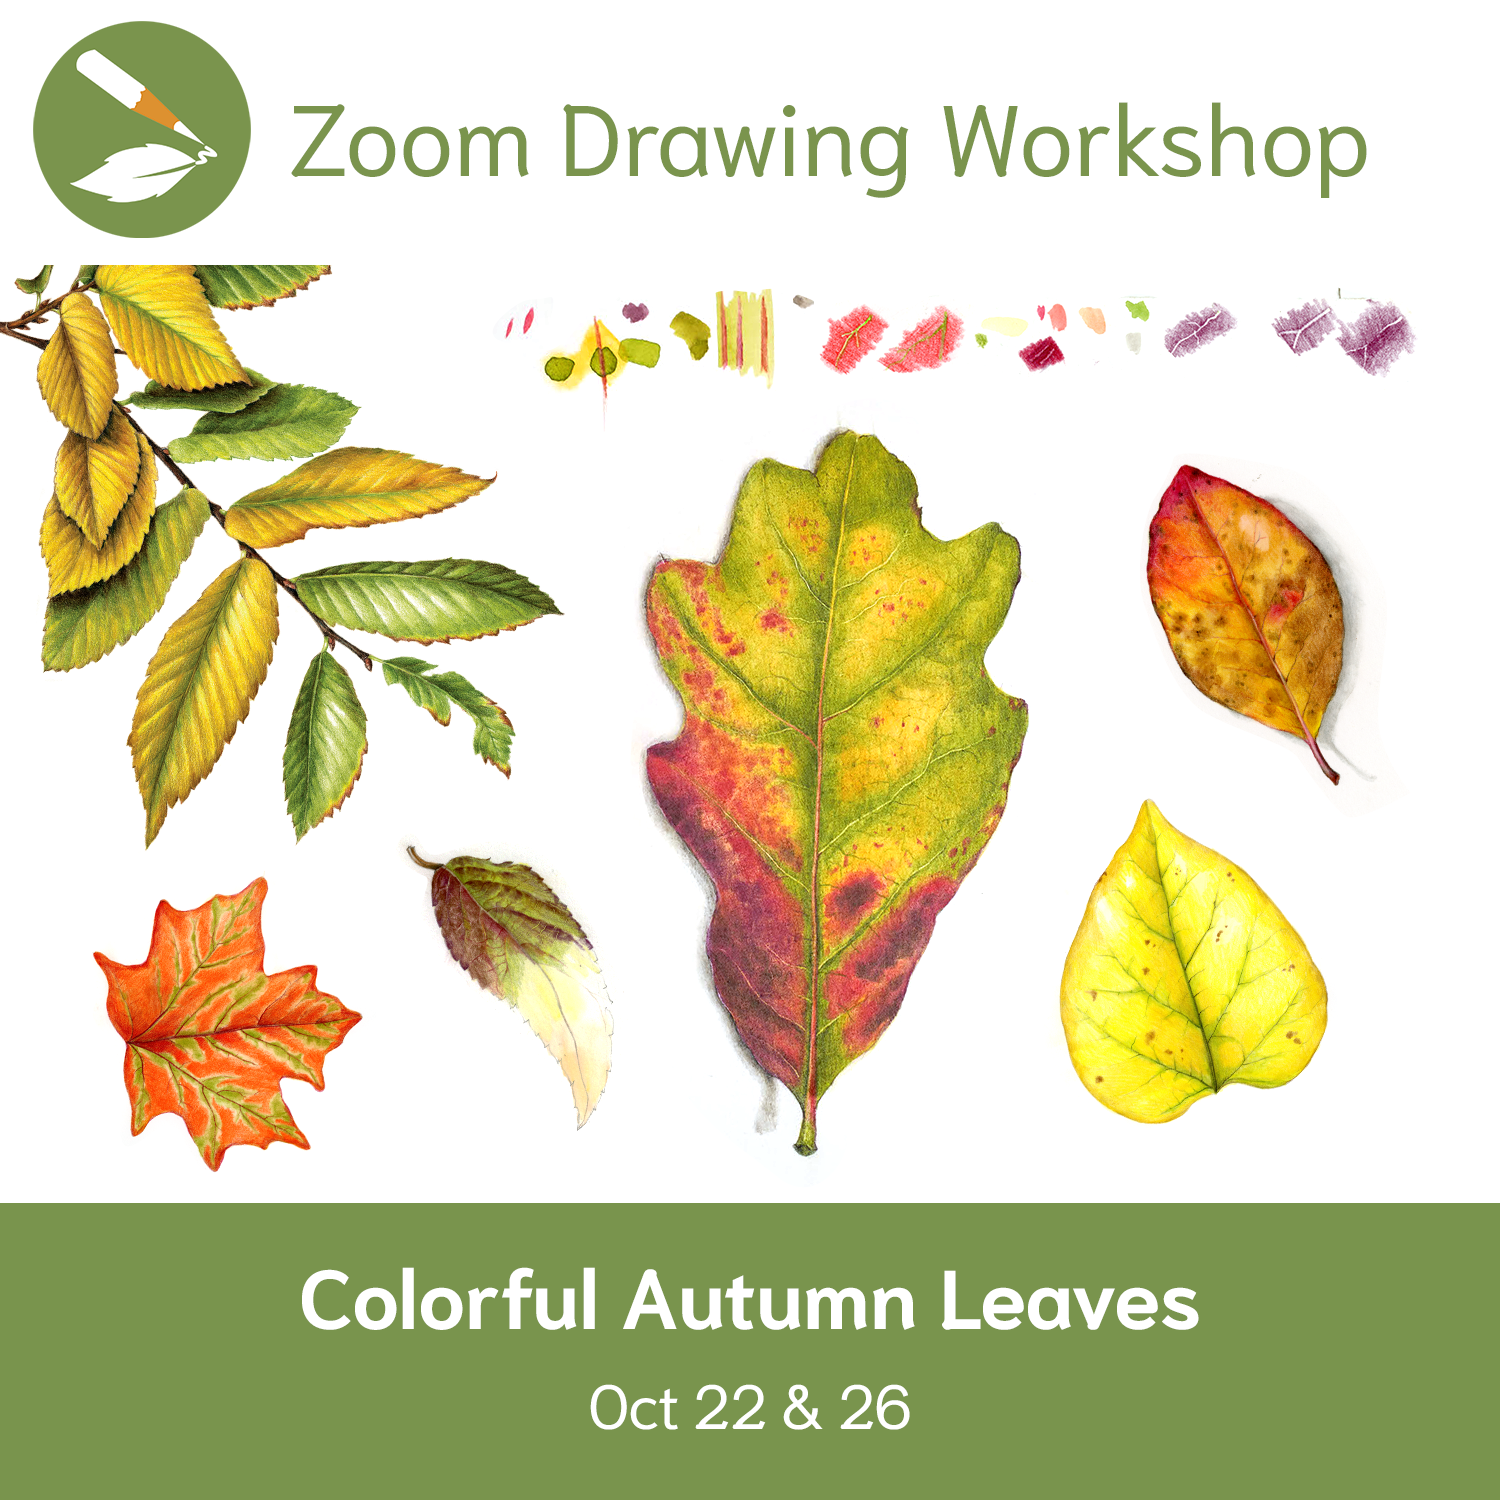
Capture the vibrant charm of autumn leaves! Learn to bring fall’s fiery reds, oranges, and yellows to life on paper. Perfect for artists of any level, this fun and interactive class will guide you through color mixing and techniques to draw realistic fall leaves with a combination of colored pencil and watercolor… Check out the RECORDING of our Zoom Drawing Workshop, Fabulous Fall Leaves.
Find all of the ways you can learn to draw with us!