How to Draw Texture: The Key to Realistic Botanical Art
Transform Your 2D Botanical Drawings with Textures that Look 3D
Easy Texture Drawing Ideas to Try
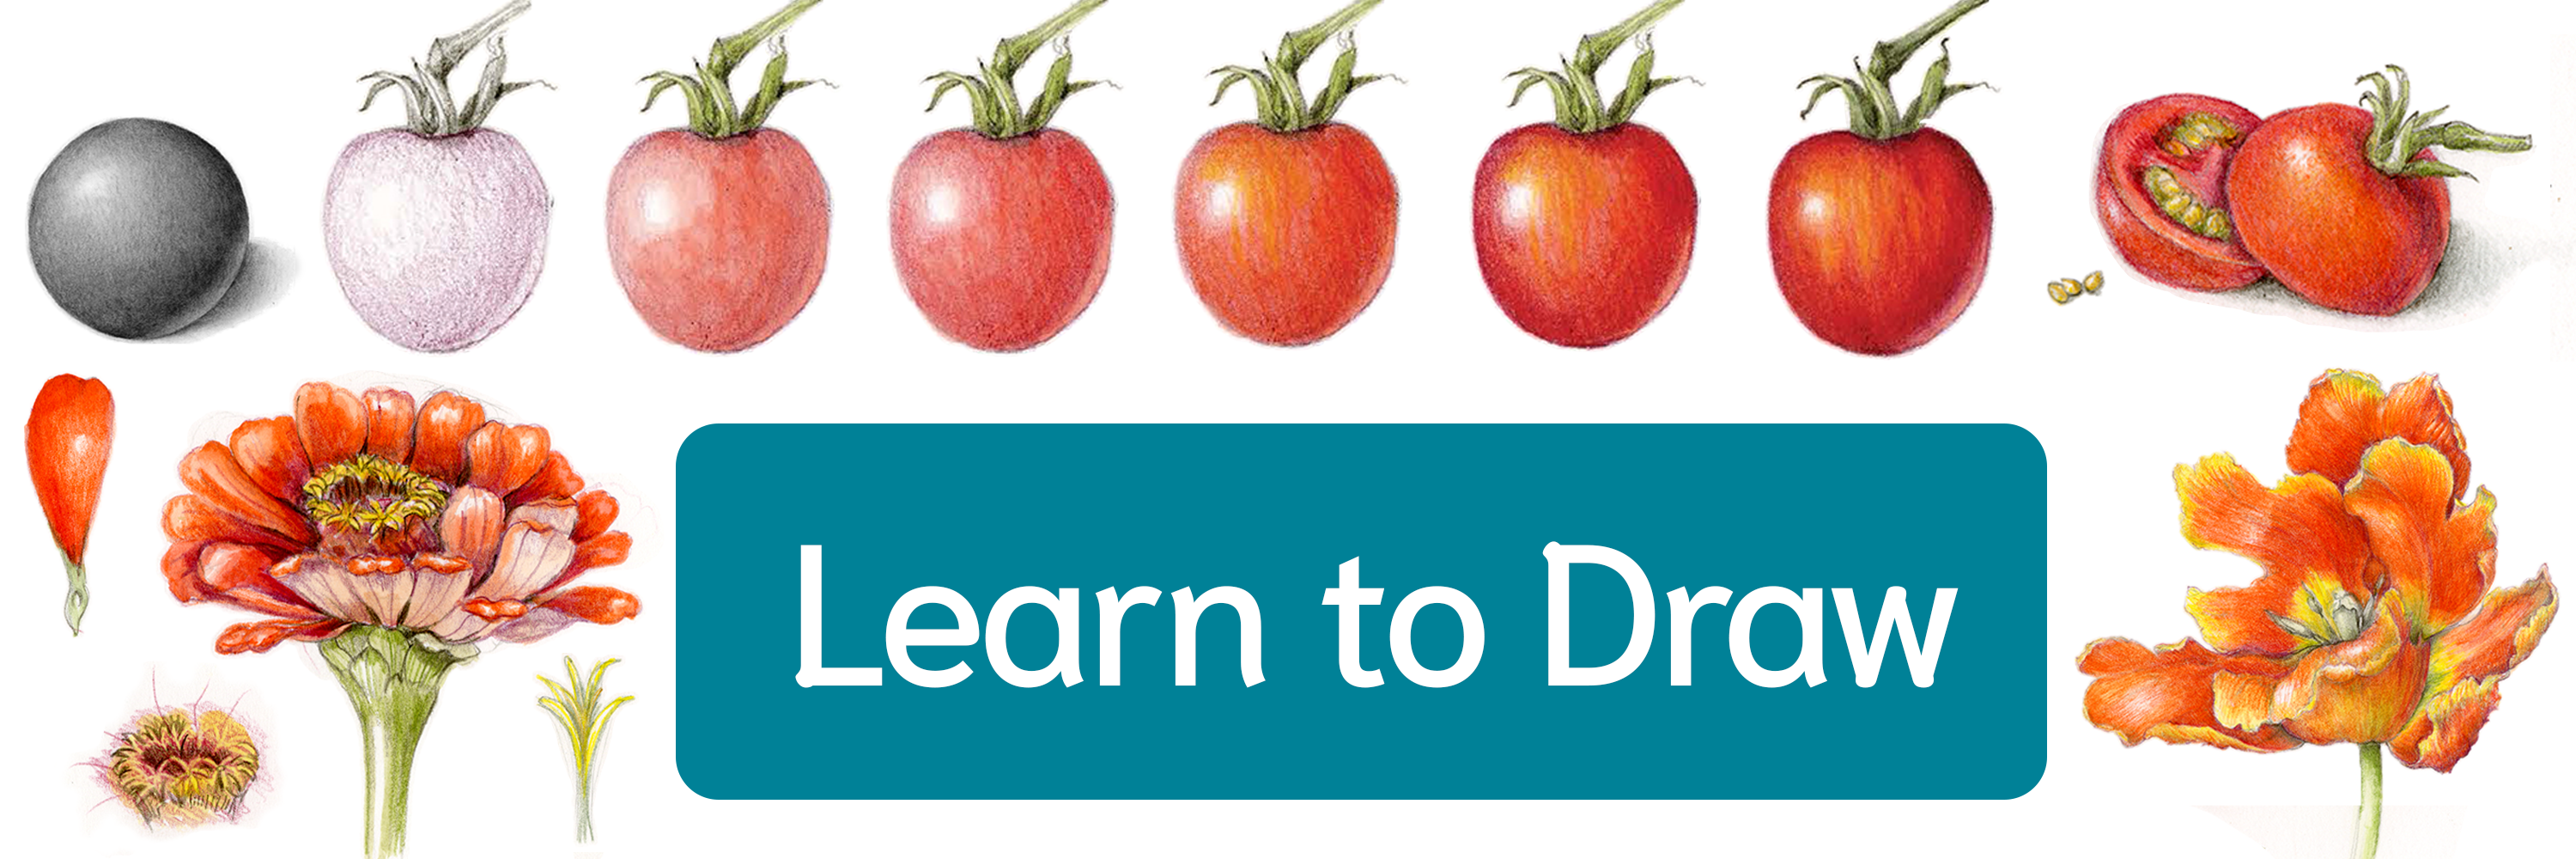
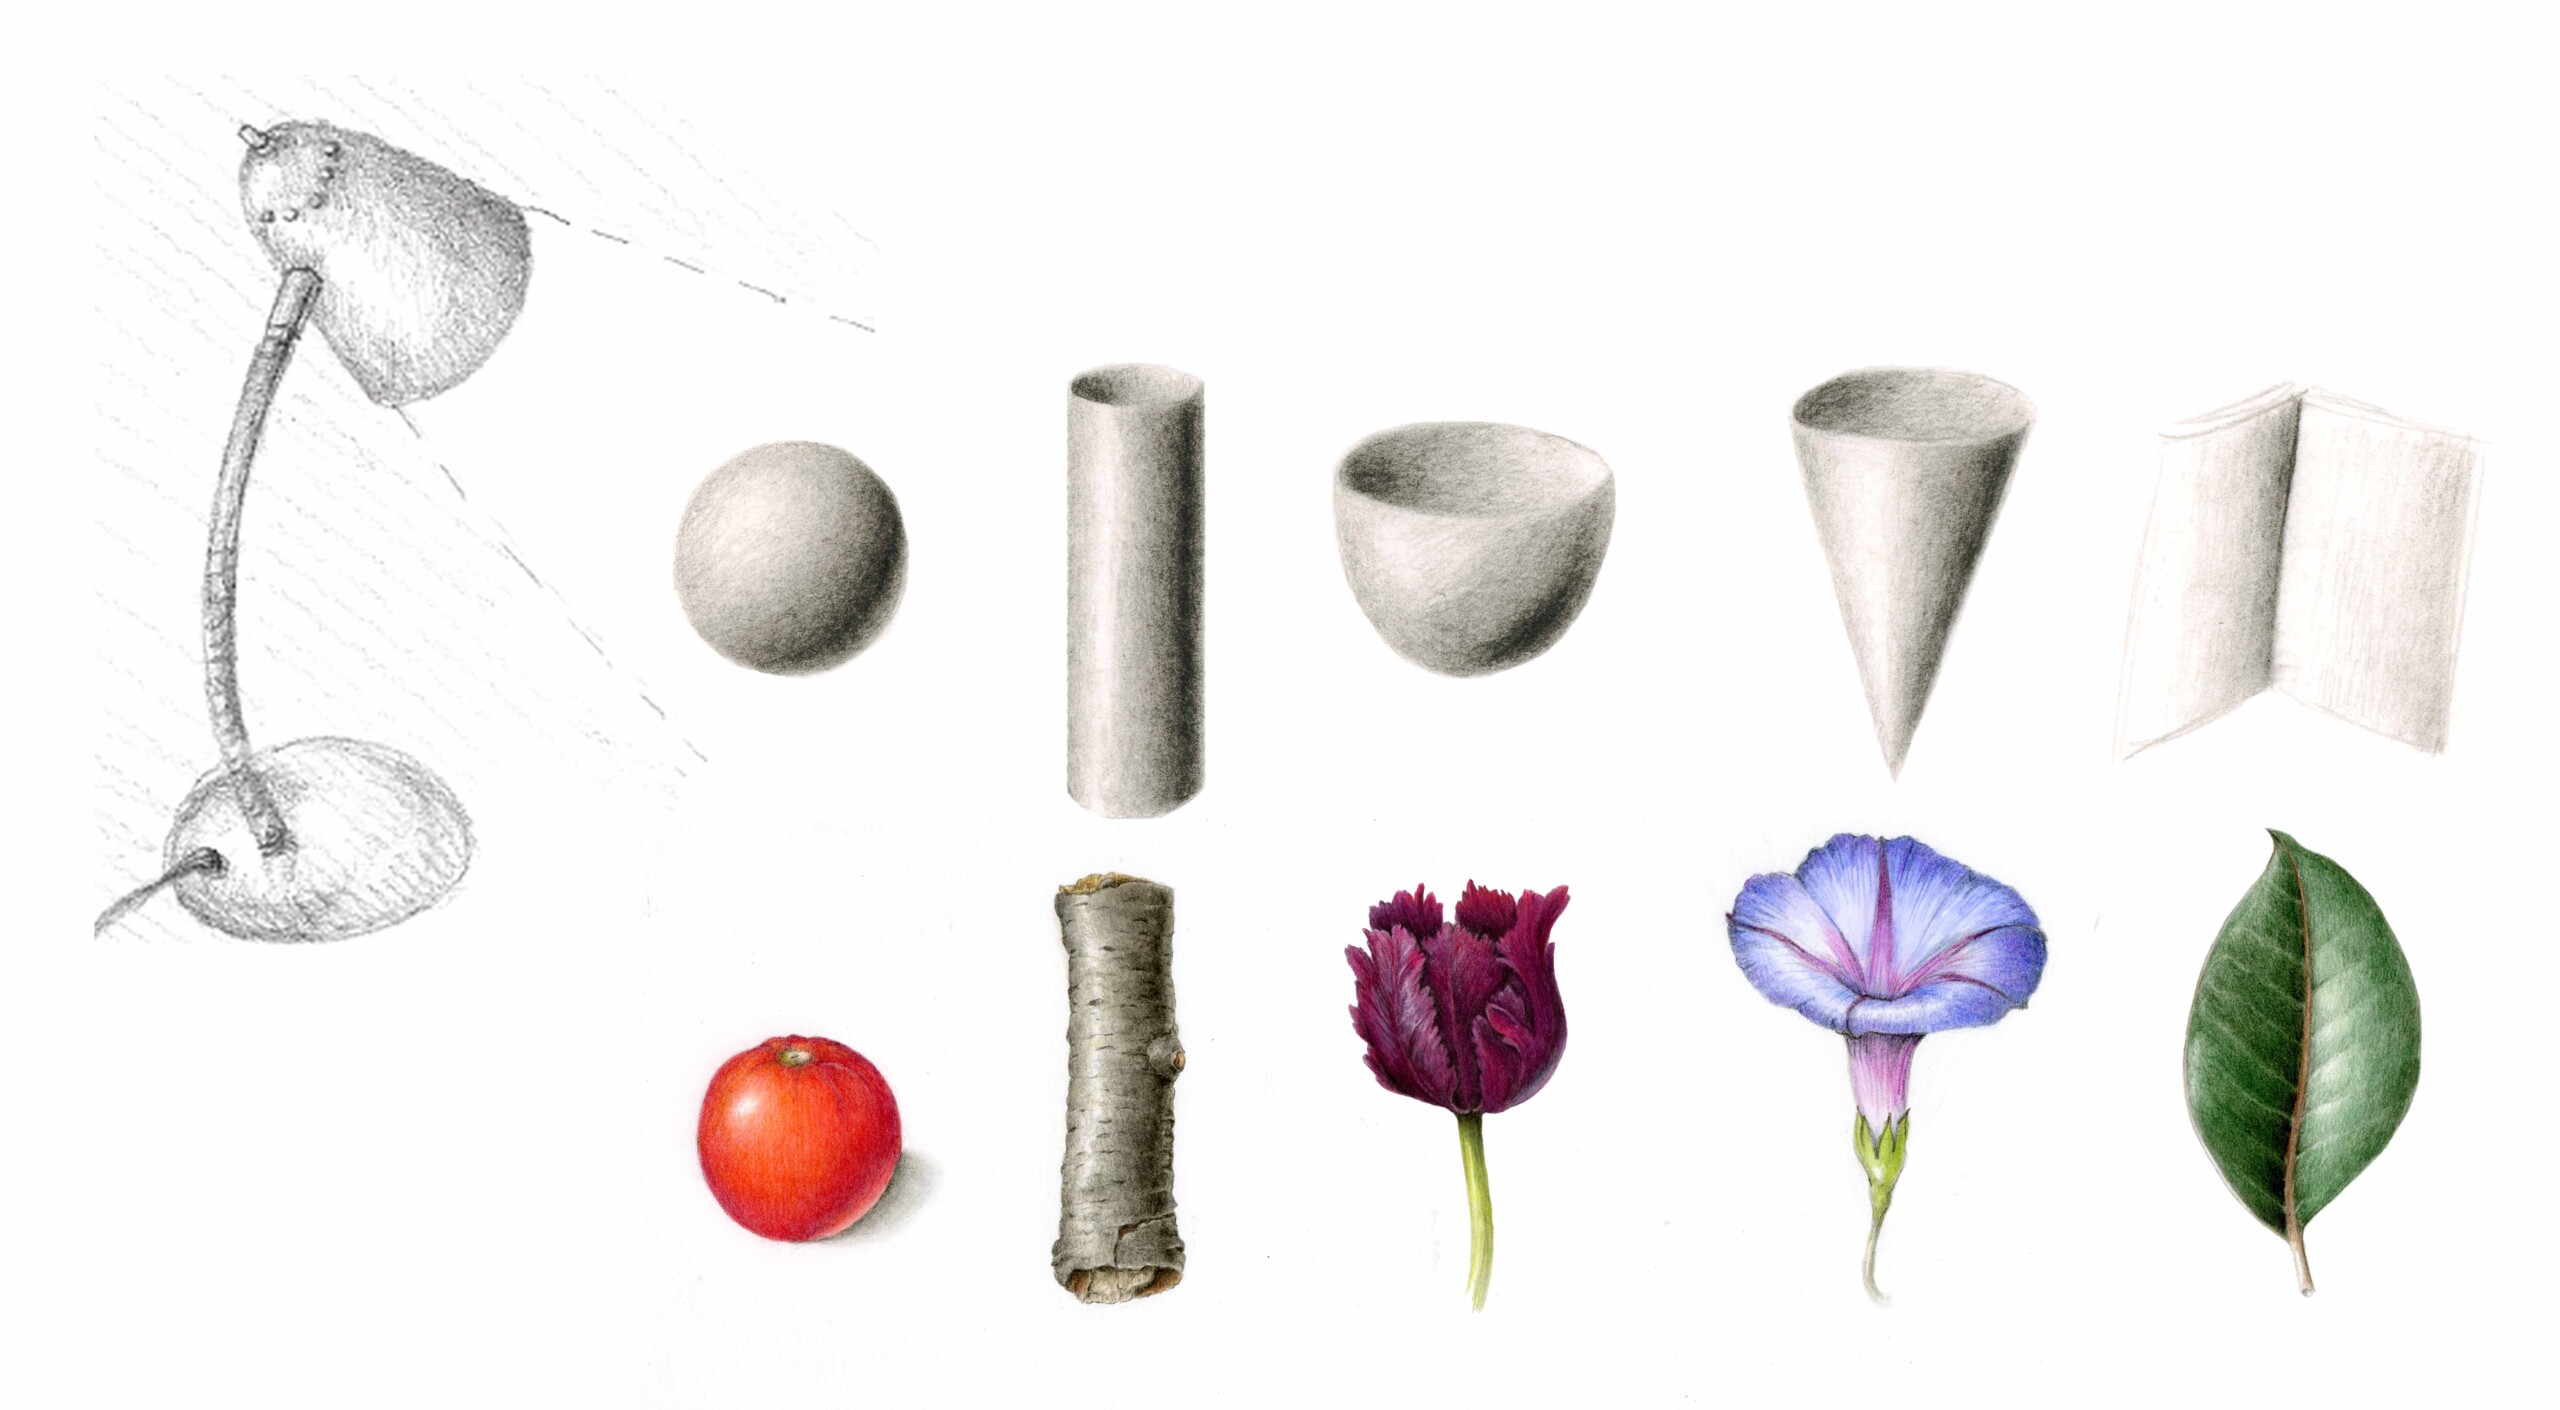
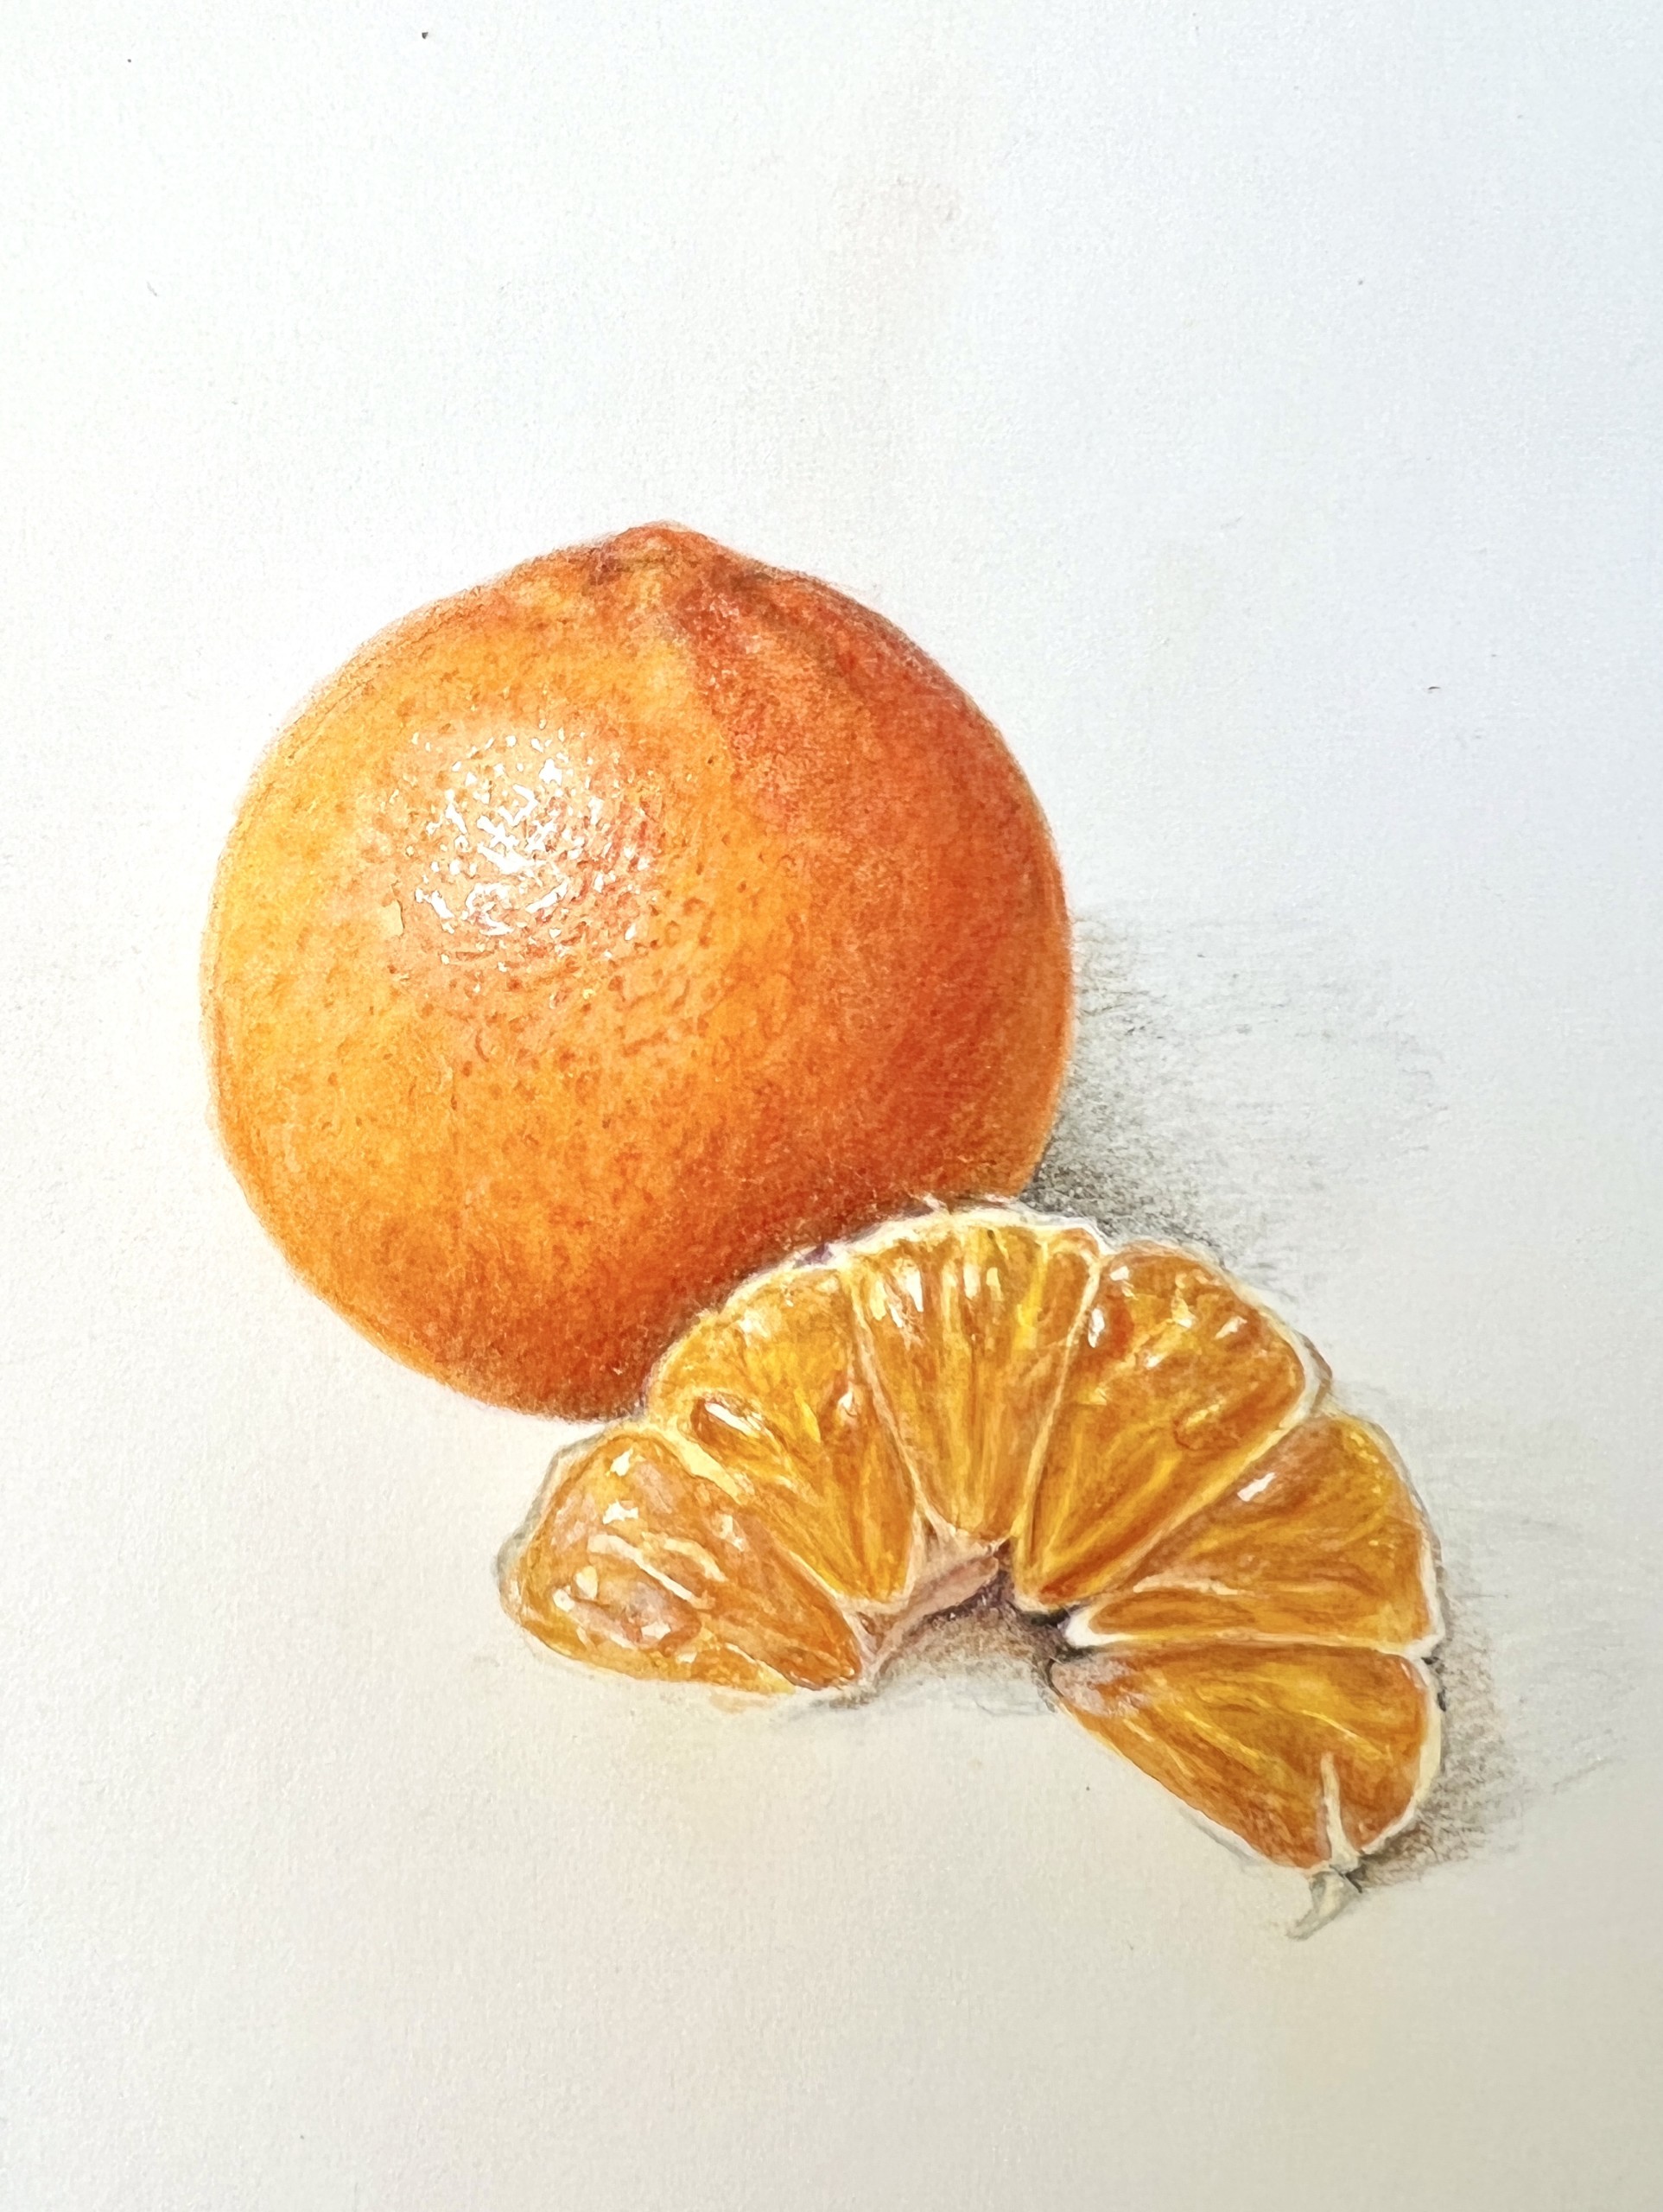
Ever wonder how to make your botanical drawings leap off the page? The secret lies in texture. By infusing your forms with texture, you can transform a basic sphere into a ripe tomato, a geometric cylinder into a weathered branch, and a cup shape into a delicately petaled tulip – almost like magic! Let’s dive into some premium tips for adding texture and bringing your botanical illustrations to life.
Building on the Basics
Before diving into texture techniques, ensure you have a basic draft of your subject, complete with the beginnings of your grisaille toning. This foundational work in light source and perspective sets the stage for realistic texturing. Aspiring artists, begin with basics here!
For a deeper dive into texture, check out the recording of our Peels & Pulp: A Focus on Texture Zoom Drawing Workshop.

Start Small
Begin by practicing a small swatch of your texture on the side of your paper (or on scrap paper, if you prefer). This warm-up will boost your confidence and help you refine the technique before applying it to your main drawing.

Enlarge to Emphasize
Sometimes, the details of your plant are too minute to capture in a life-size drawing. Measure your subject and multiply your measurements to enlarge it enough to show the finer details. Include a scale indicator to clarify the magnification. (ex. If you multiplied your measurements by 4, label your drawing “4x” or “x4”.) Even if you don’t include the magnified details in your final composition, the practice of drawing them will help you better understand the structure and improve the accuracy of your life-size drawing.
For more tips on how to magnify the scale of your drawing, watch this Recording of our Magnification of Wildflowers Zoom Workshop.
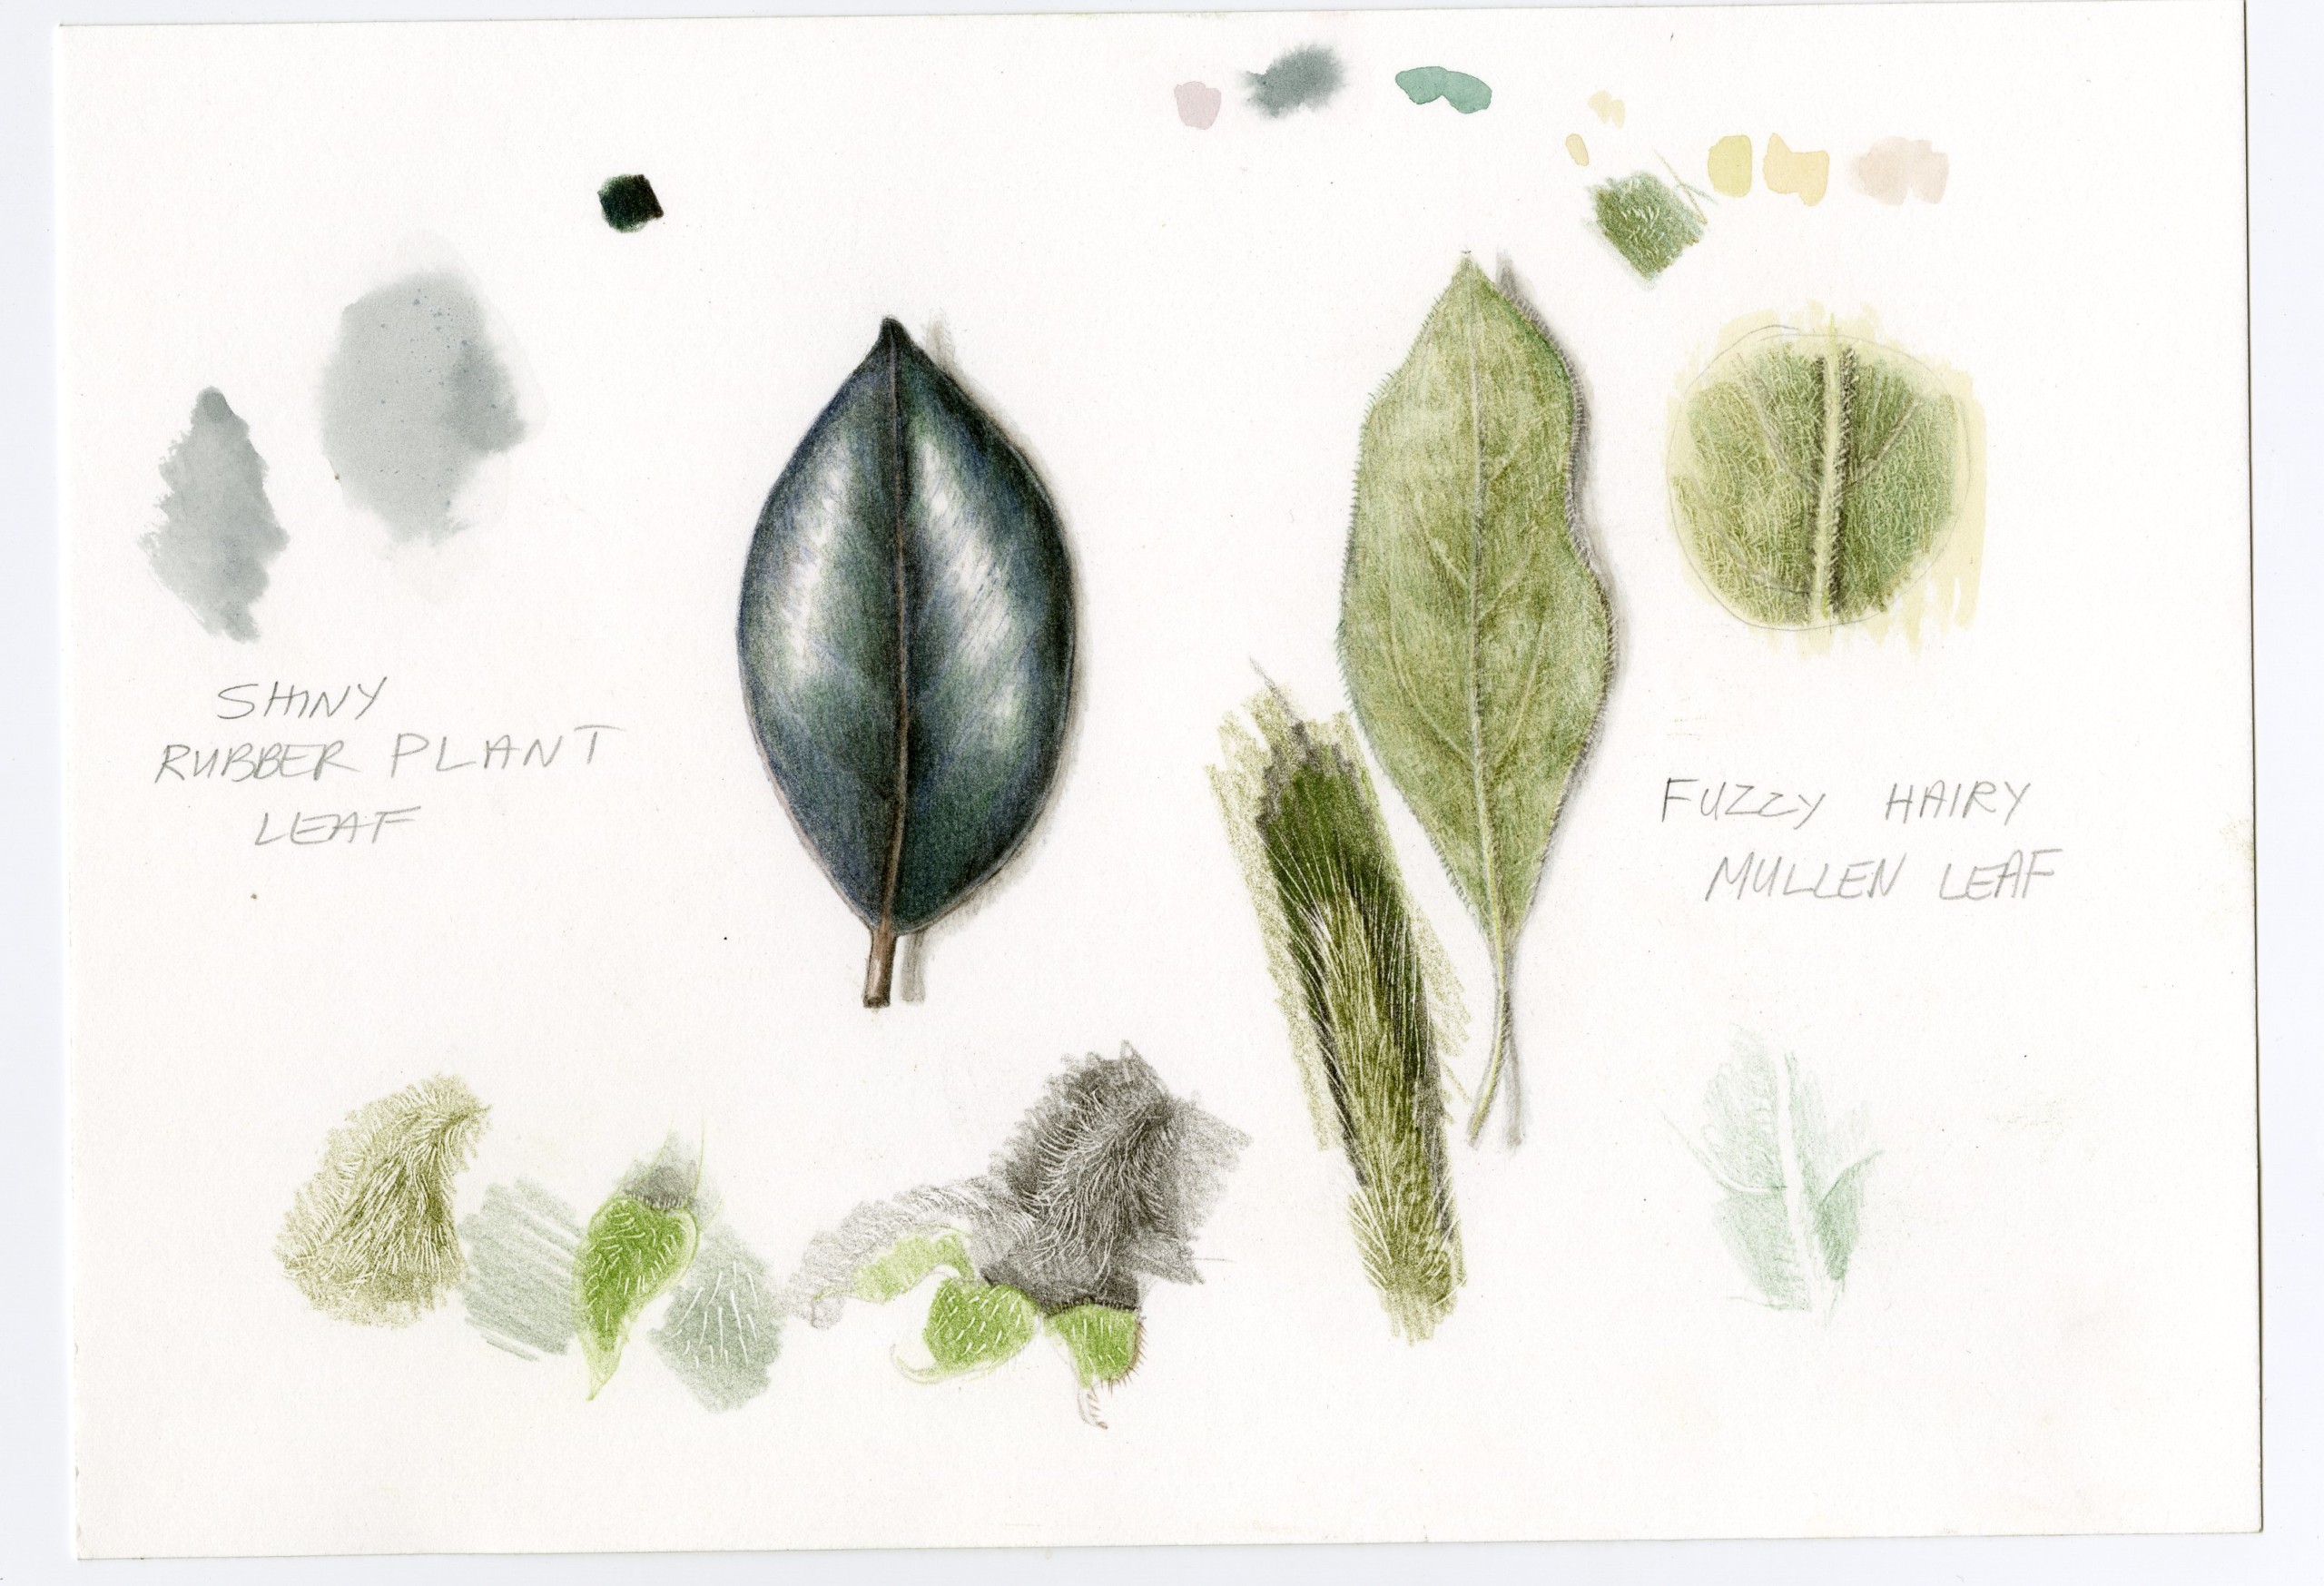
Shiny vs. Fuzzy
Understanding the difference between shiny and fuzzy surfaces is crucial for realistic rendering. Fuzzy surfaces absorb light, resulting in closer tonal values and mostly midtones. Shiny surfaces reflect more light, displaying greater contrast between the darkest and lightest values. For more insights on shiny and fuzzy leaves, check out this video.
Learn how to create realistic renderings of different leaf textures and tones with the Recording of Green Leaves: Texture and Color Zoom Workshop.
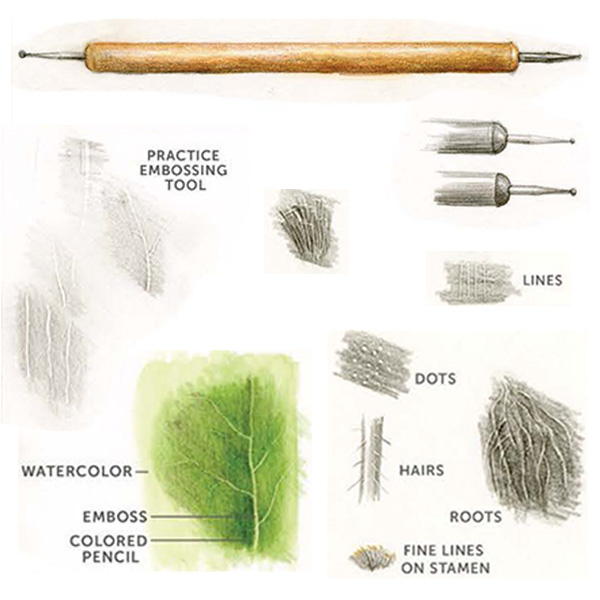
Embossing for Delicate Details
The key is to keep it SUBTLE!
Embossing tools are used in various crafts to create a recessed or indented pattern on a surface. Press the tool into the paper’s surface. Then, when you draw over the embossed area with a colored pencil or watercolor, the embossed area stays light while the pencil tones cover the paper around the embossed area. This technique is perfect for rendering thin roots, hairs, veins, or stamens.
Practice keeping your embossing subtle and varied so that the lines are not stiff and regimented. Apply stronger pressure at first, and then ease up on the pressure, making the line thinner and thinner until it disappears. Play around with different sizes of embossing tools for further variation. The trick is to achieve a good mix of embossing with regular drawing so that the indented marks blend in more naturally.
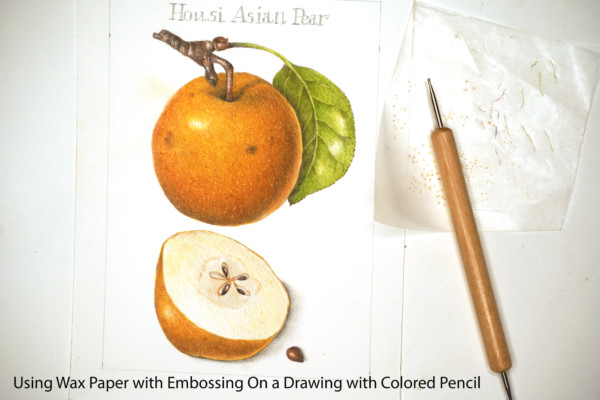
Technique Tip: Use Wax Paper
Use the embossing tool on top of wax paper (on top of your drawing) for even subtler indentations. See this FREE video for further details.

Wet & Juicy
Put the “water” in “watermelon” by keeping your highlights bright and shimmering. Learn how to achieve the many textures of watermelon – from the green pattern on its smooth outer rind, to the spongy, fibrous, juicy red melon and glossy seeds hidden inside. Learn more and get the RECORDING of the Wonderful Watermelon Zoom Workshop Here

Dots for Realism
For subjects like apples, practice embossing dots. Start with a swatch. Once satisfied with your results, emboss the dots on your drawing and layer colors along the apple’s cross-contour lines. (Learn more about cross-contour in this post.)
Masking Fluid
You can use masking fluid to leave areas of the paper white when using watercolor. A great way to make small marks with masking fluid is to use an inexpensive dip pen. (Find our art supplies recommendations here.) This technique is explained more in the recording of our Peels & Pulp: A Focus on Texture Zoom Drawing Workshop.
Technique Tip: Apply Masking Fluid to Highlights Before Using Watercolor
In the highlight areas that you want to keep the brightest, apply masking fluid with a dip pen, then paint with watercolor to get some color down. Once your paper is completely dry, use a kneaded eraser (or gently peel it off with your fingers or a washcloth/paper towel), and you’ll be left with the white of your paper in your brightest highlights. Then fine-tune the details with colored pencil.
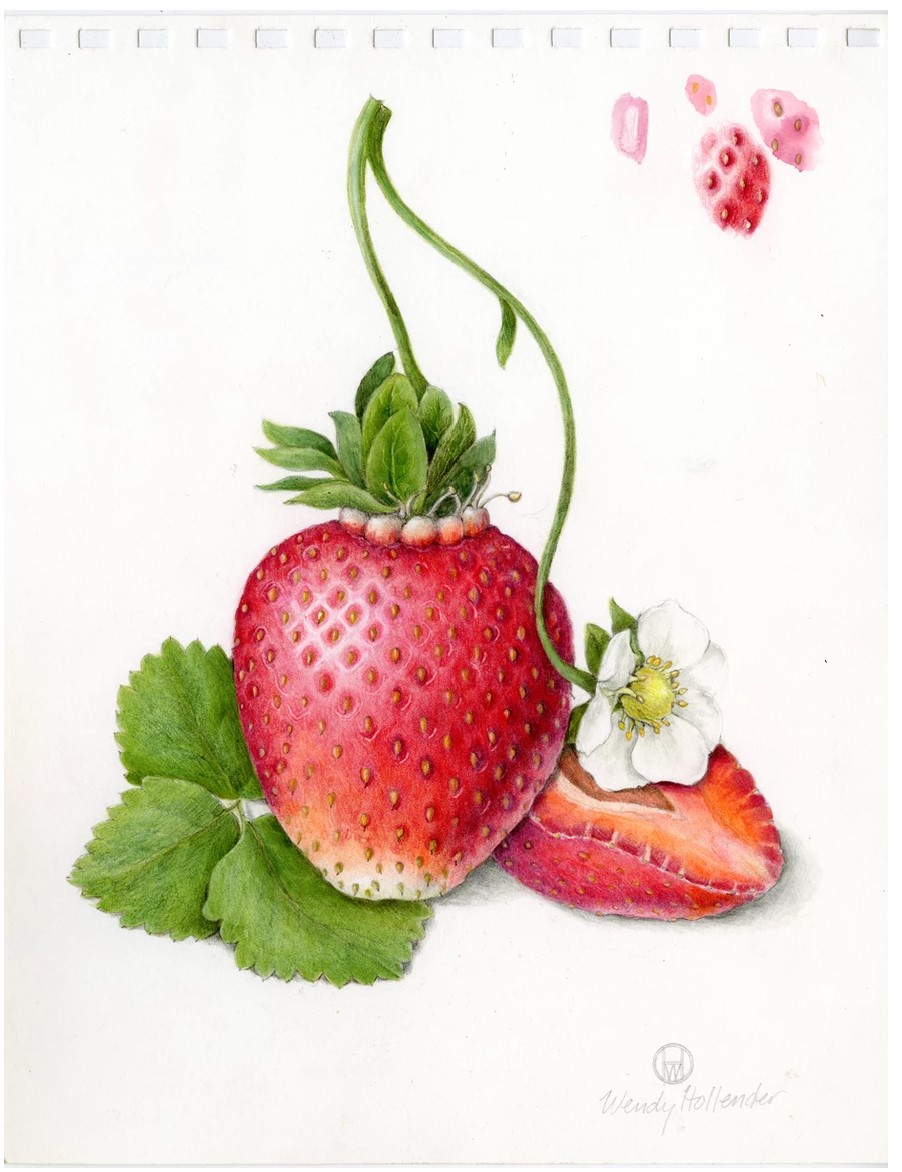
Capturing Bumps & Recessed Seeds
On aggregate fruits like strawberries, shadows play a crucial role in depicting indented seeds. Include these shadows to show each seed’s depth in the strawberry’s flesh. Check out this free lesson – 20 Steps to Stunning Strawberries – or dive deeper with this Recording of Sketching Sweetness: Strawberries Zoom Workshop.
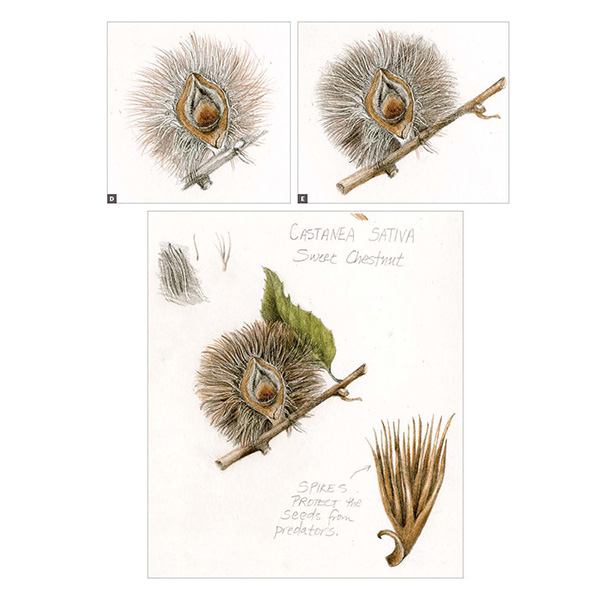
Drawing Spikes
How to Paint Prickly Plants
Spikes tend to be wider at the base and taper to a very fine, sharp point. The shape of spines and thorns is similar to basic 3D shapes like cylinders and cones, so use a light source thumbnail (found here) to remind yourself of where to shade. Practice drawing some individual spikes with varied thicknesses. Embossing tools can really come in handy here!
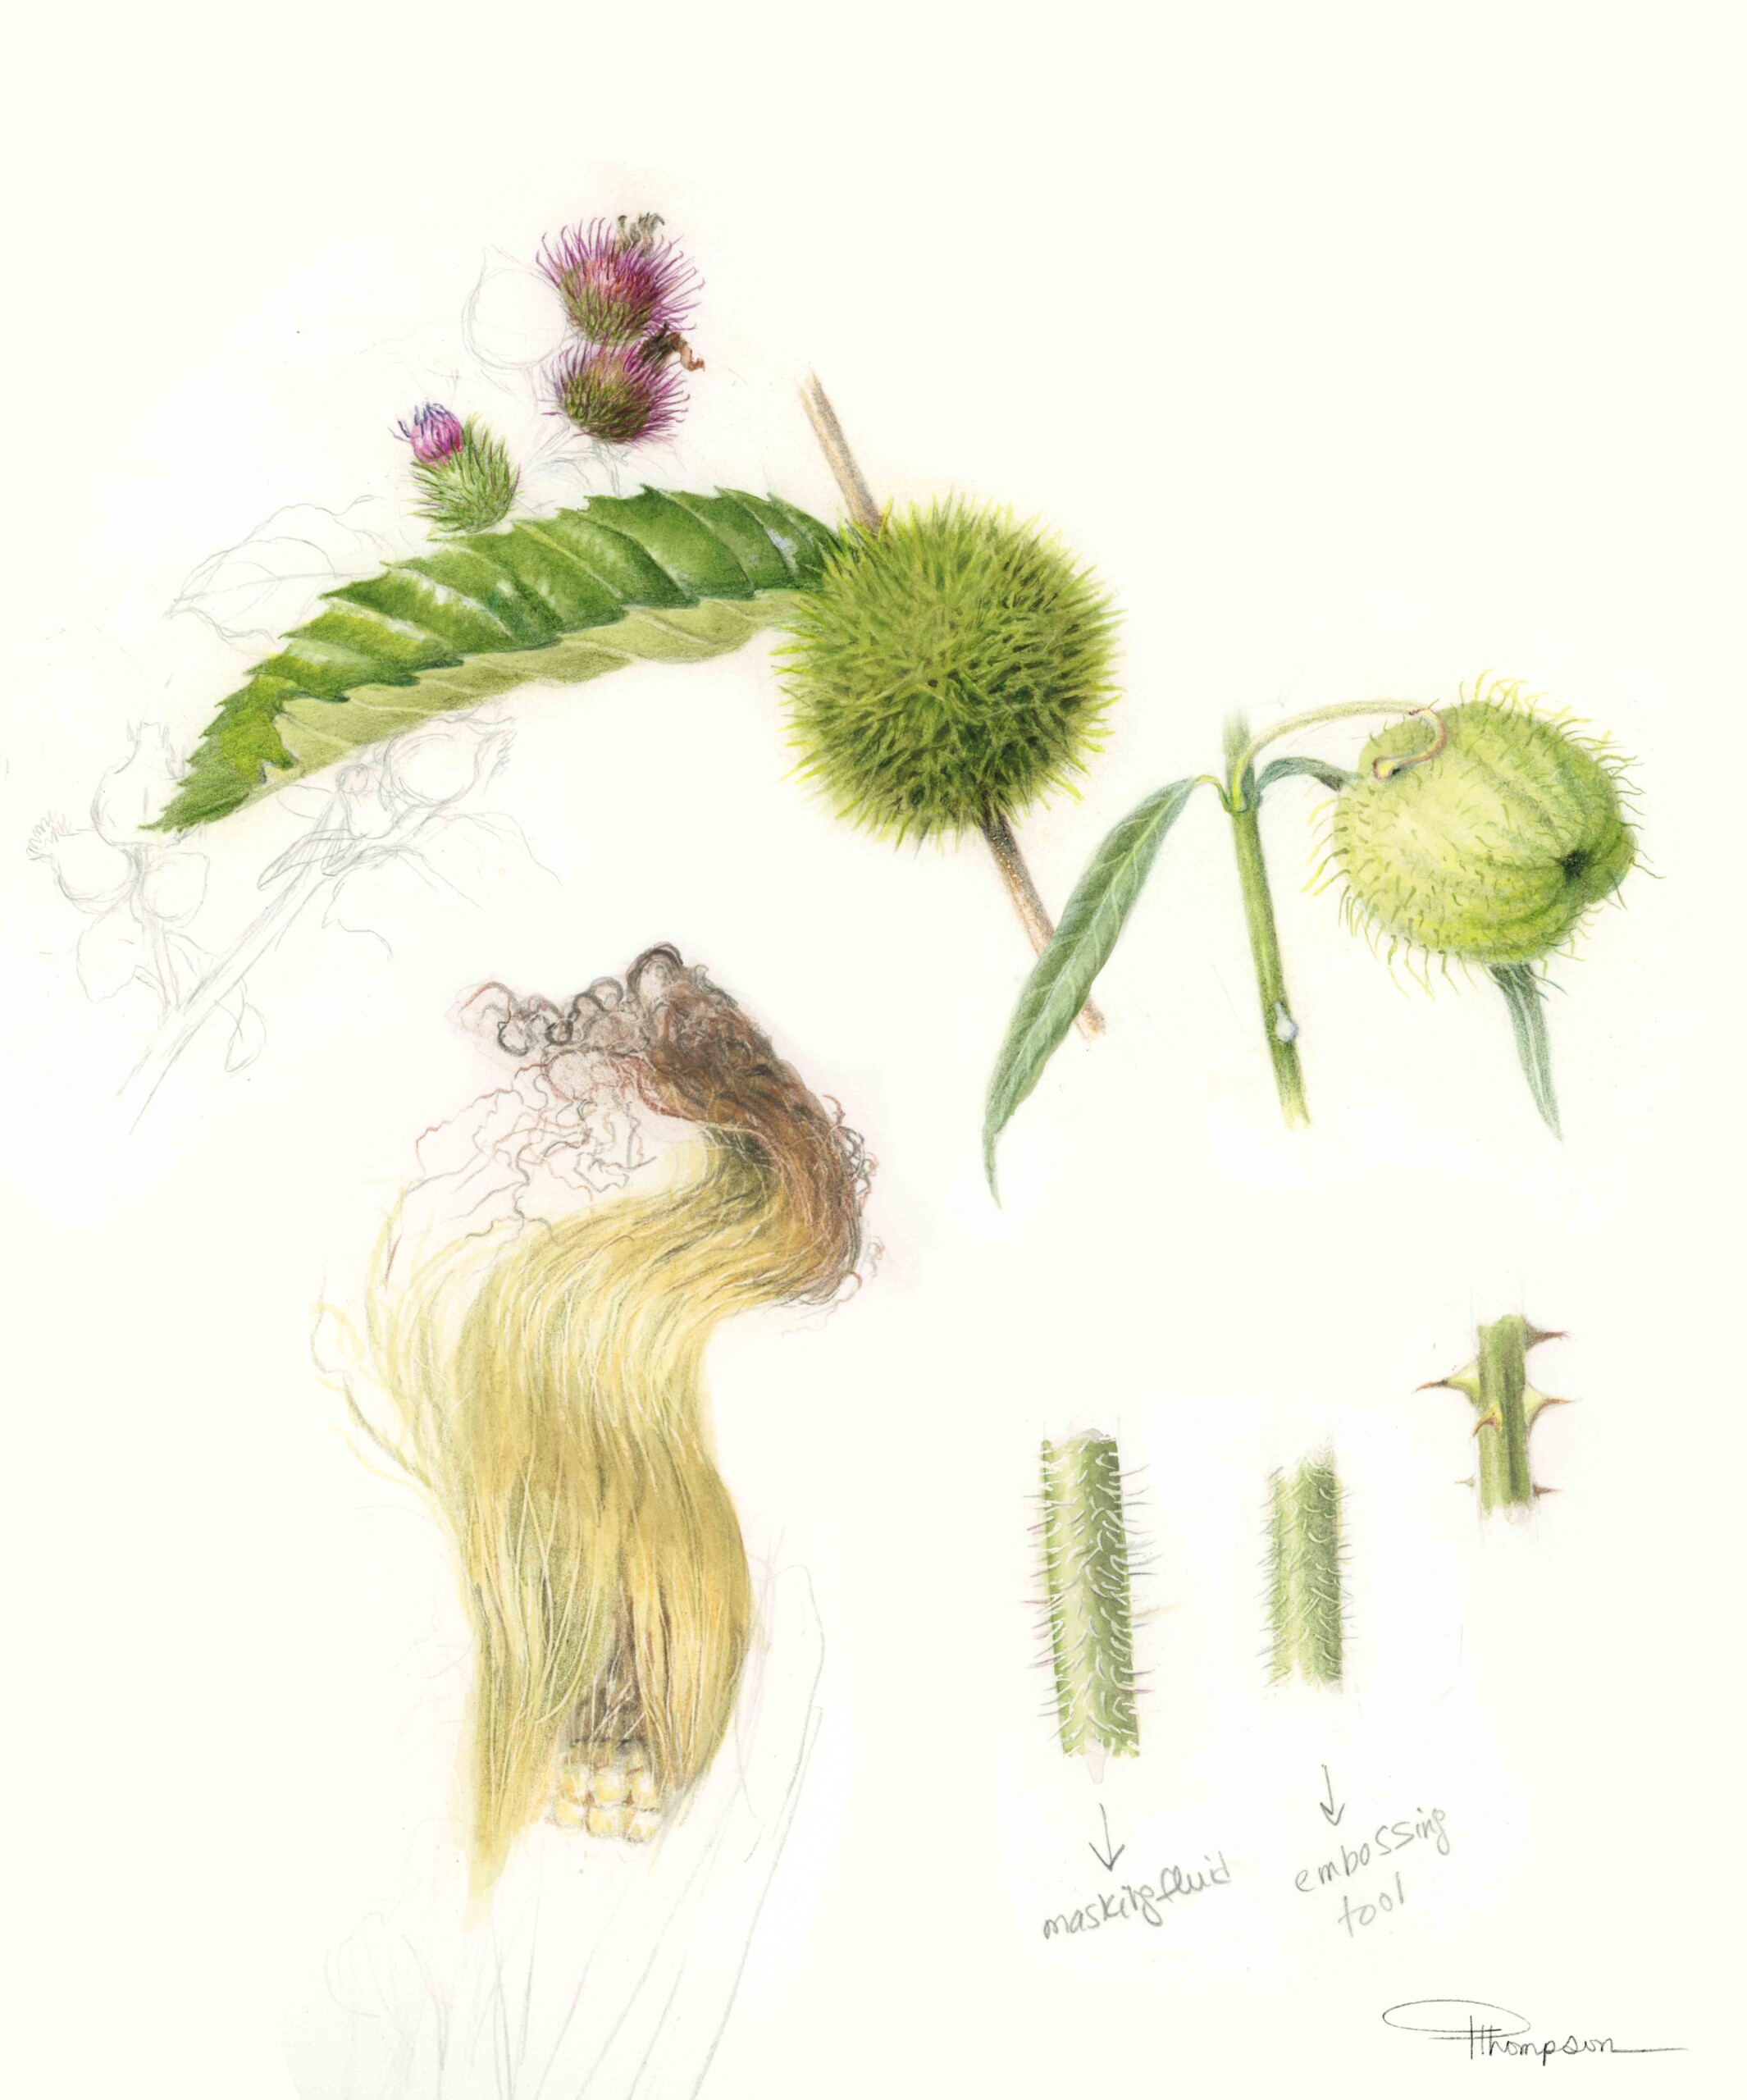
Technique Tip: Start by Drawing Spikes Enlarged
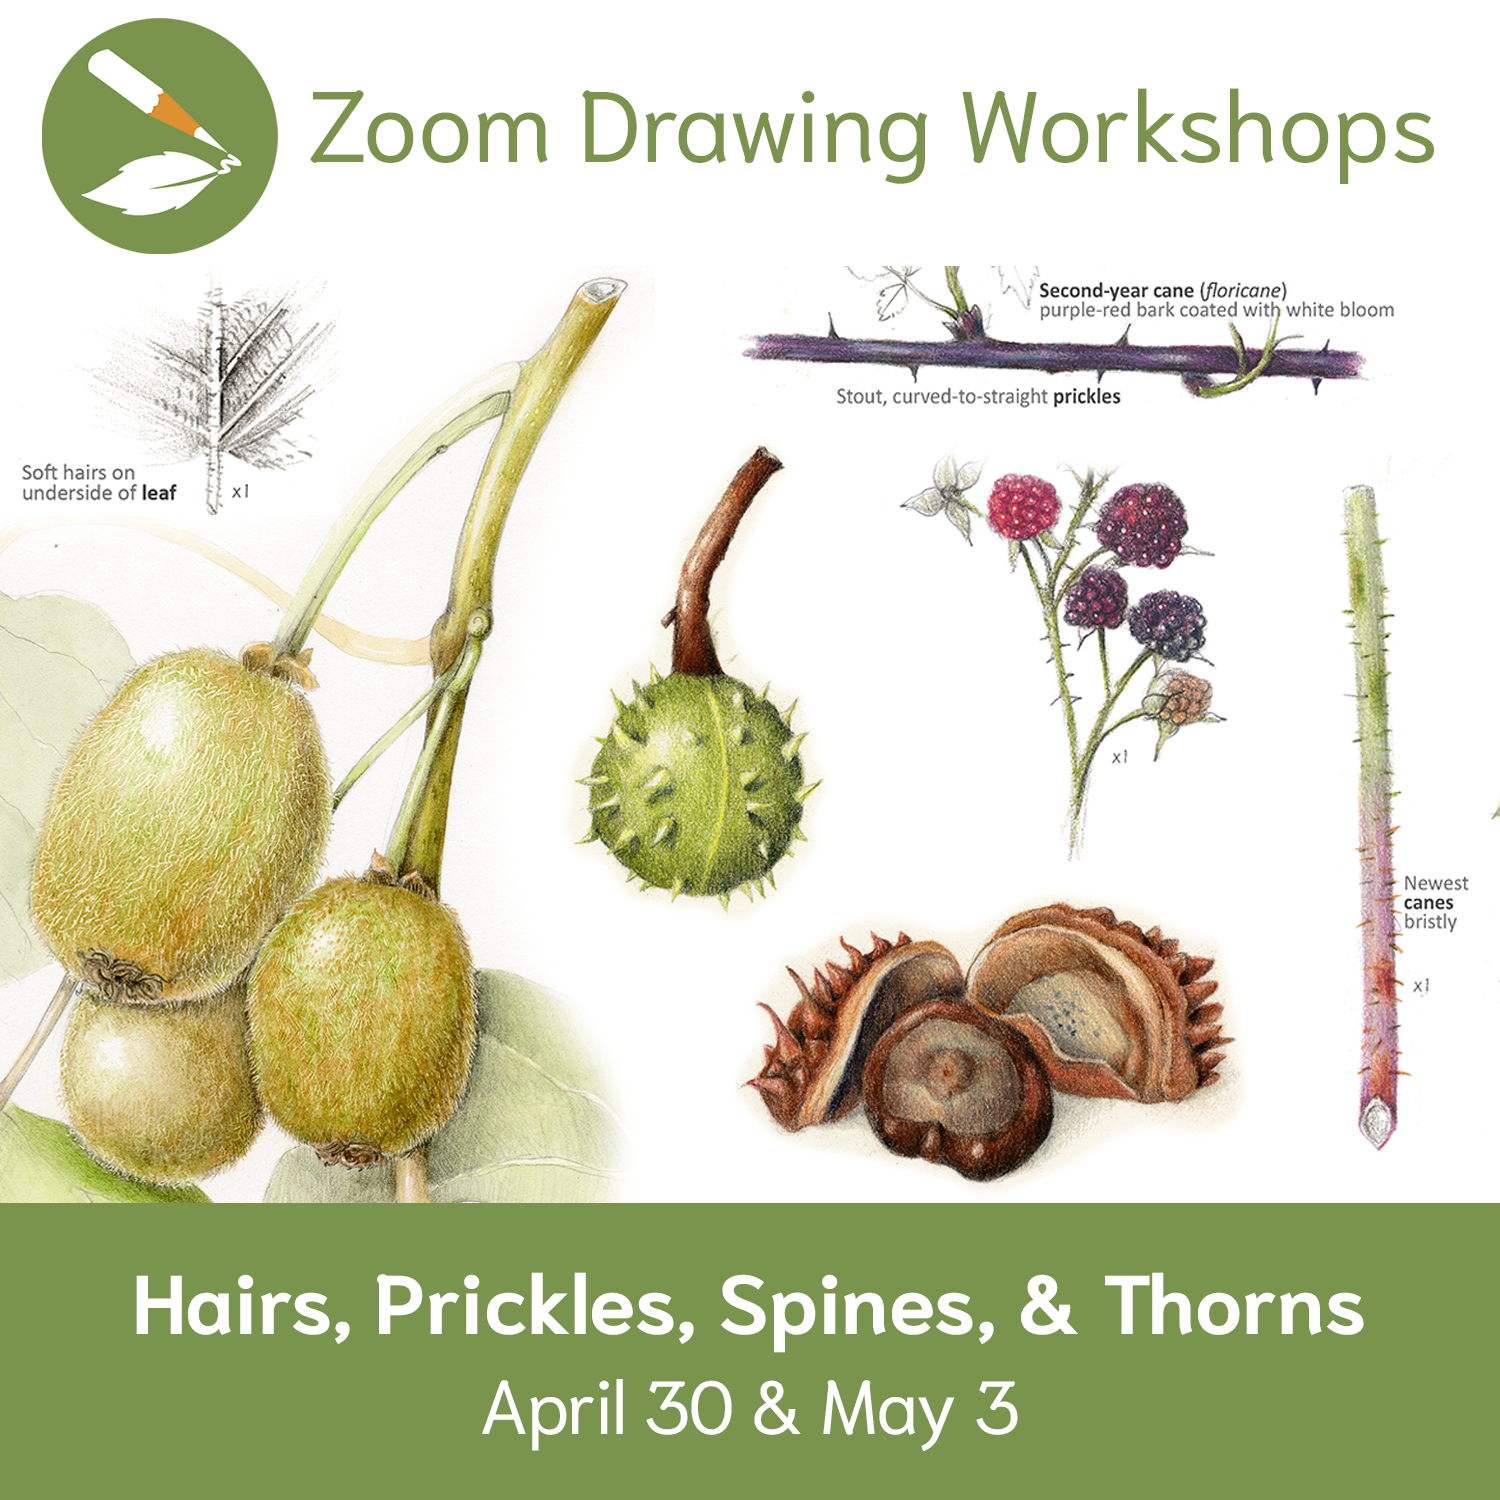
Drawing the spikes at a magnified scale can help you understand and better communicate their structure. Learn more about how to draw sharp and pointy subjects in this Recording of our Hairs, Prickles, Spines, & Thorns Zoom Drawing Workshop.

Flaky, Papery Parts
Let light shine through that papery texture, often found on our botanical subjects, like drying out bracts and flaky onion skins. For techniques to create that translucent, thin, papery “feel,” check out this Recording of Papery Texture: Garlic, Onions, etc. Zoom Workshop.
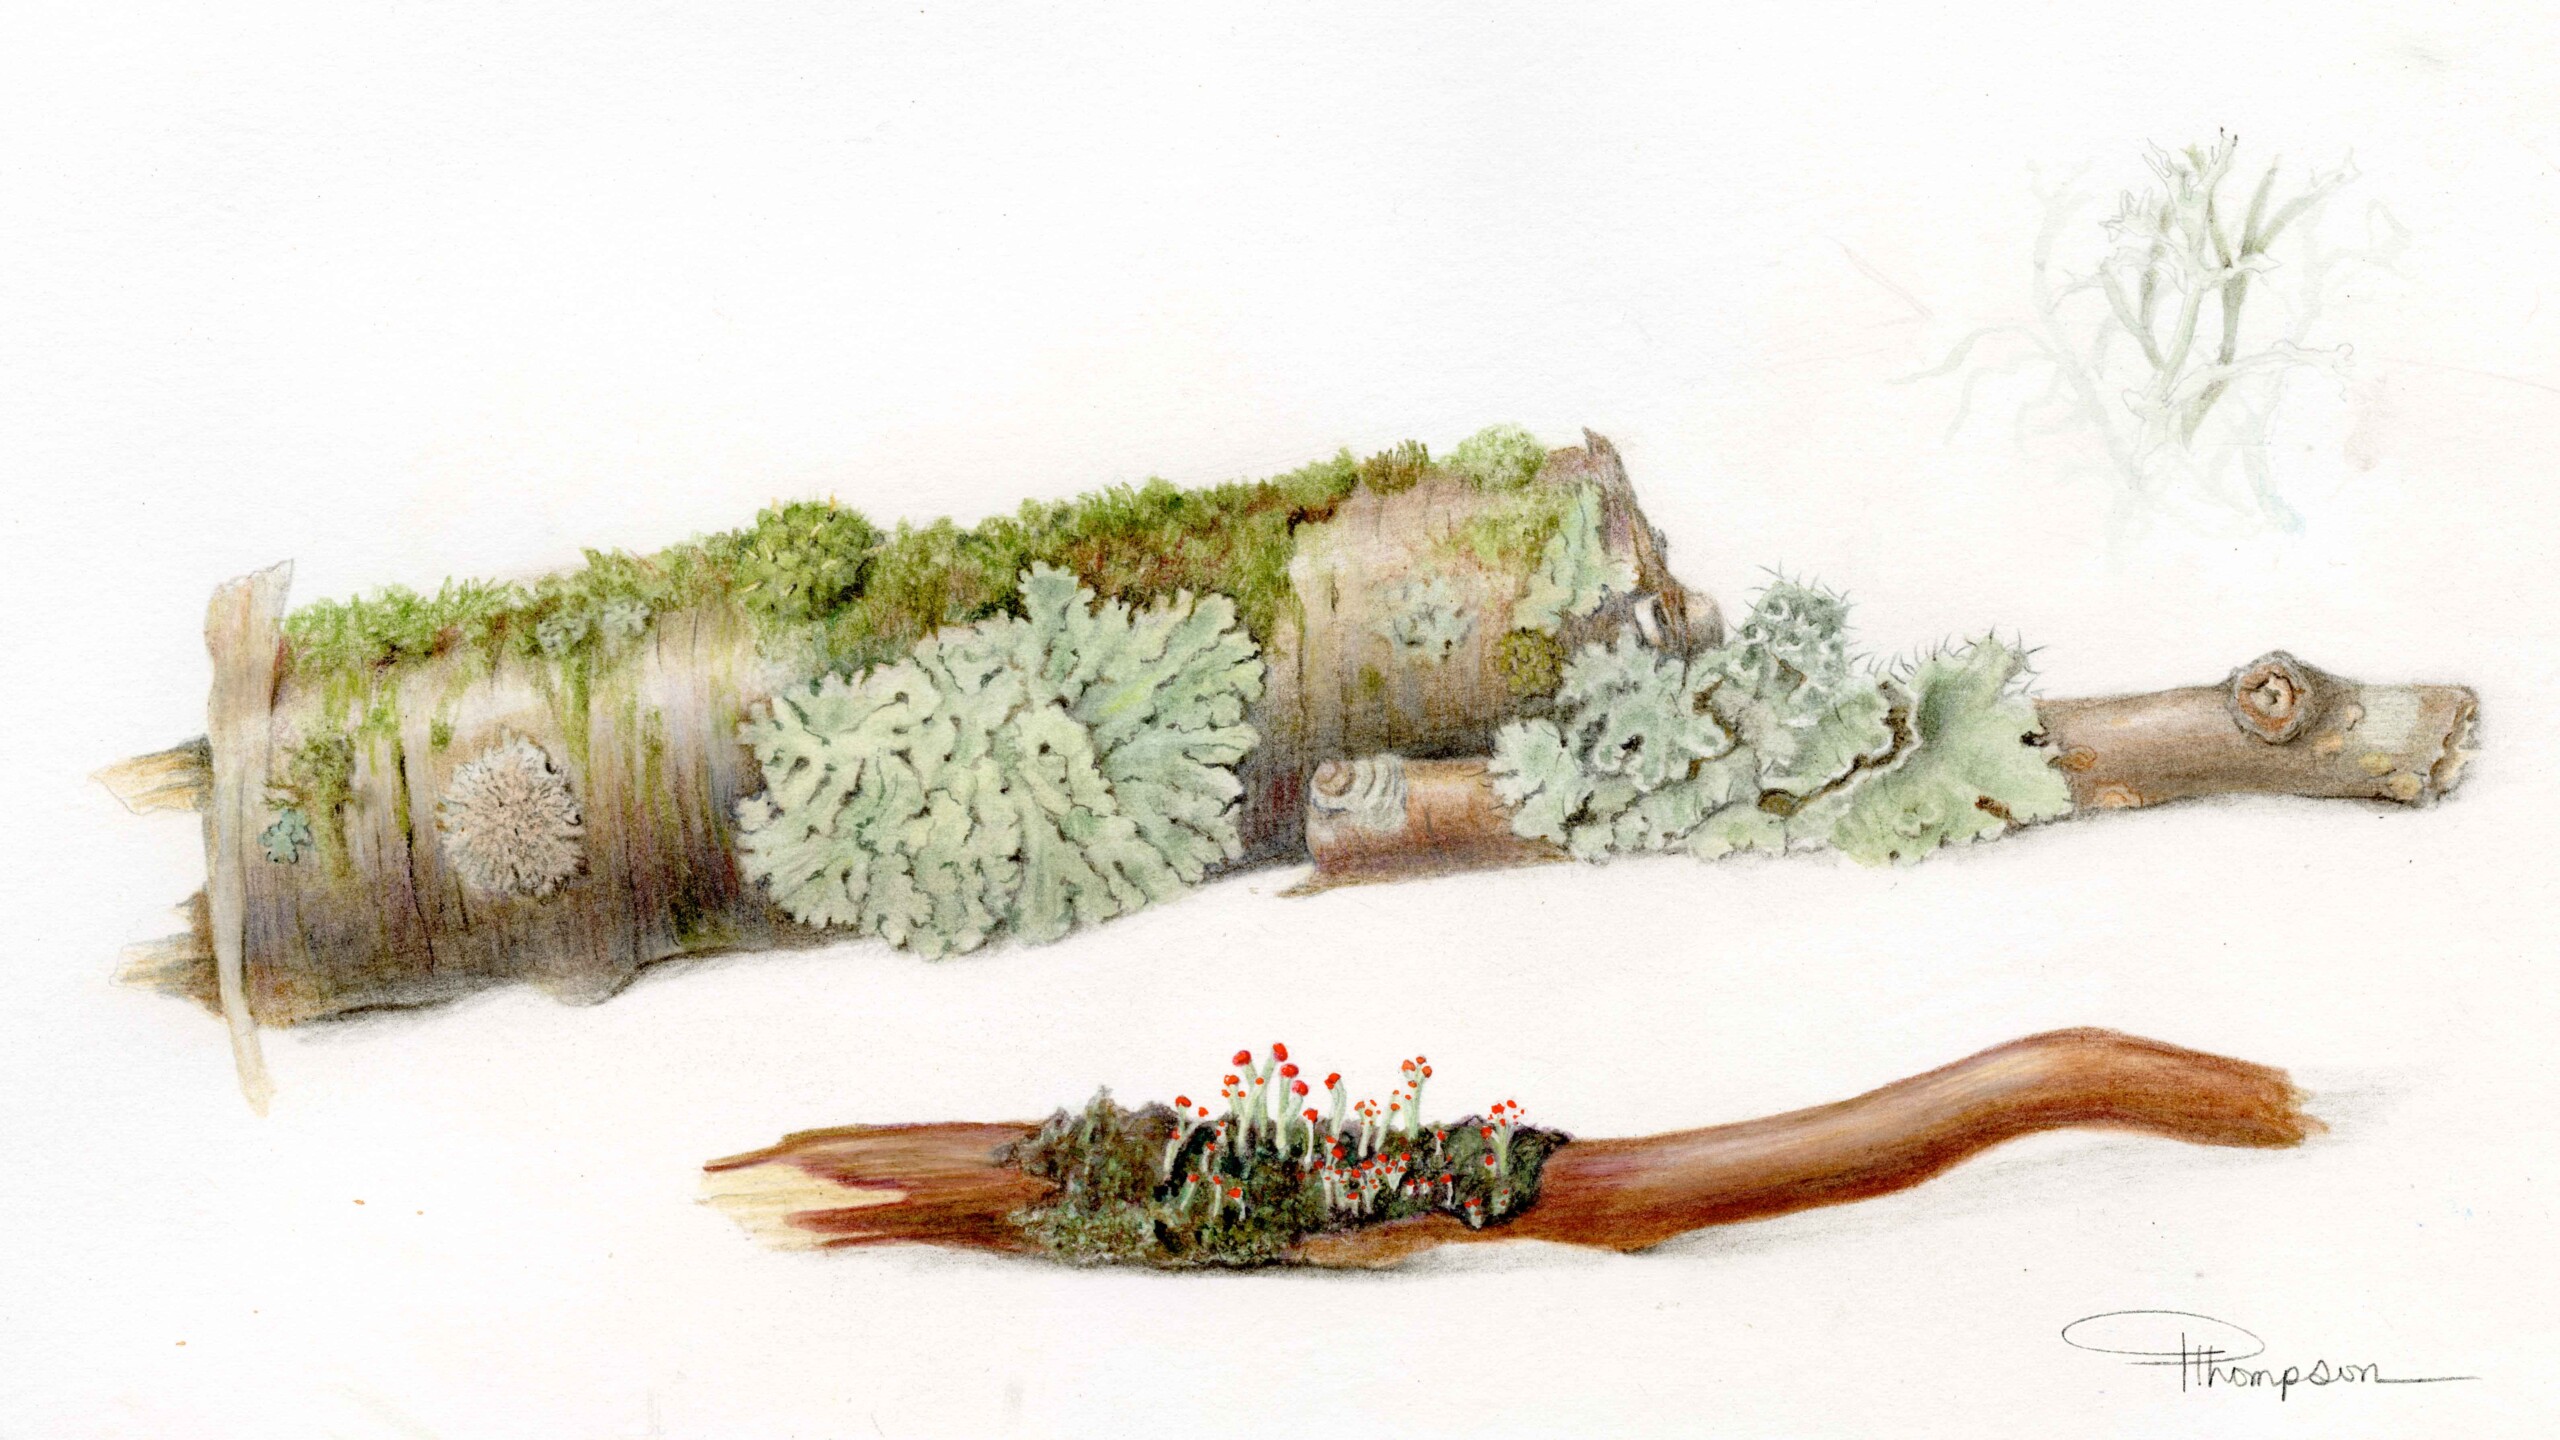
Detailing Branches
Barks, Lichens, and Mosses… (Oh my!)
Observe the details on your branch (like lenticels, which allow the branch to breathe!), drawing them lightly at first. As you fill in closer and closer to the highlight, make sure your highlight appears irregular and not an empty stripe. Look to your branch for inspiration, and let nature guide you! Branches are a great introduction to botanical drawing.
Technique Tip: Highlights Should Shimmer (not look empty!)
White spaces can look empty, but highlights are far from empty… they are full of light! To prevent your highlights from looking like weird empty stripes, lightly make marks like small dots, dashes, or irregular zig-zaggy toning. This will help your highlights shimmer and shine their light instead of looking like blank space.
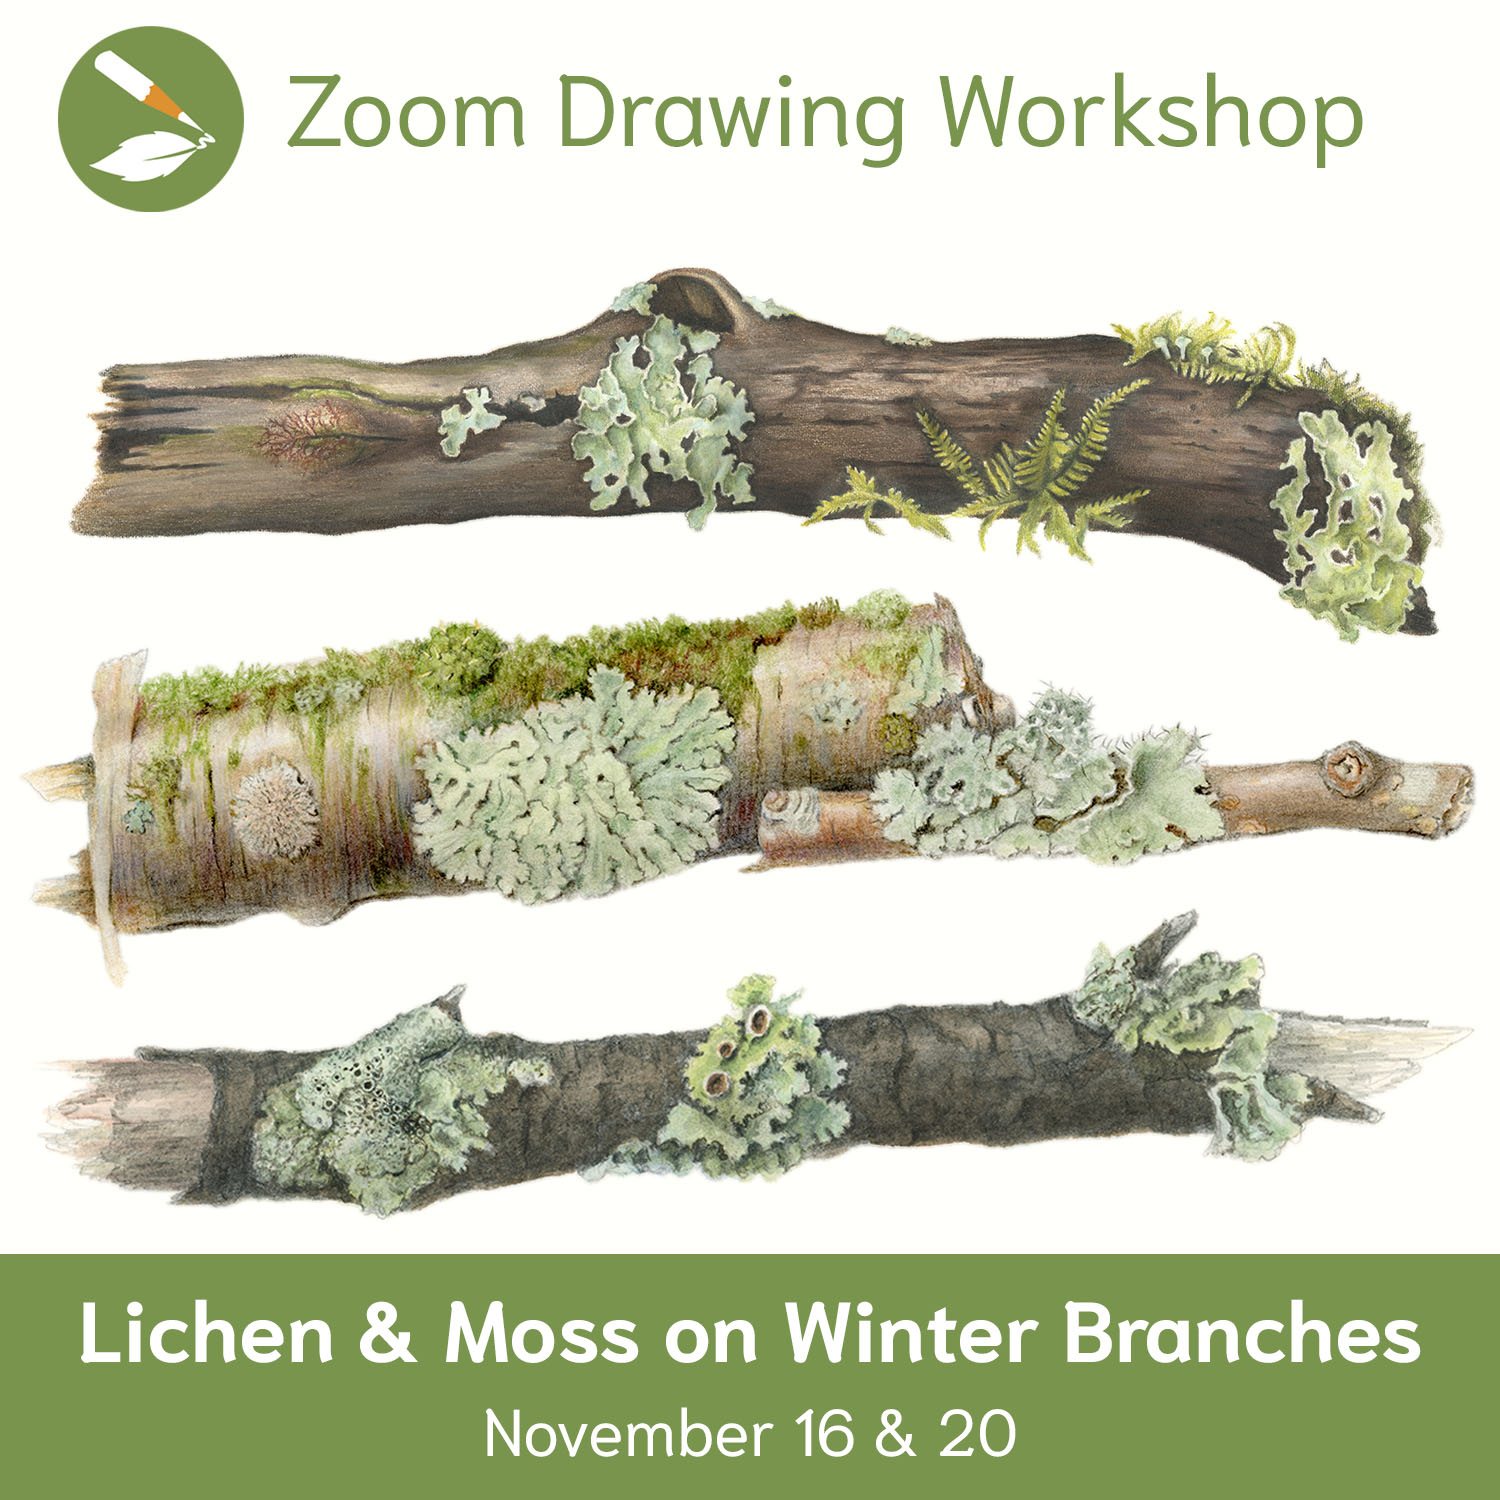
We Like Lichen and Moss!
Join this Drawing Workshop Online LIVE – Nov. 16 & 20, 2025
Mosses can be spongy, soft, bristly, feathery, fibrous… Lichens can be crusty, leafy, shrubby, powdery, scaly… Bring any branches from your backyard, and we’ll walk you through the whole process so you’ll leave this workshop with new textural skills in your botanical illustration toolkit. Take your time, enjoy this meditative study of tiny botanical worlds, and learn how to create their various textures, patterns, and brilliant colors with a mix of colored pencil and watercolor. (Want a fun challenge? Try using kraft paper for this workshop!)… Learn more
Click Here to Register for Lichen & Moss Zoom
Infusing texture into your botanical art transforms it from flat to fantastic.
Start practicing today and see your drawings come to life!
Dip your toe in with short lessons from Botanical Basics, or dive deeper with full-length lessons from The Practice of Botanical Drawing.
Try your FIRST WEEK FREE and cancel any time with no hidden fees!
Join our online course and get personalized feedback on your artwork in addition to hours of video lessons.