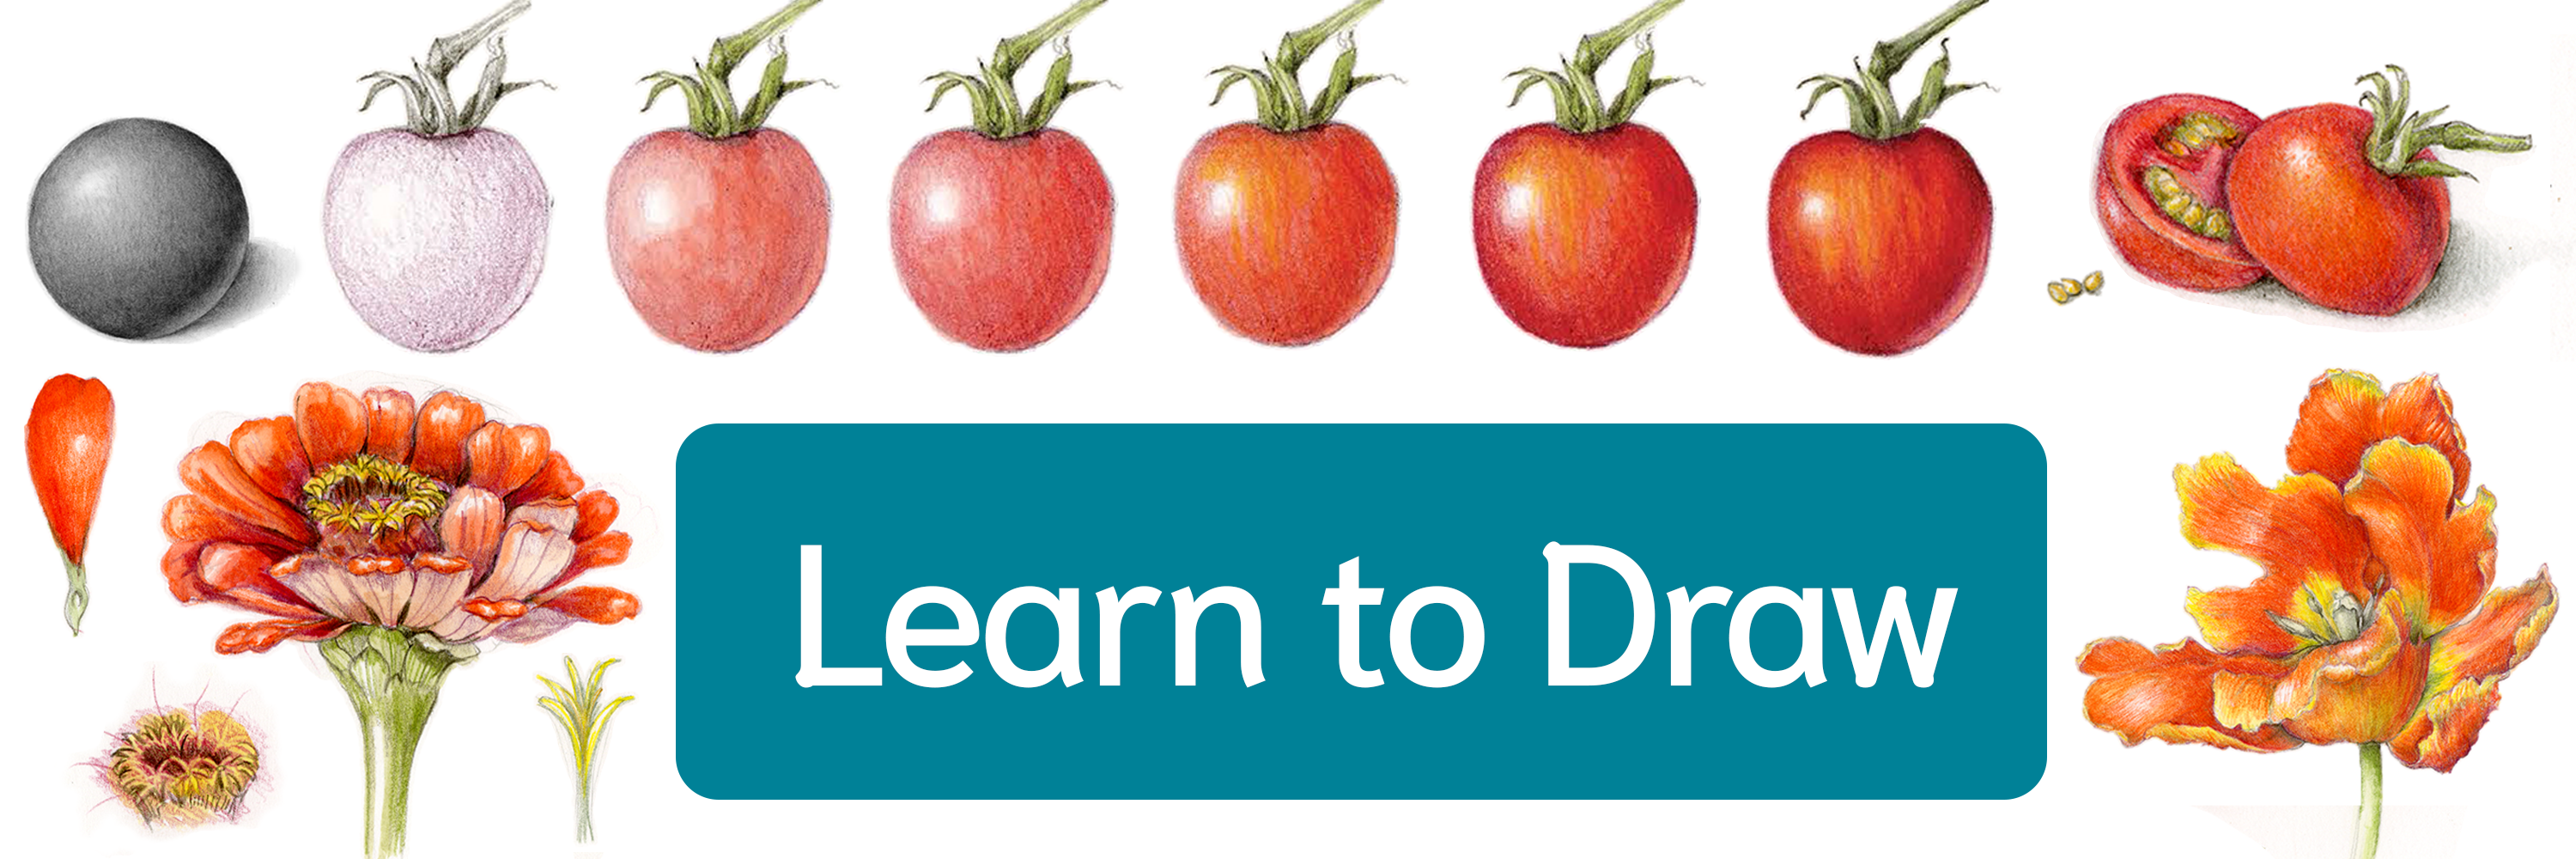
Strawberries are as fascinating as they are sweet. (Did you know that each tiny “seed” on a strawberry’s surface is technically its own fruit?!) Whether you’re attracted to their vibrant red color, their mighty green crown, or their cute white flowers, we’re here to help you create your own stunning strawberry illustration.

Watch this video or scroll through this post for a step-by-step guide through the process of drawing a strawberry plant, complete with seeds, sepals, leaves, and even a cut section to showcase the fruit’s intricate details. Find all of the art supplies we recommend here.
Strawberries are part of the Rose Family! What traits do members of the Rose Family share? Find out here!

Discover all the juicy secrets behind drawing strawberries in this workshop. With drawing demos and confidence-boosting, constructive critiques, we’ll capture the mouthwatering magic of strawberries as we learn to draw their delectable details, from glistening highlights to the distinct textures of these sweet treats.
Learn More Here
Step-by-Step Instructions for How to Draw a Strawberry
Remember, this tutorial is just one example of how to draw this sweet subject. We encourage you to find a real strawberry that inspires you to create your own unique composition. Let’s get started!
1: Sketch Seed Pattern

Start by studying the pattern created by the seeds on your strawberry. In graphite pencil, lightly sketch an outline of your strawberry with diagonal lines to indicate where the seeds will go. Set up your strawberry with the right light source and snap a photo for reference.
2: Practice Seeds and Watercolor Wash

Practice drawing the seeds to find your groove. Have fun experimenting with different techniques to capture the realistic texture.
Use a colored pencil to draw the seeds within the pattern lines. Then, add a layer of watercolor wash to the strawberry. Be sure to avoid adding color where the bright highlights are!
3: Add Base Color and Shadows
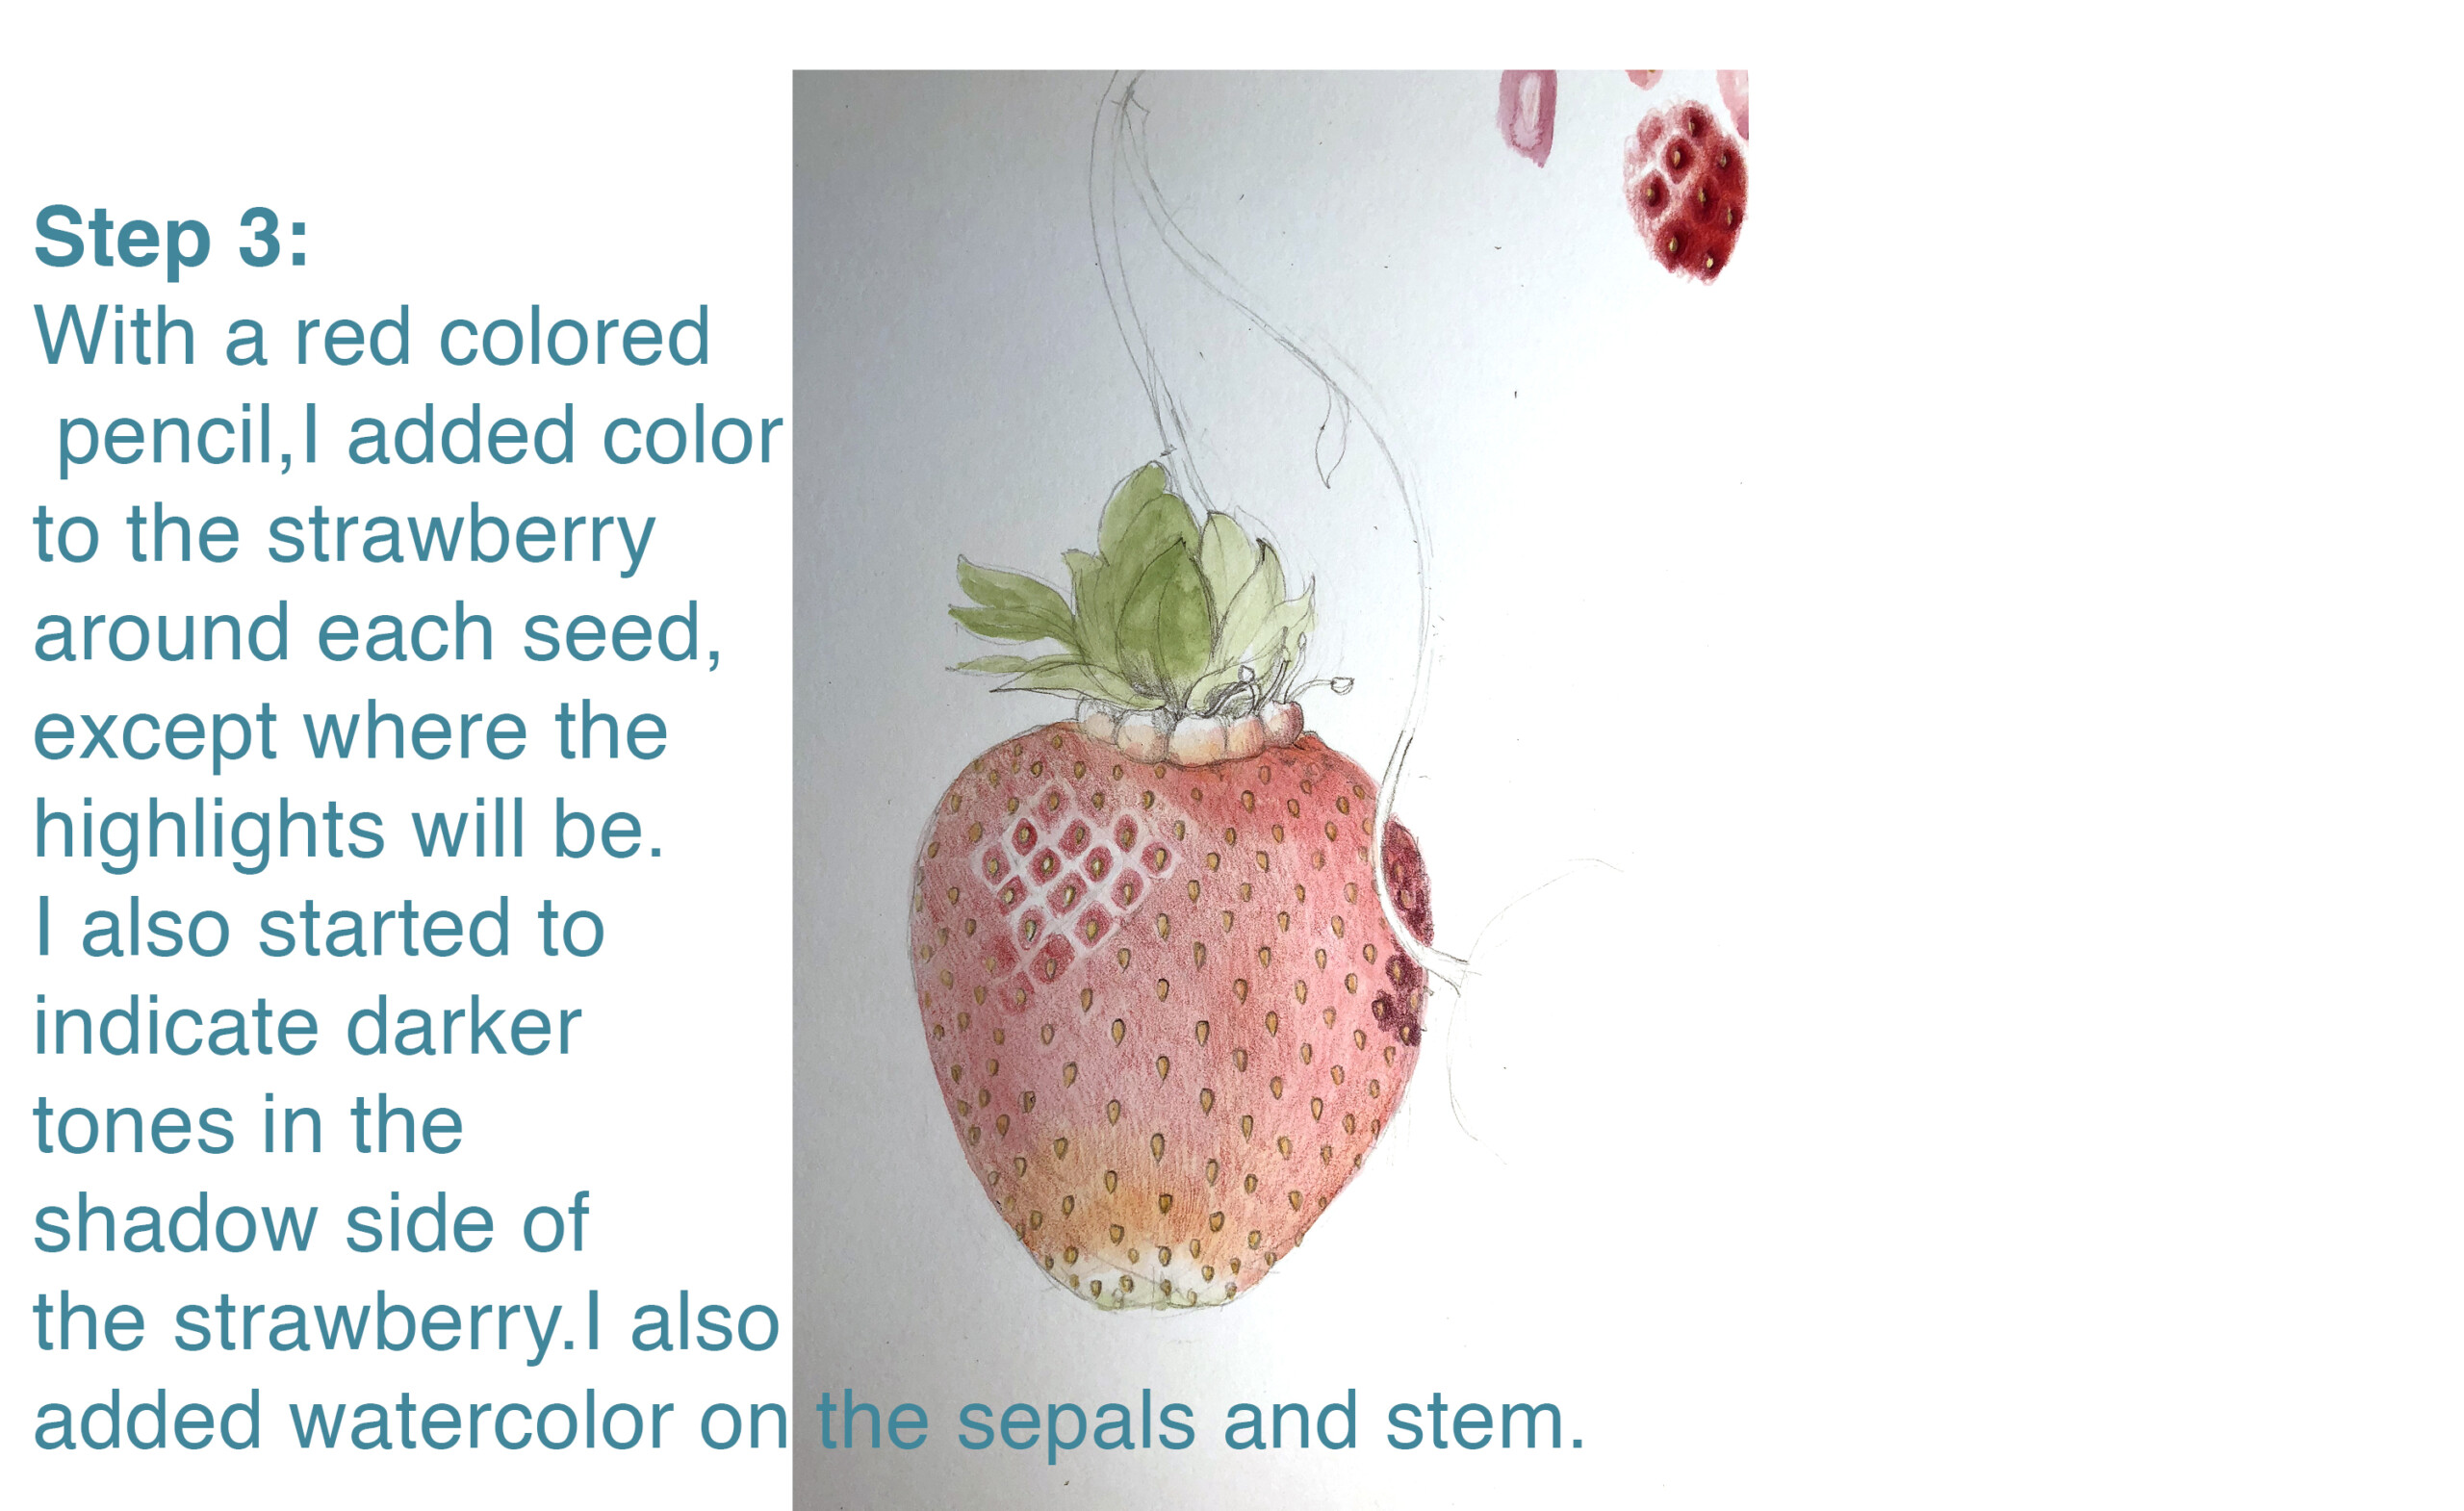
Grab a red colored pencil and color around each seed, keeping the highlight areas bright. Start shading the shadow side of the strawberry with darker tones. Add watercolor to the sepals and stem. Find helpful tips about watercolor techniques here.
4: Start Flower
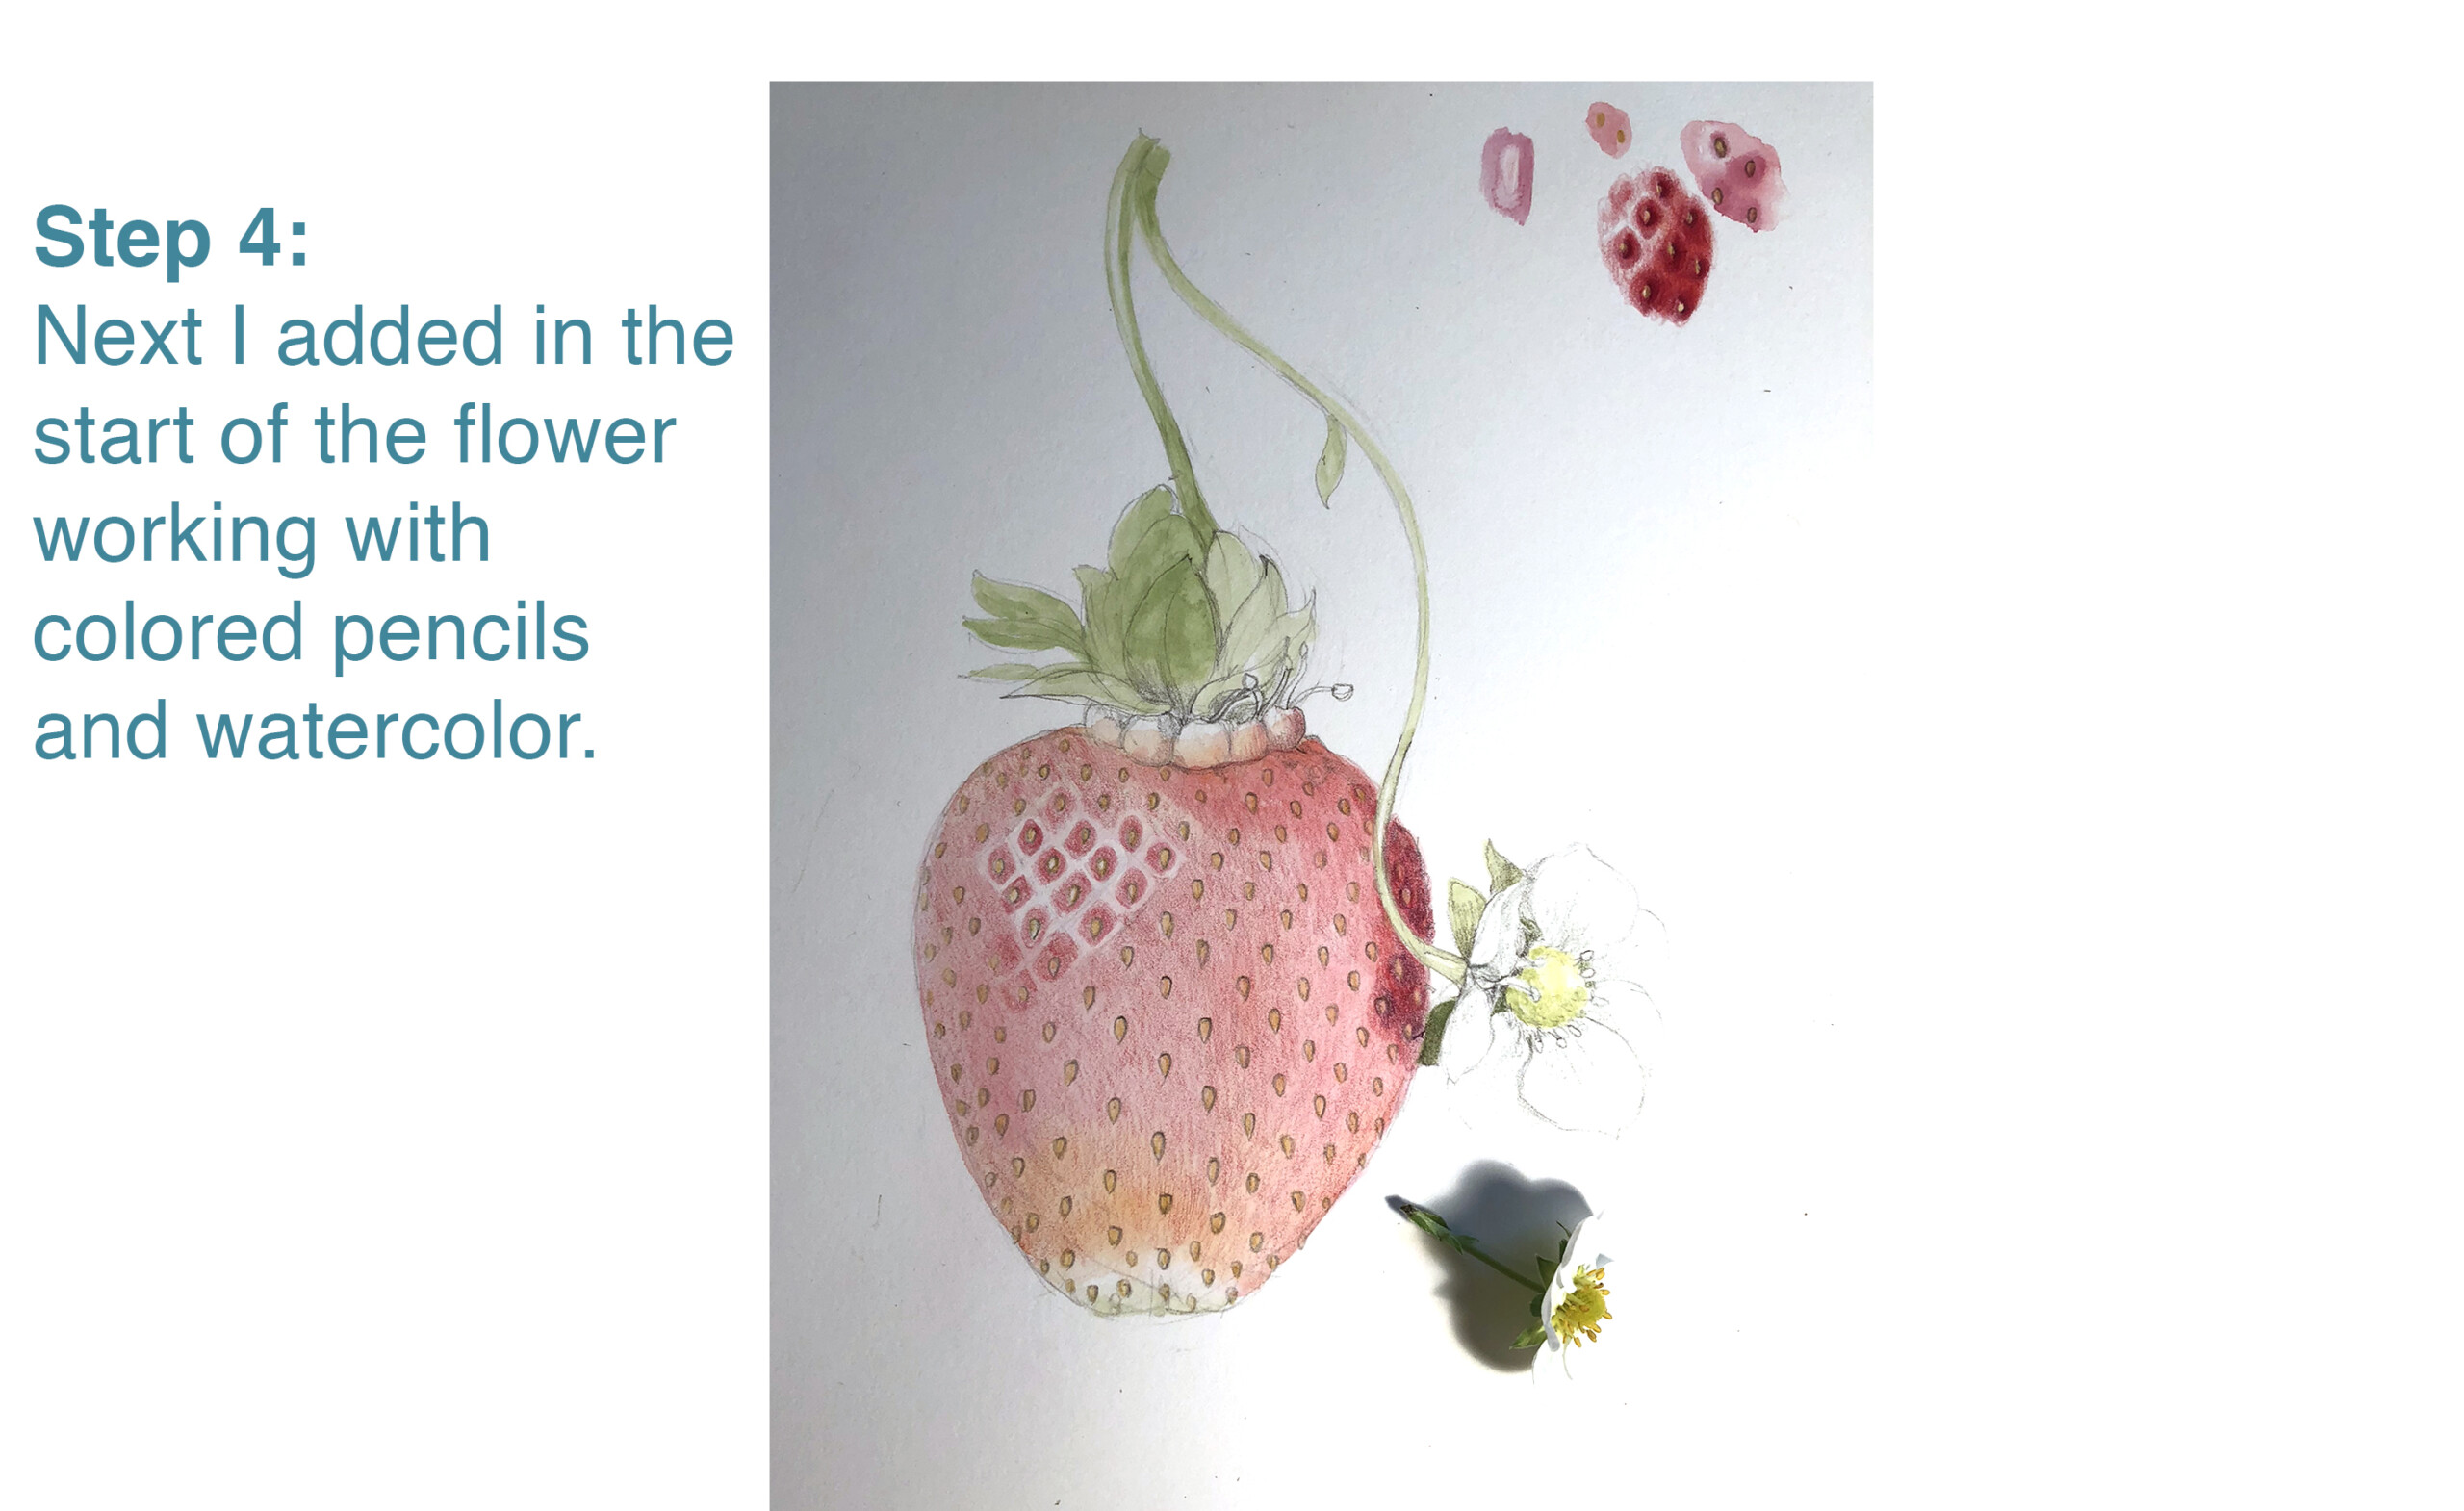
Draw the beginnings of the flower using colored pencils and watercolor. This not only adds a charming touch to your composition, but also aids in educating your viewers about the life cycle of the strawberry plant.
5: Create Subtle Highlights
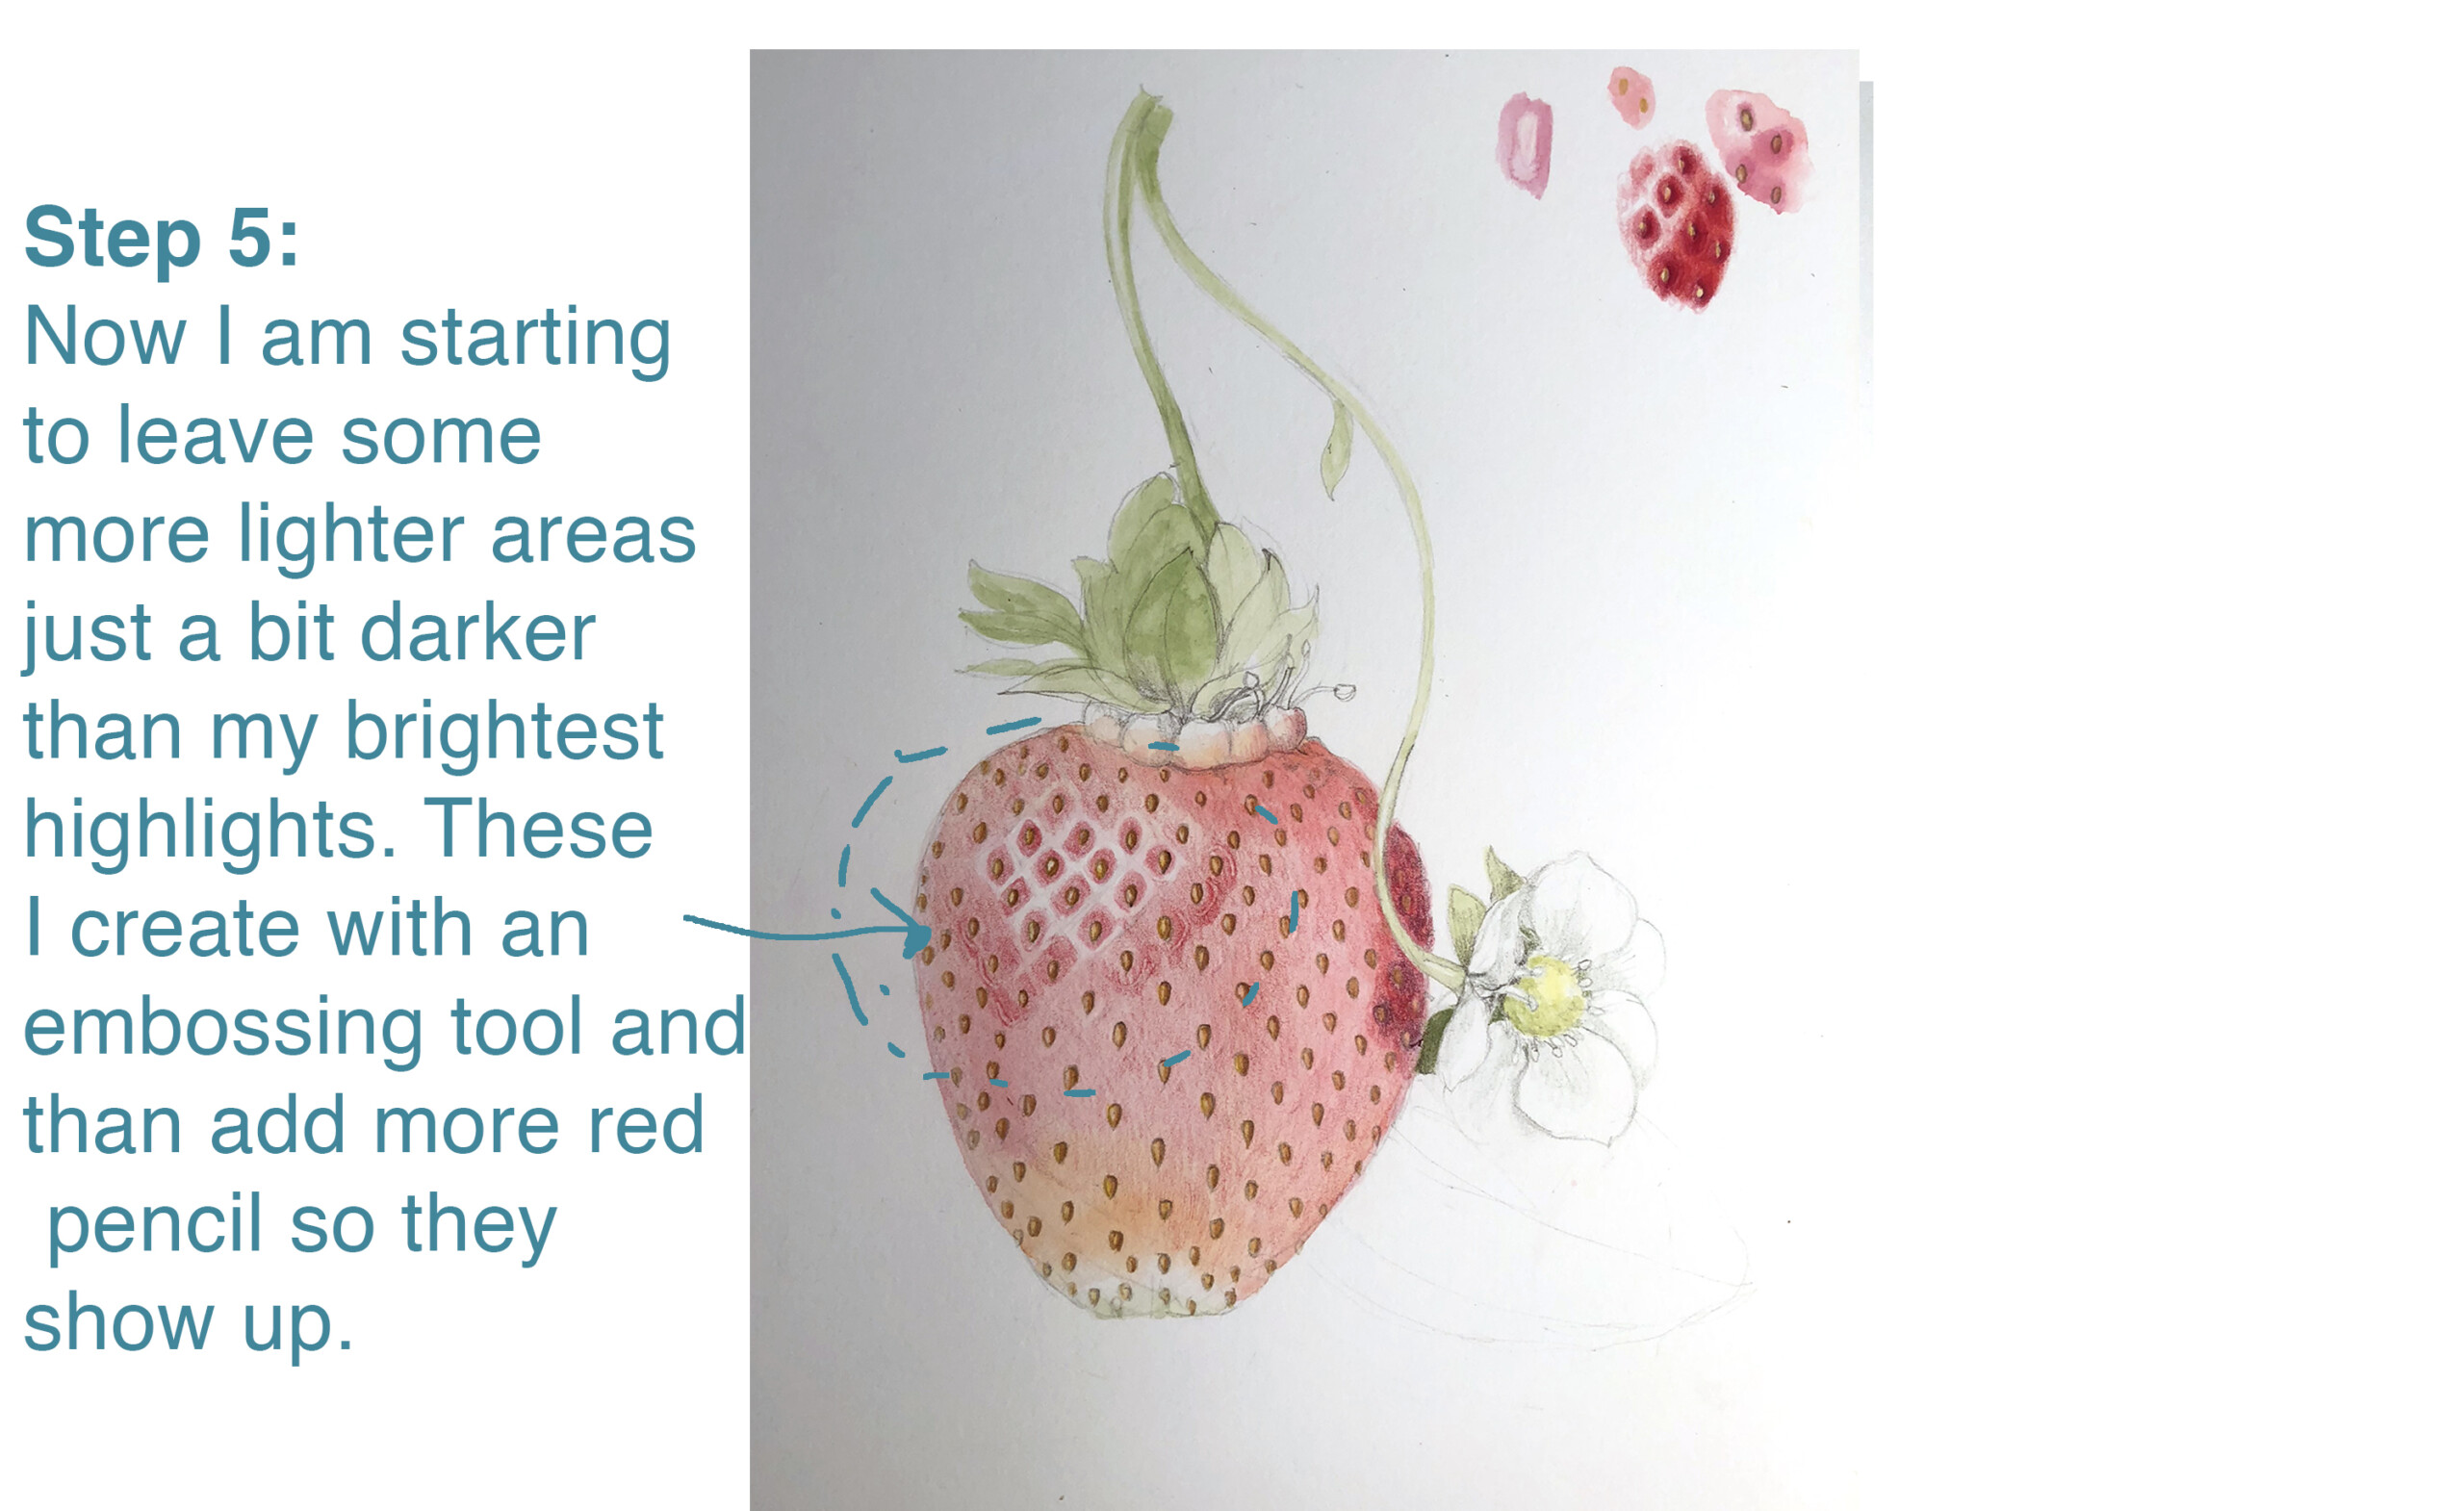
Leave some lighter areas a bit darker than your brightest highlights. Use an embossing tool to create these areas, then add more red pencil to make them pop.
6: Define Shadows

Shade the darker shadow side with a dark red-violet pencil. Emboss more in the dark areas to add depth.
7: Add Color to Shadows
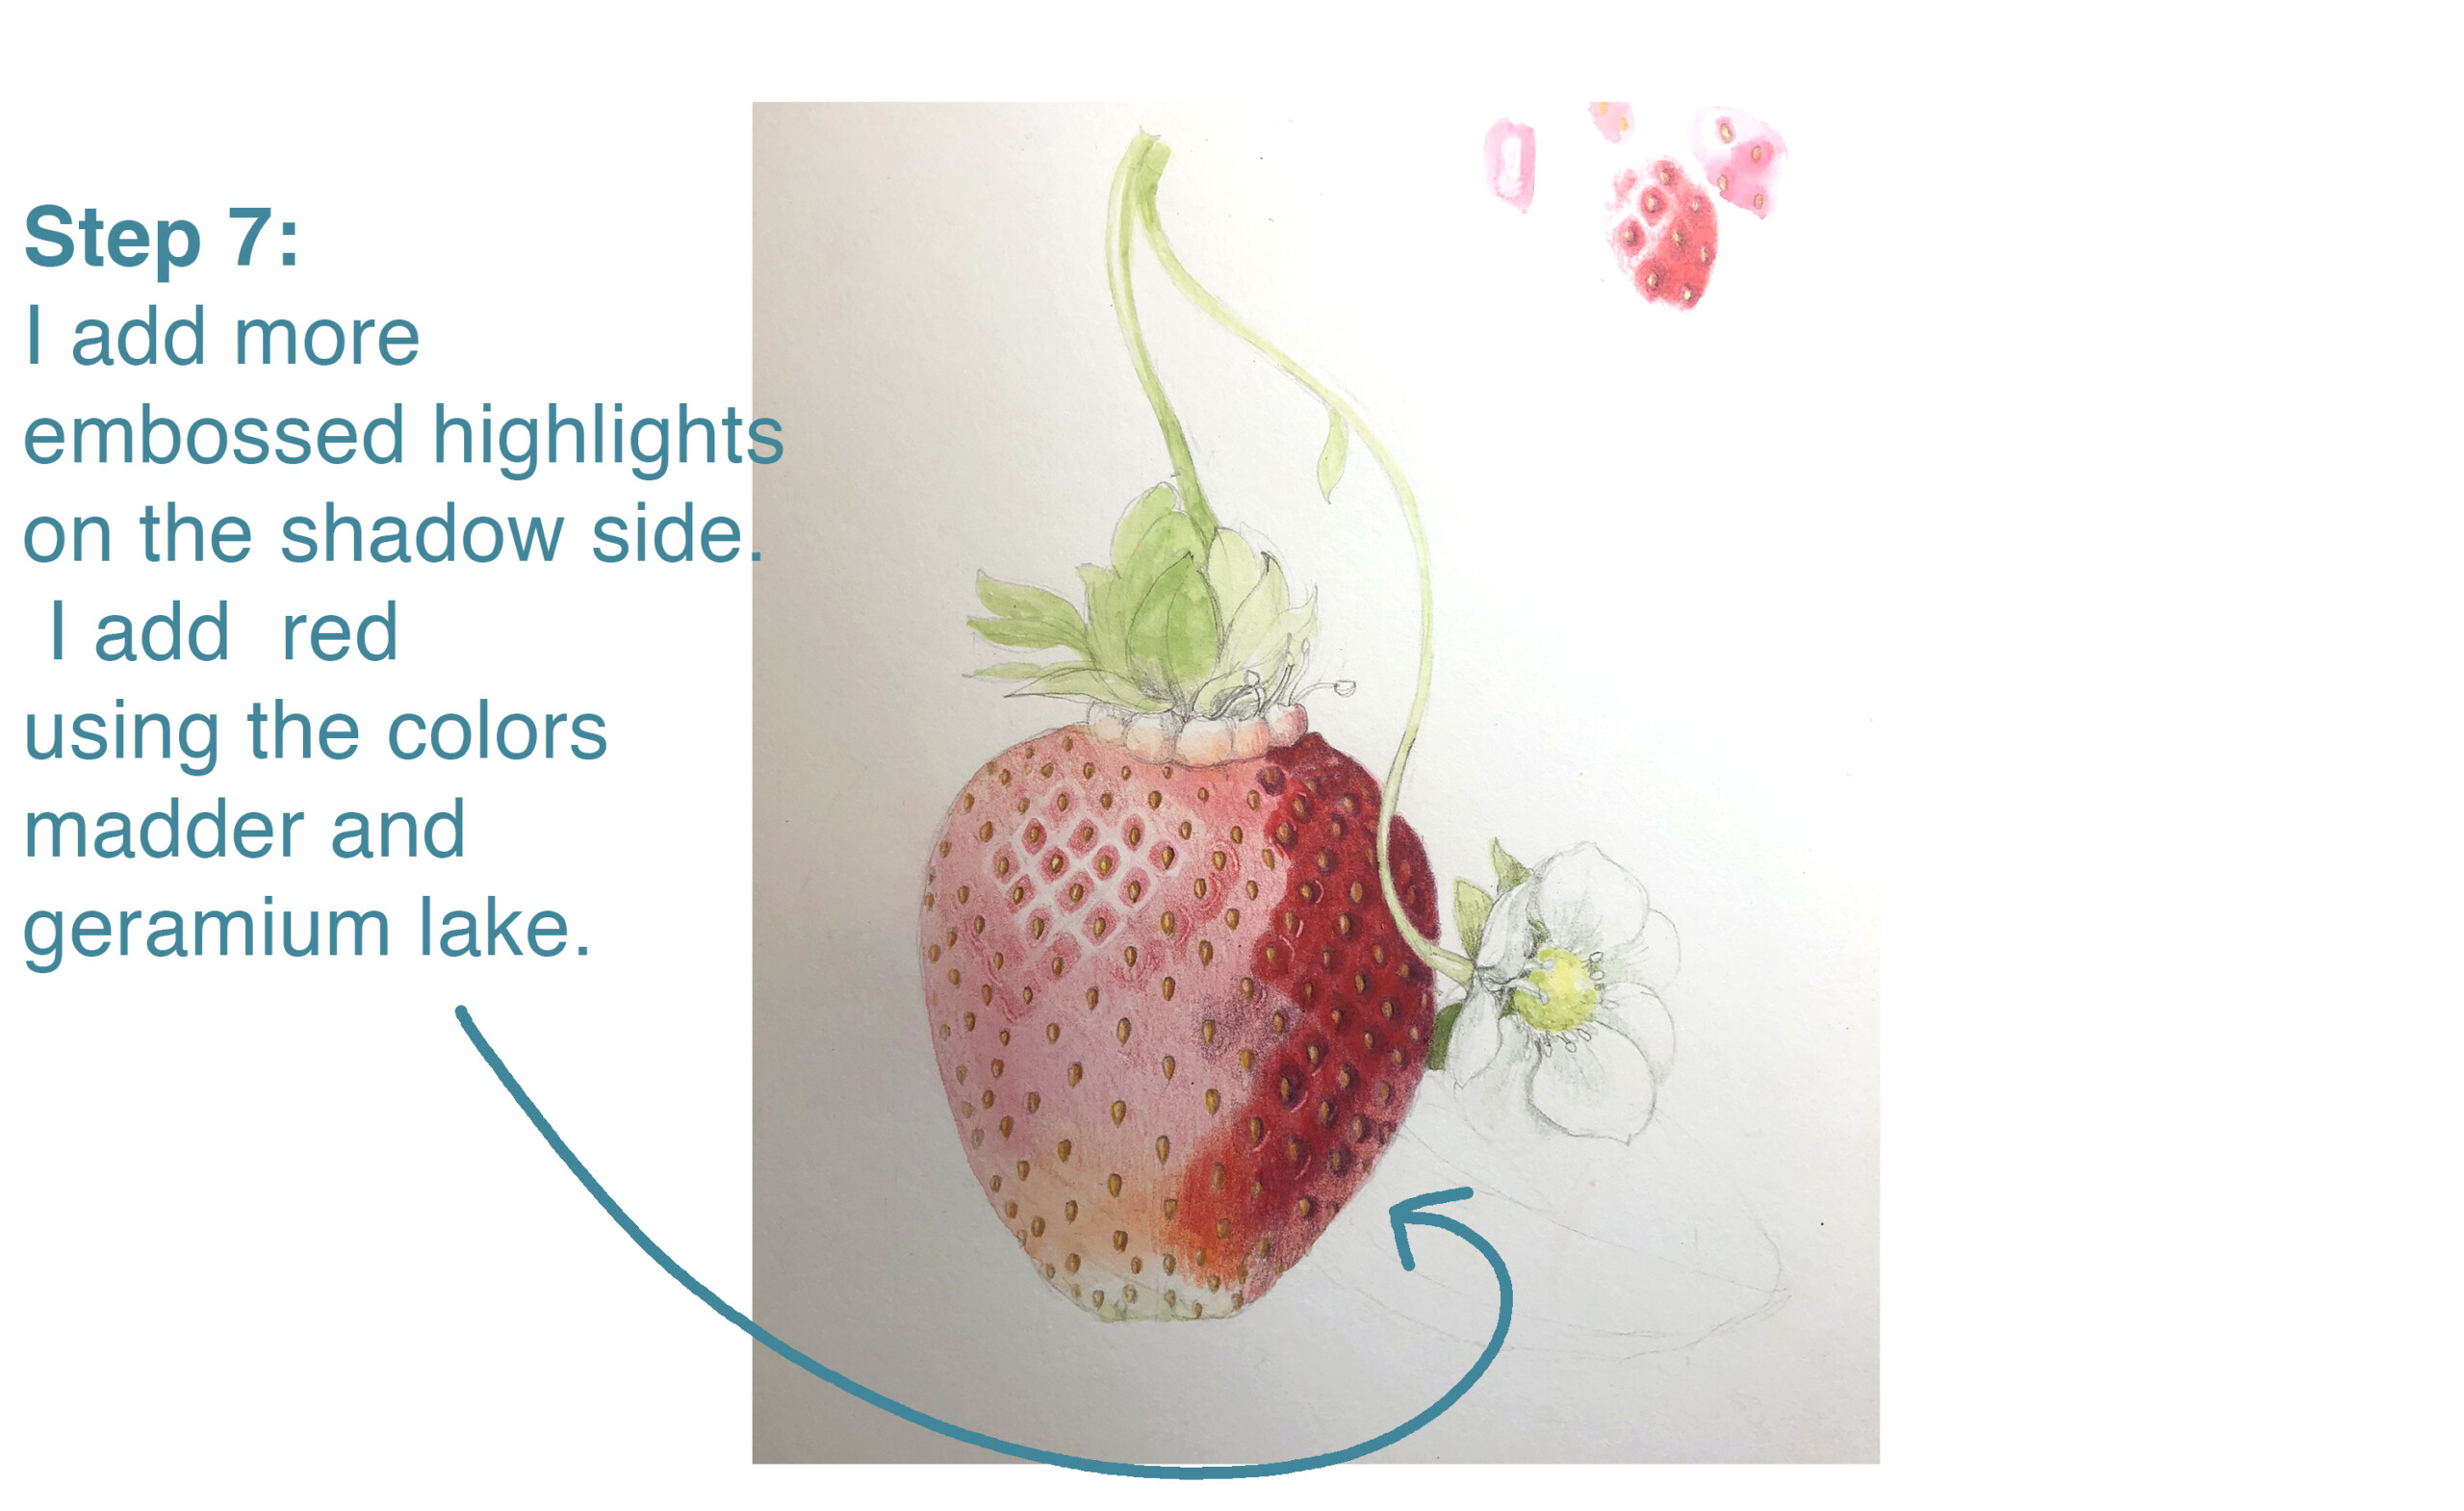
Add embossed highlights on the shadow side. To deepen the red tones, use colored pencils such as Madder and Pale Geranium Lake.
8: Enhance Seed Details

Keep adding tones around the seeds in the middle of the strawberry. Use embossing to define the lighter areas.
9: Detail Sepals
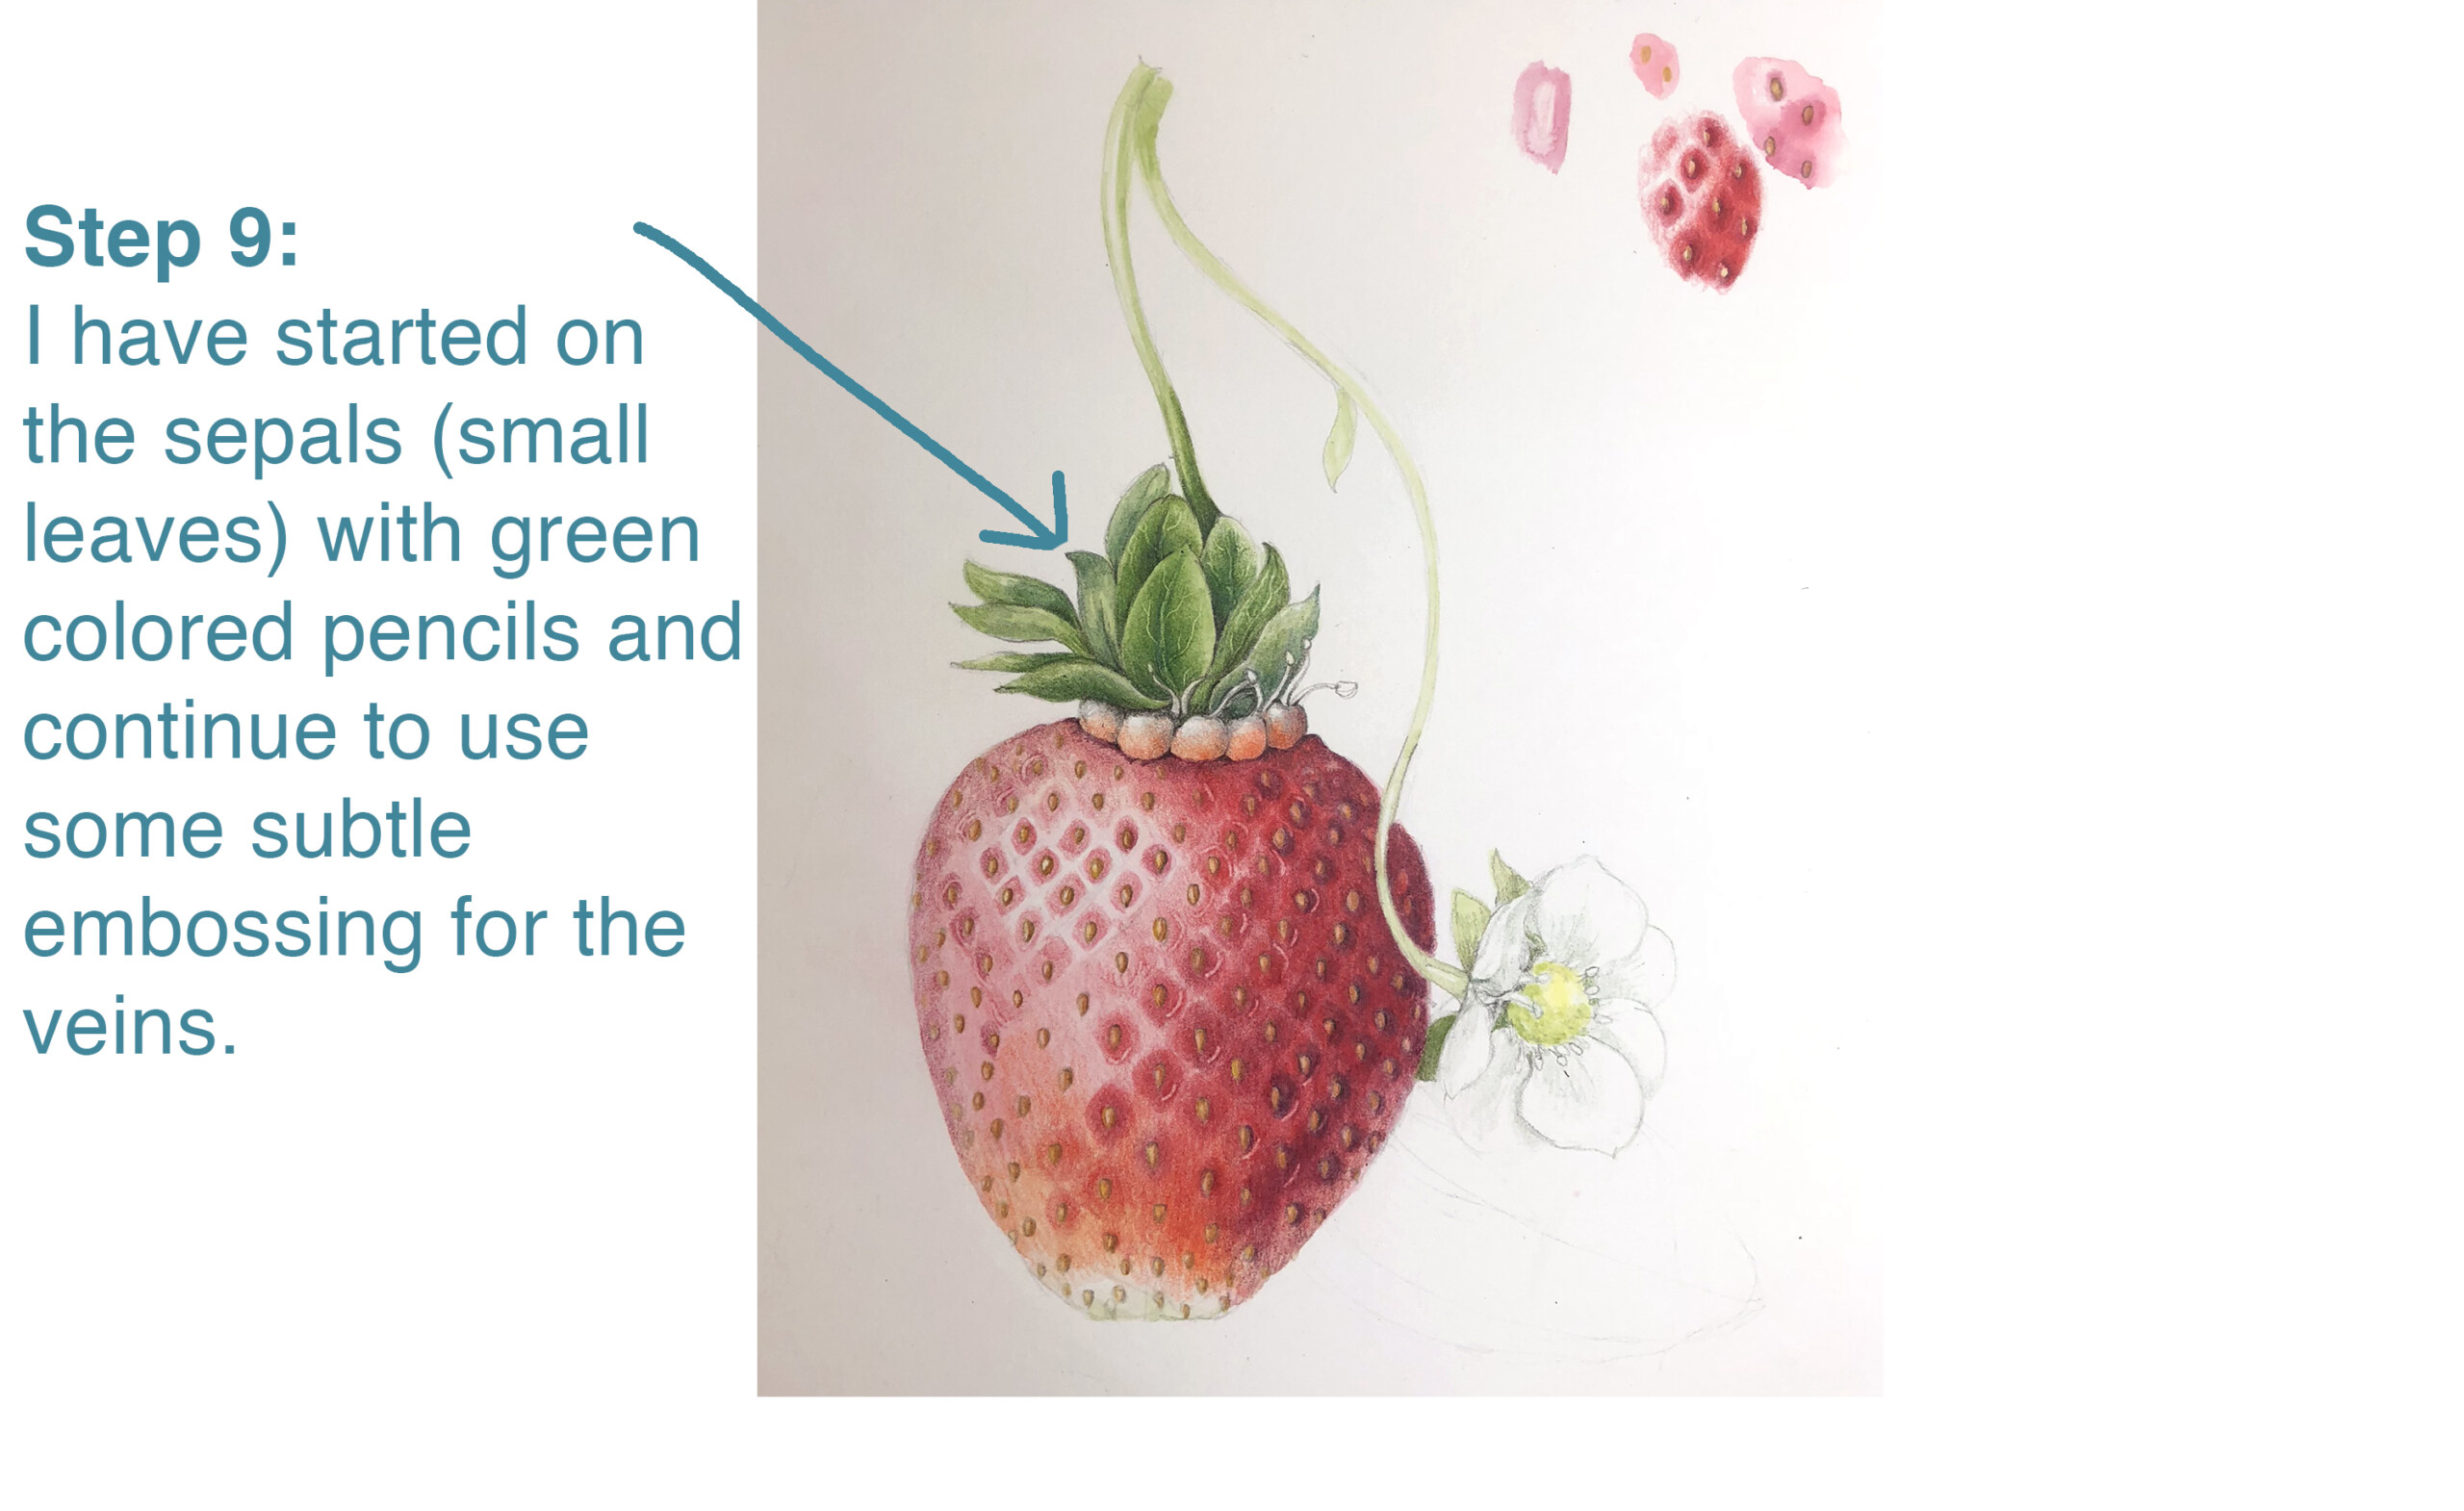
Work on the sepals (those little green leaves) with green colored pencils. Use subtle embossing for the veins.
10: Add Color to Light Side
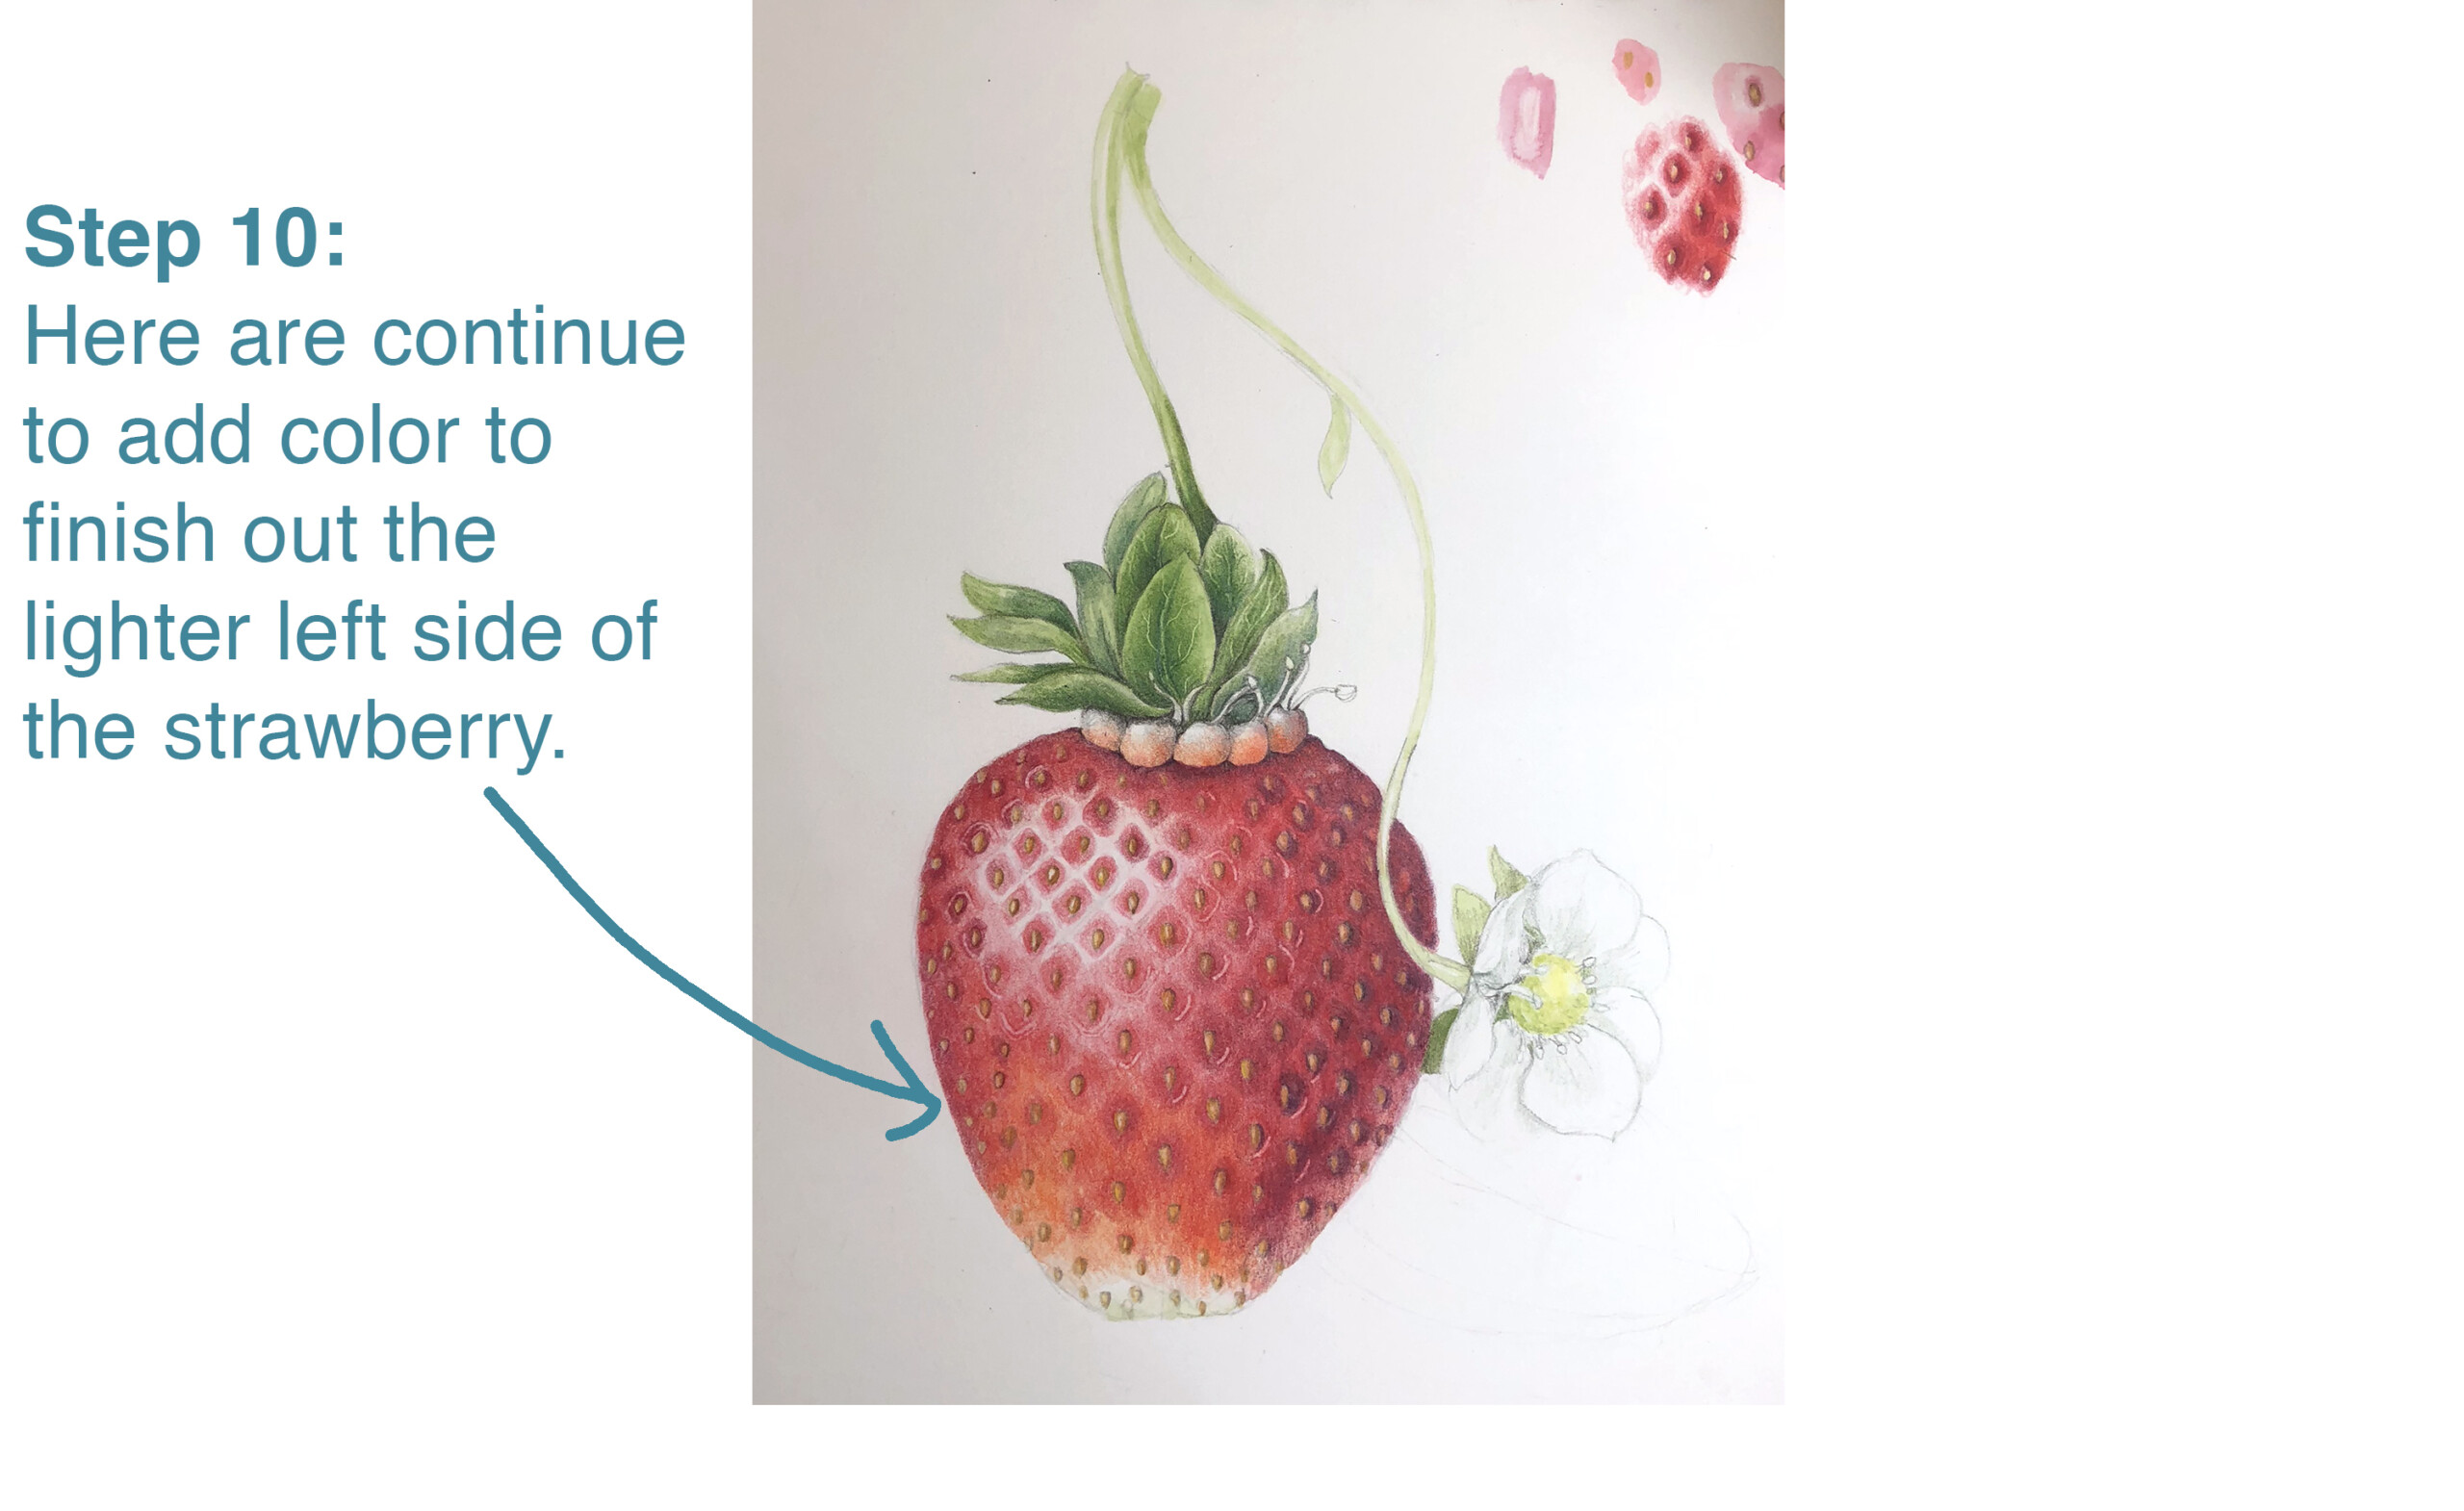
Continue coloring the lighter (left) side of the strawberry to make it look natural and vibrant.
11: Refine Highlights

Fill in the highlight areas to create a nice shimmer effect so that your highlights don’t look like empty spaces.
12: Start Cut Section
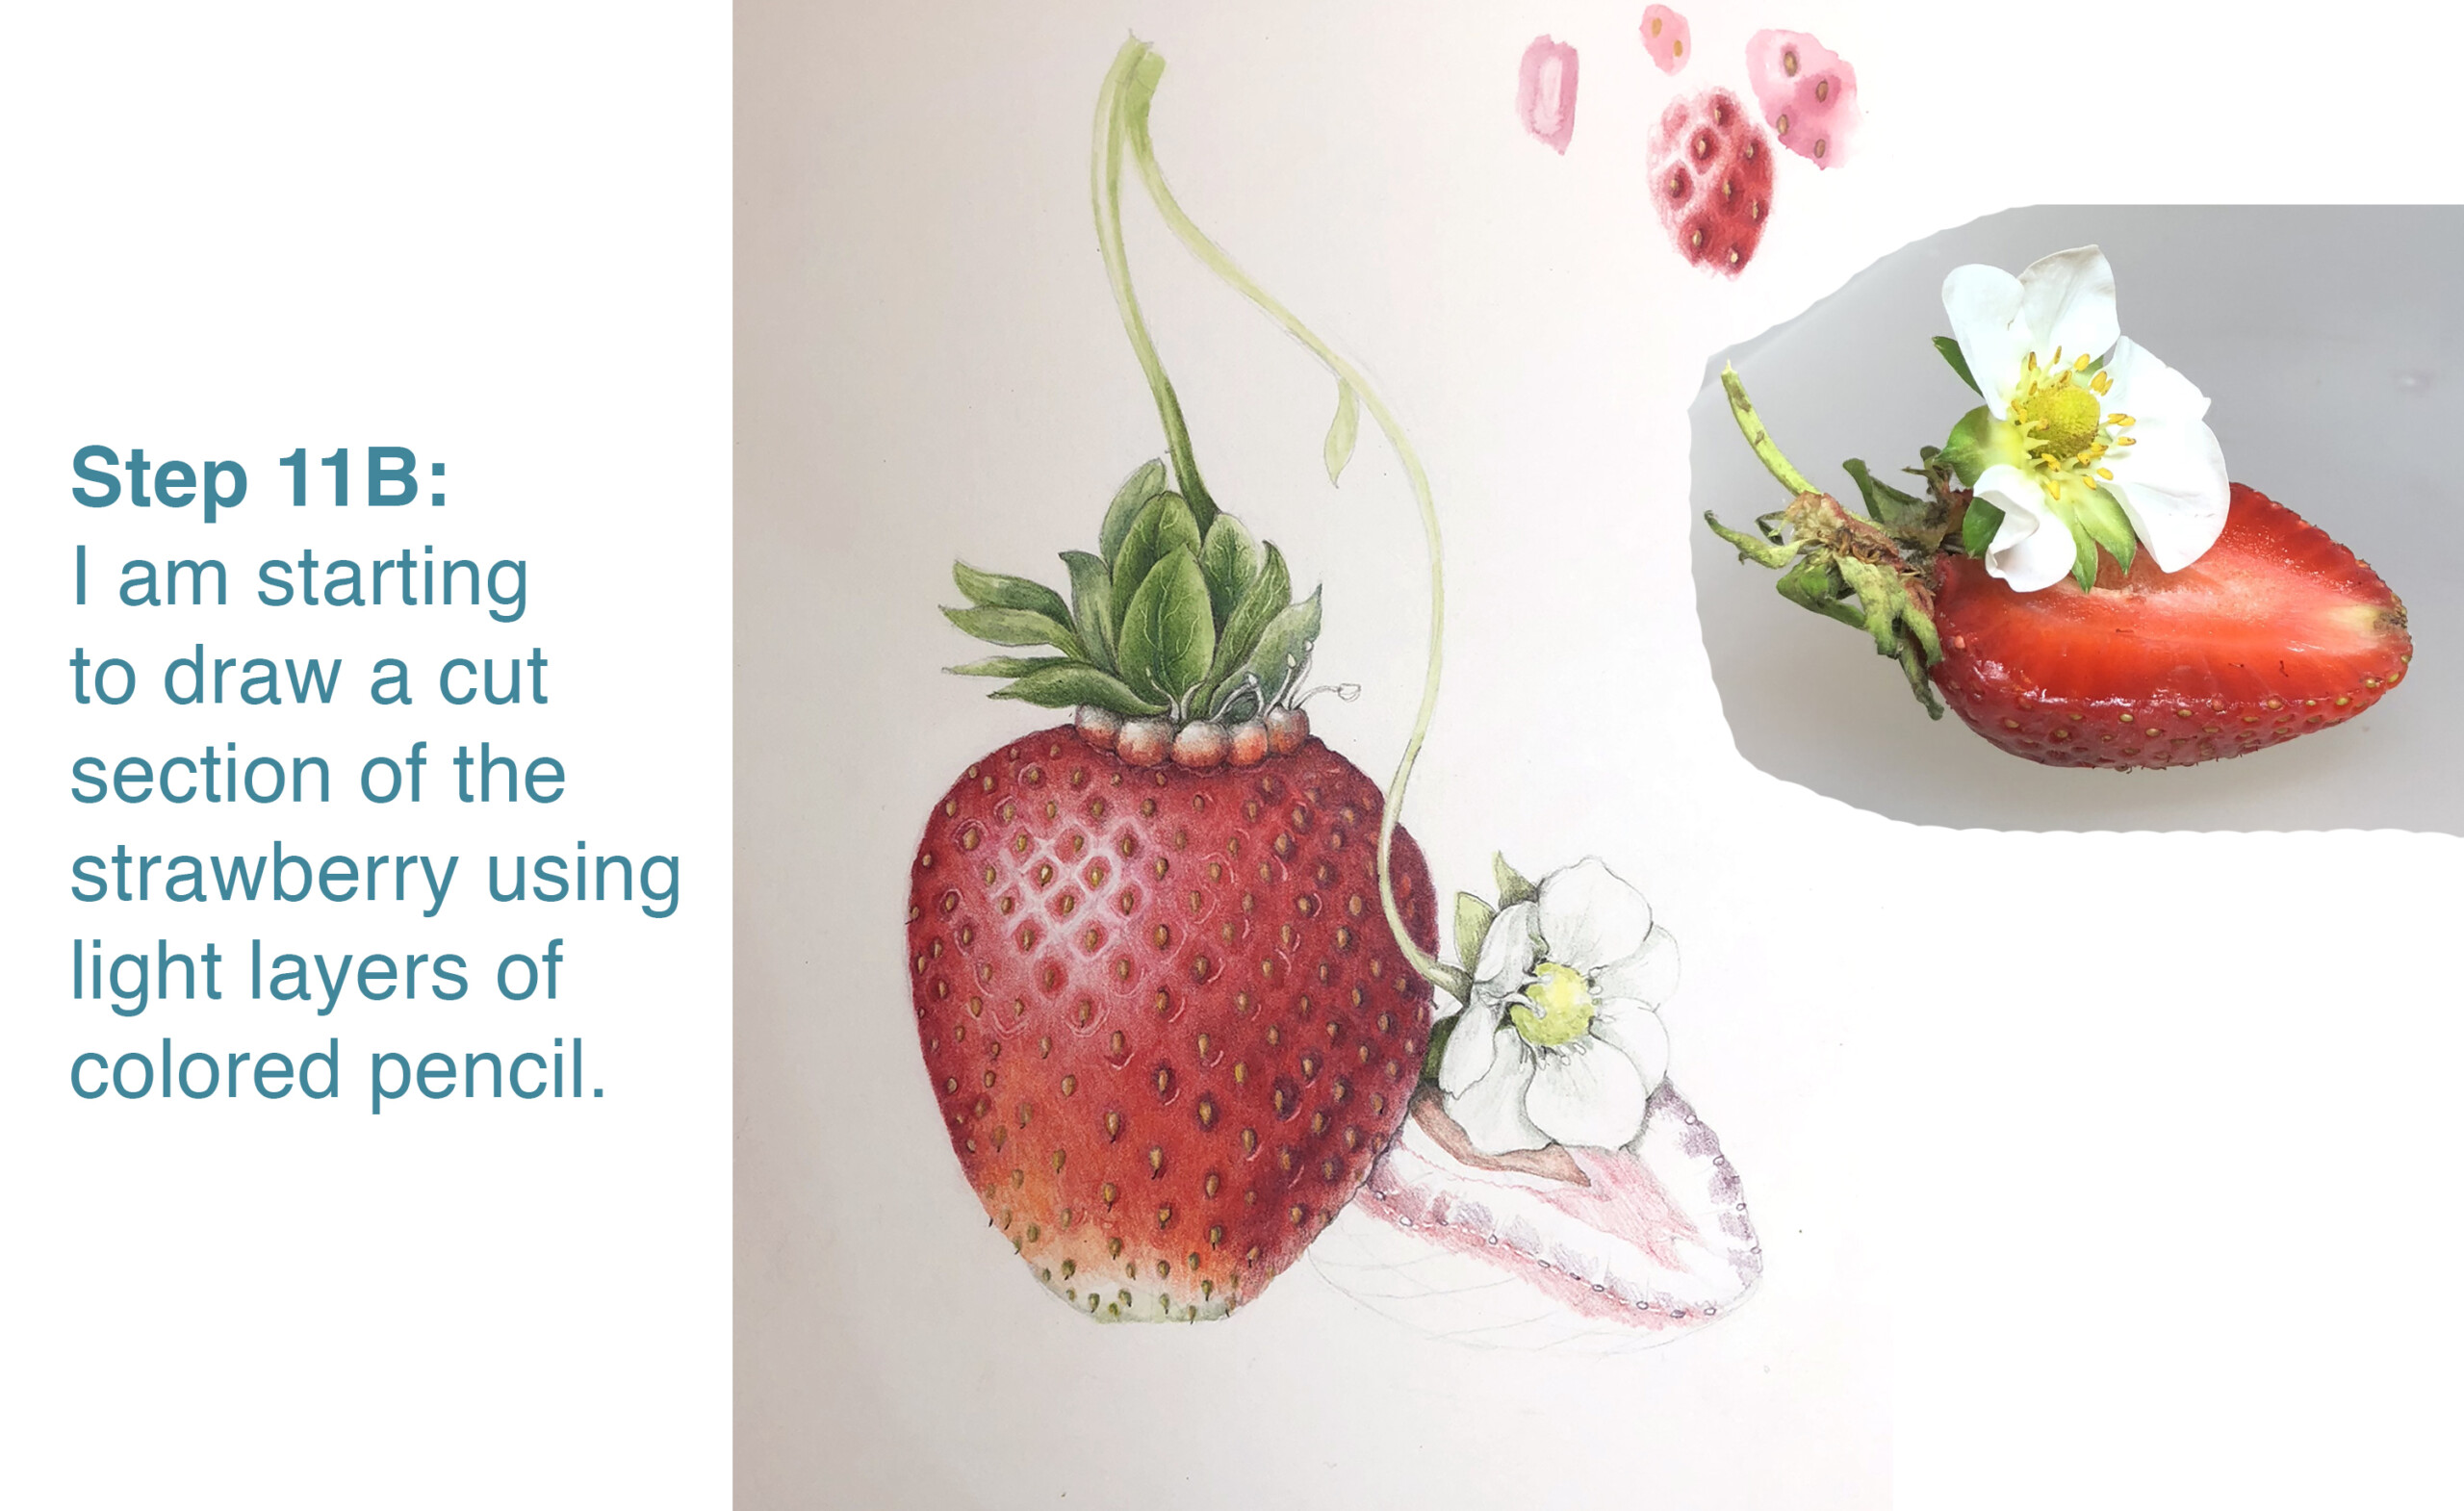
Draw a cut section of the strawberry using light layers of colored pencil to add another element to your composition. If you add the cross-section beneath the flower, it will add contrast behind the delicate white petals.
13: Add Colored Pencil to Cut Section

Continue layering colored pencil on the cut-open cross-section of your strawberry. Showcase the strawberry’s juicy interior.
14: Watercolor Cut Section
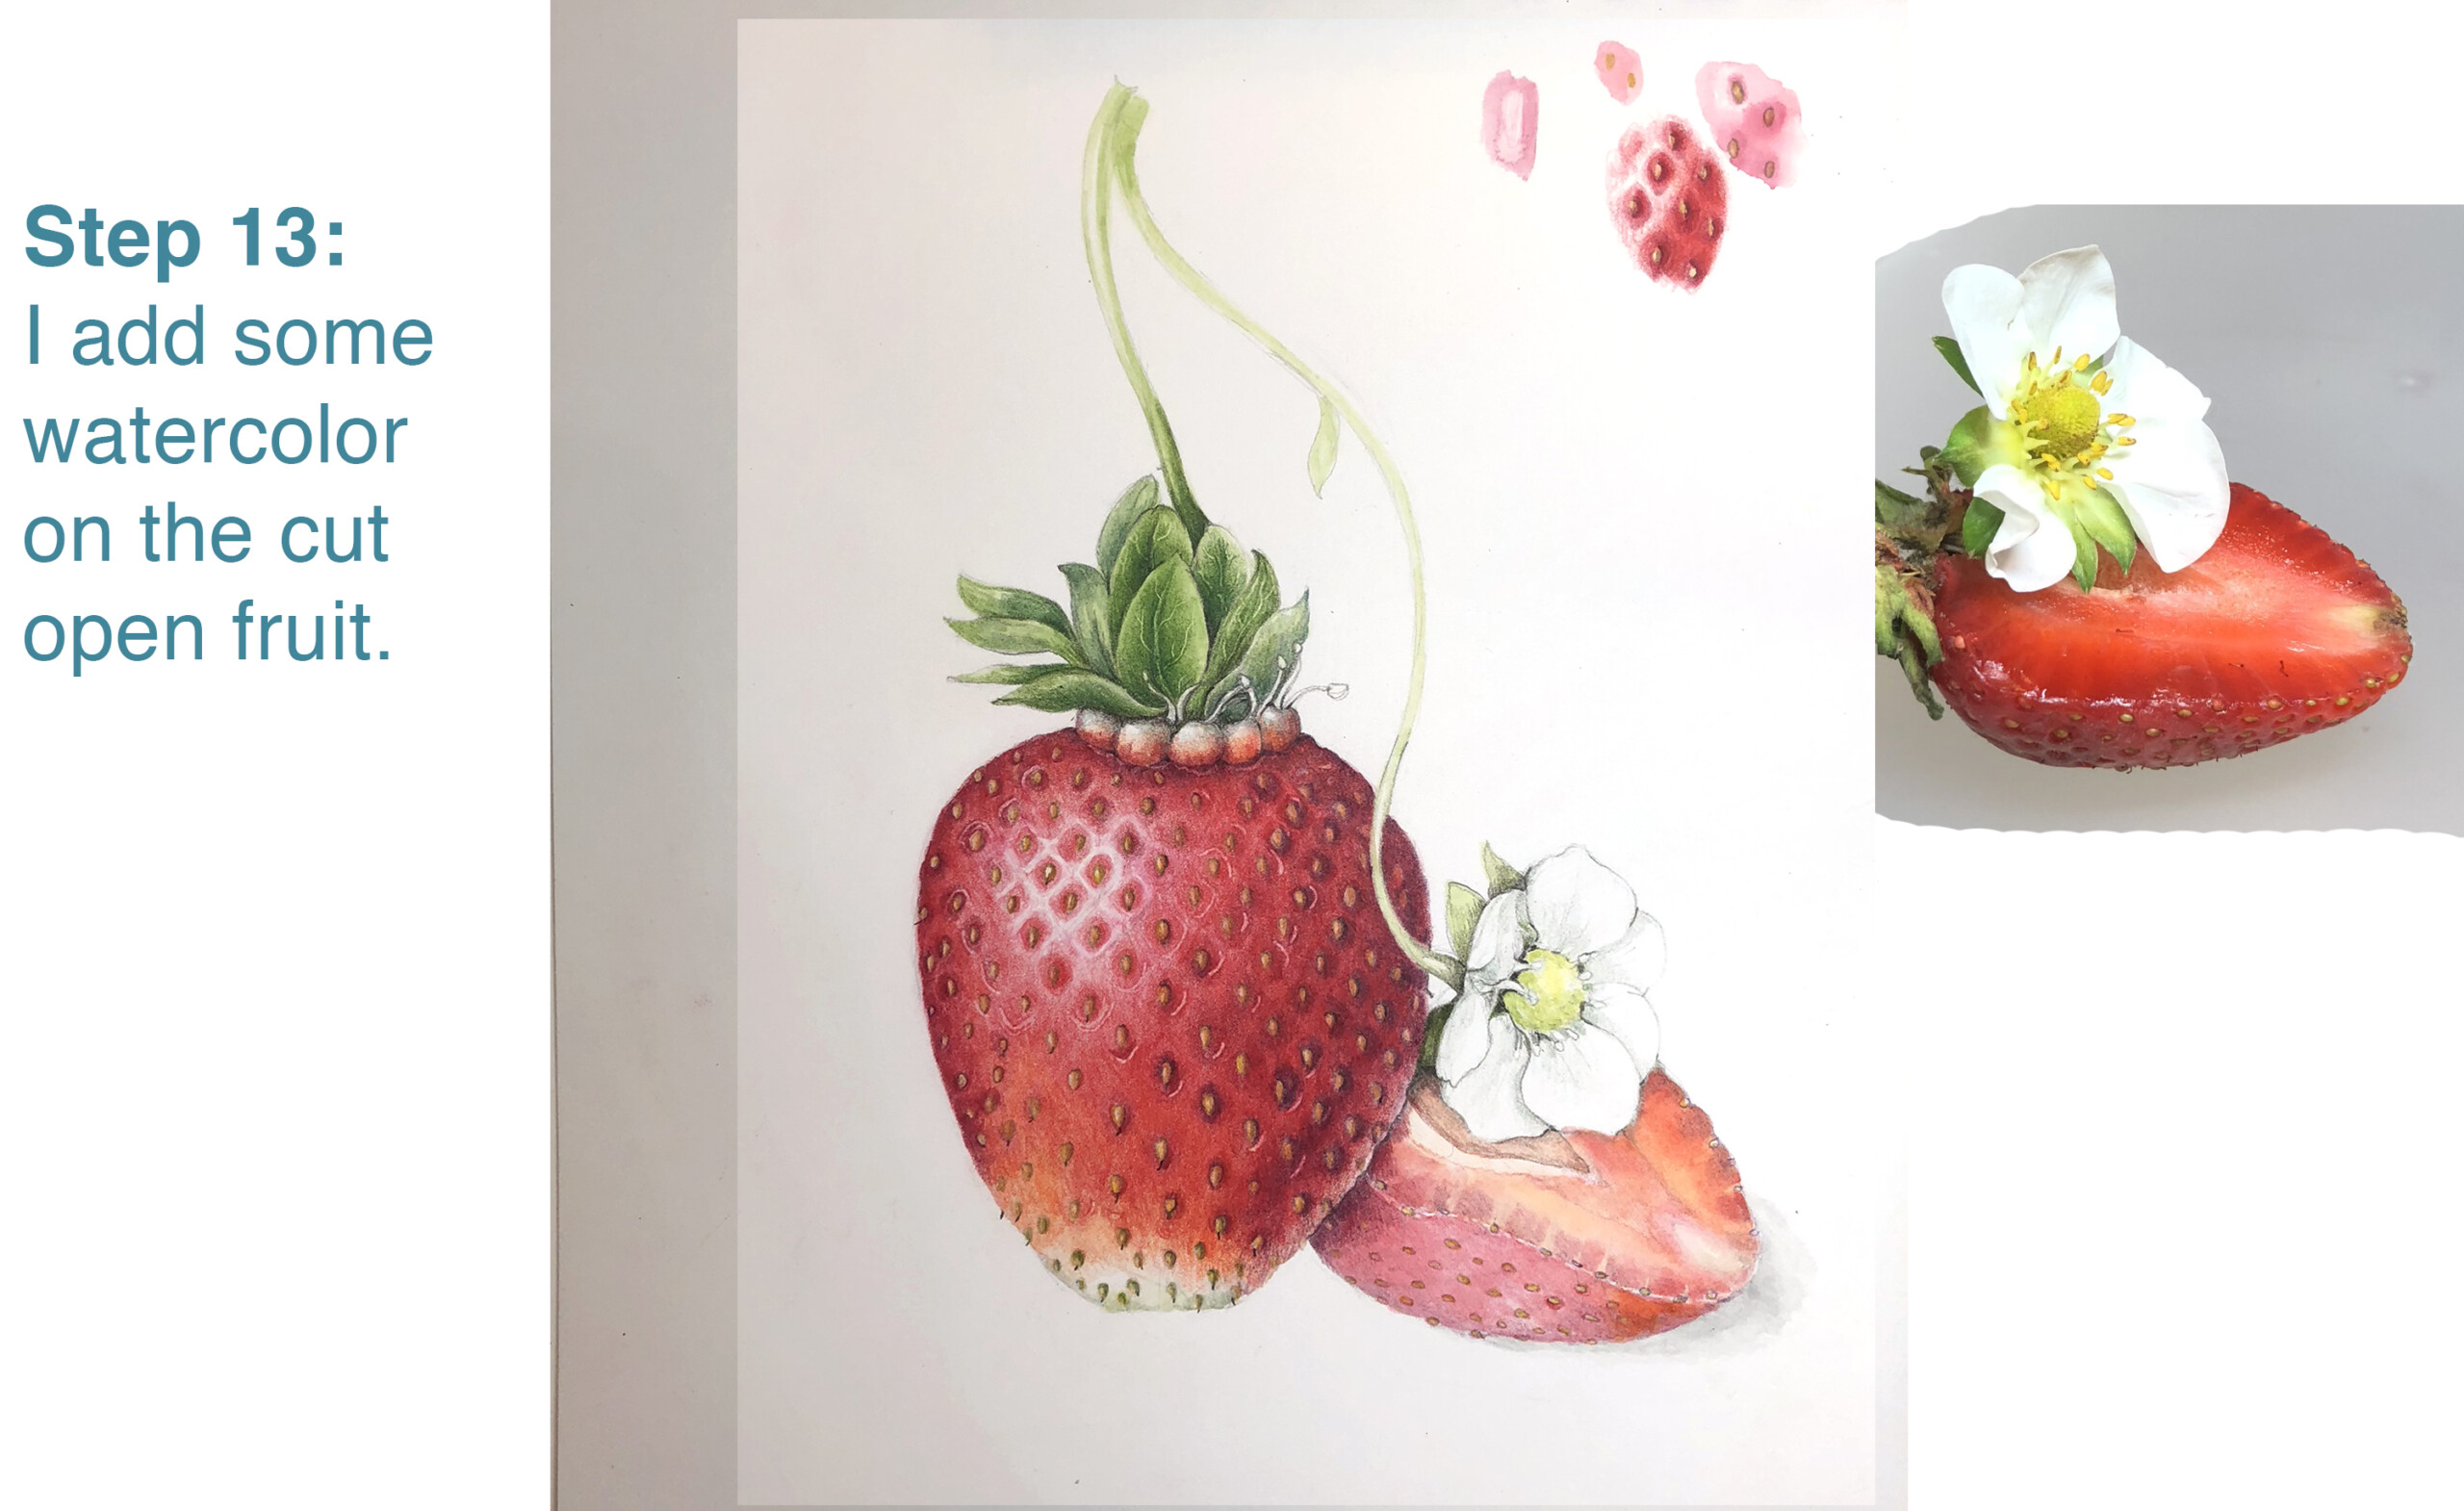
Apply watercolor to the cut-open fruit, so it will look even more delicious!
15: Add Details to Flower
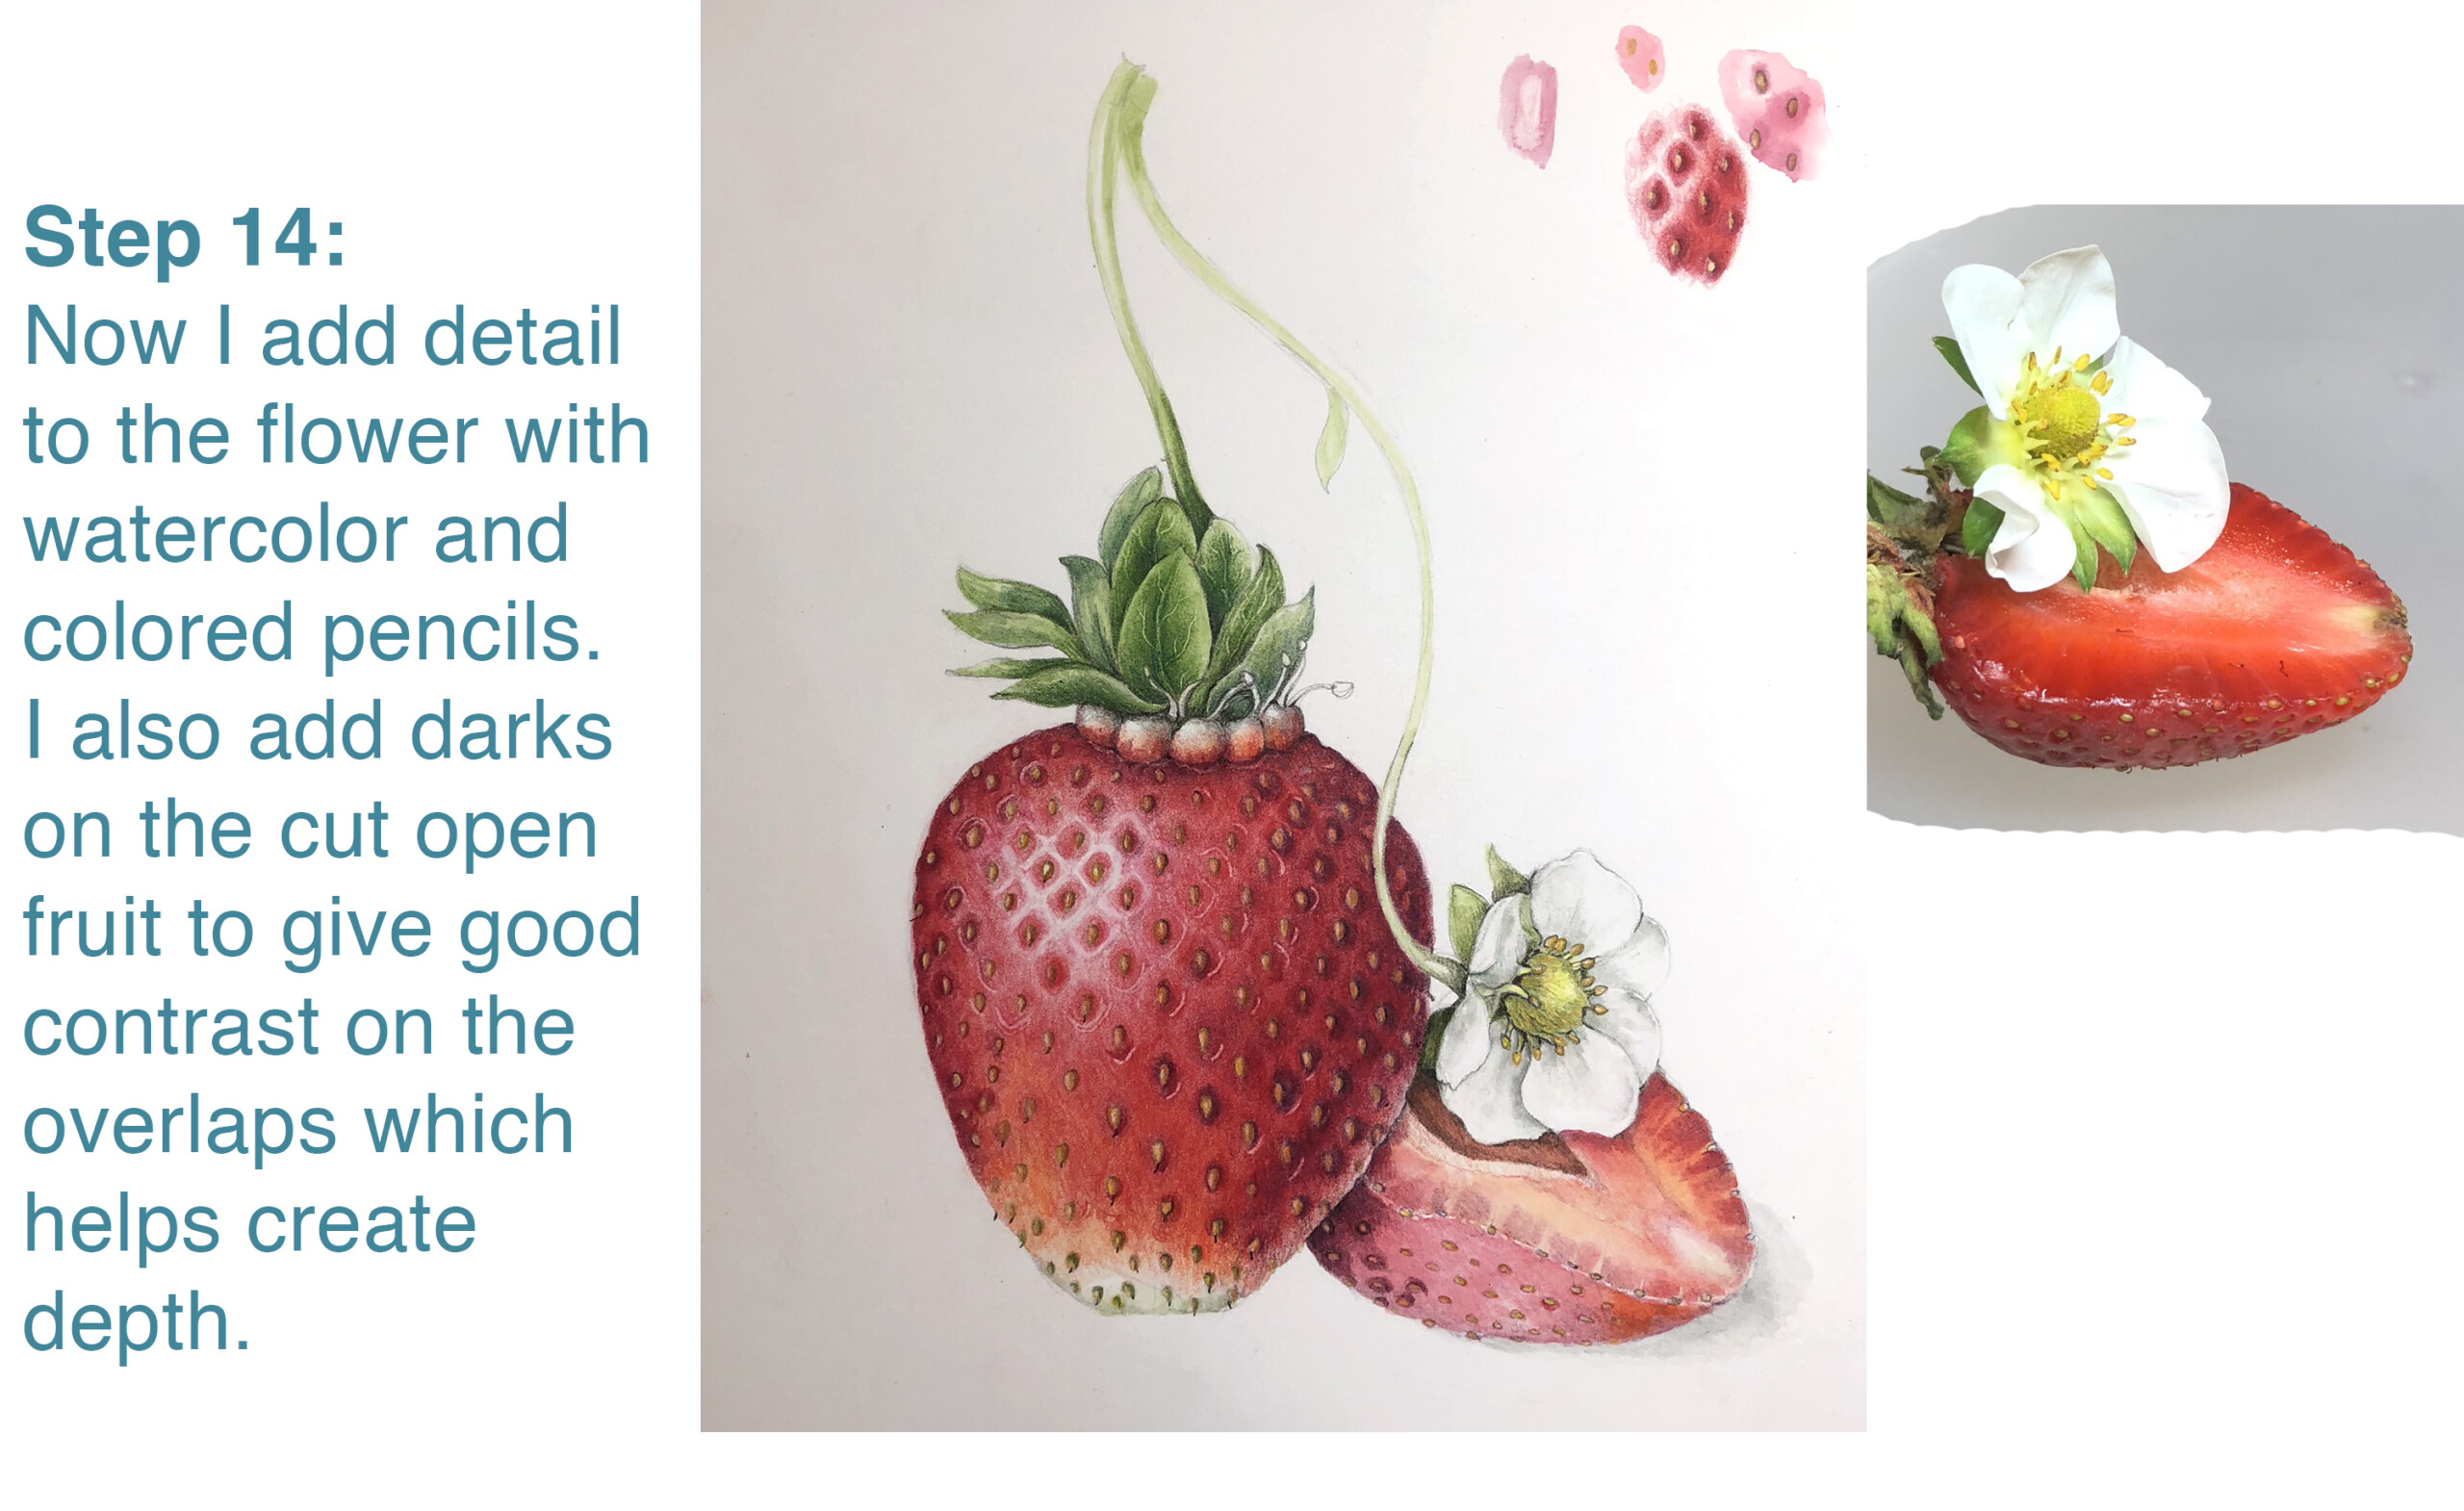
Add details to the flower with watercolor and colored pencils. To add depth to your drawing, enhance the dark areas where the flower overlaps the cut fruit underneath.
16: Shade Cut Section
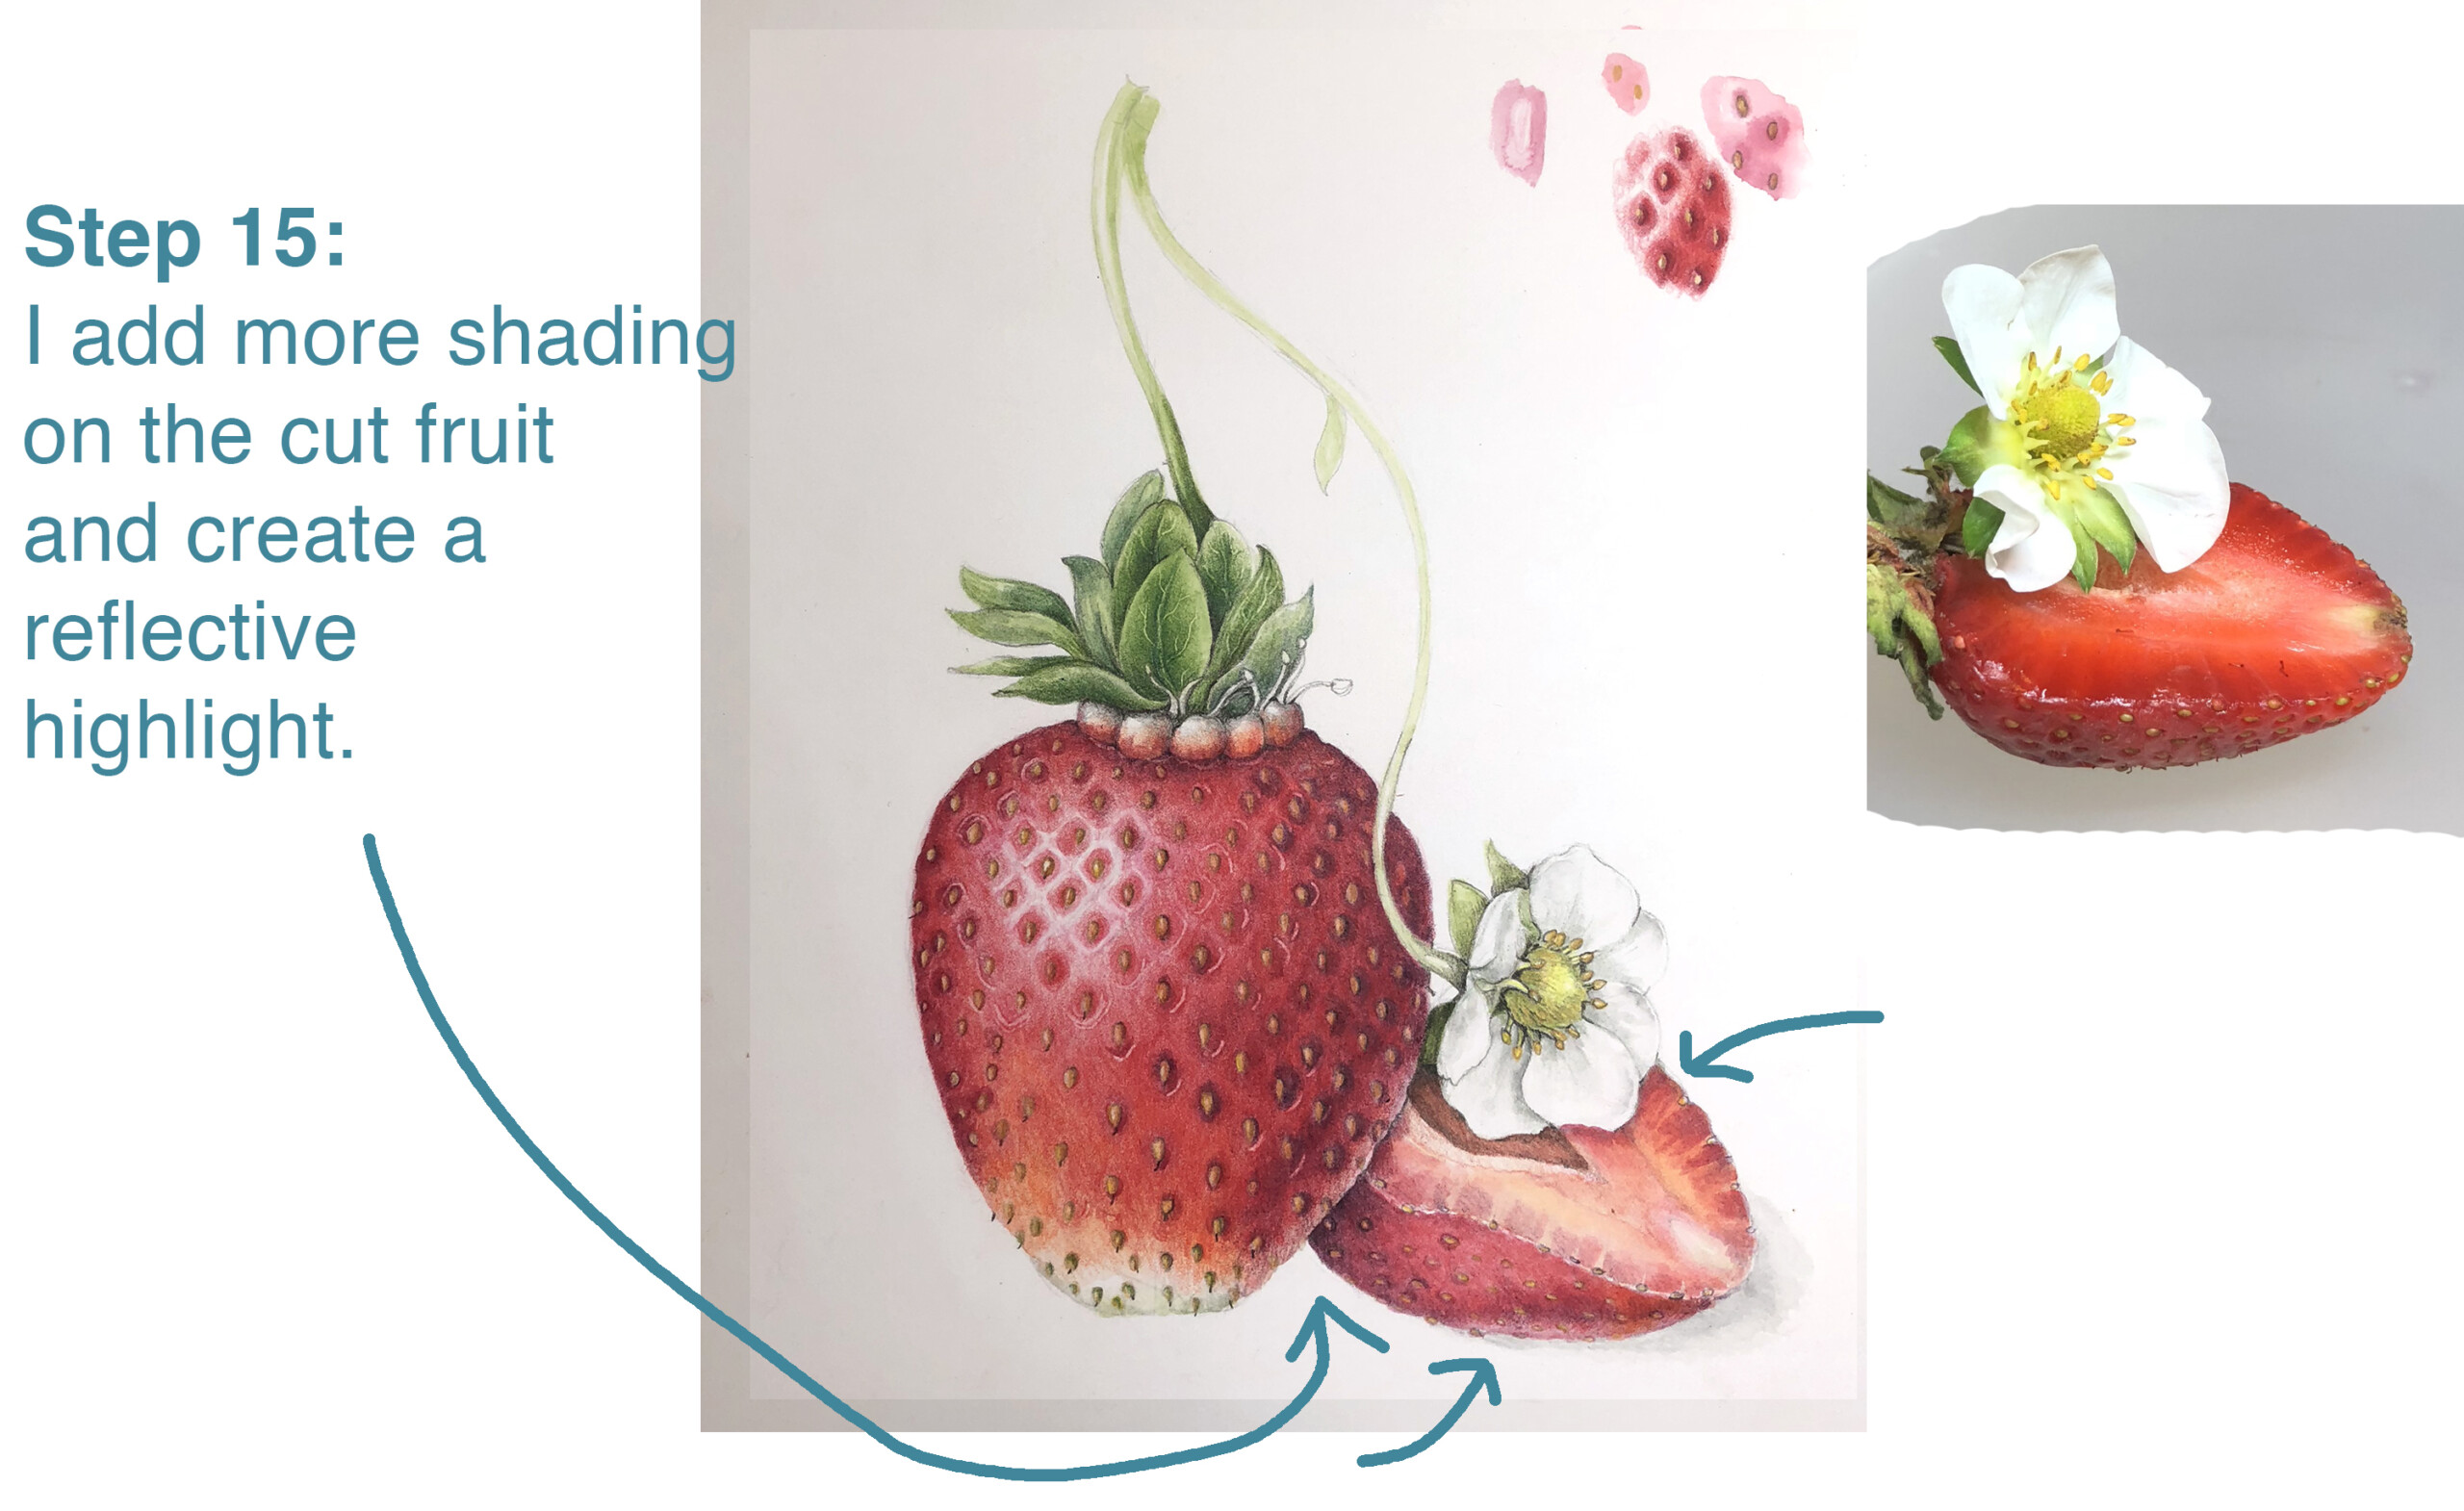
Add shading to the cut fruit section. Create a reflective highlight for a realistic touch. (Learn more about reflective highlights here.)
17: Draw Leaflets

With a dark sepia colored pencil, draw a group of leaflets, which are a distinctive feature of the strawberry plant. To add more depth to your composition, position the leaflets underneath other elements to create overlaps.
18: Add Green Watercolor to Leaves

Apply green watercolor for lush and lively leaves.
19: Add Cast Shadows
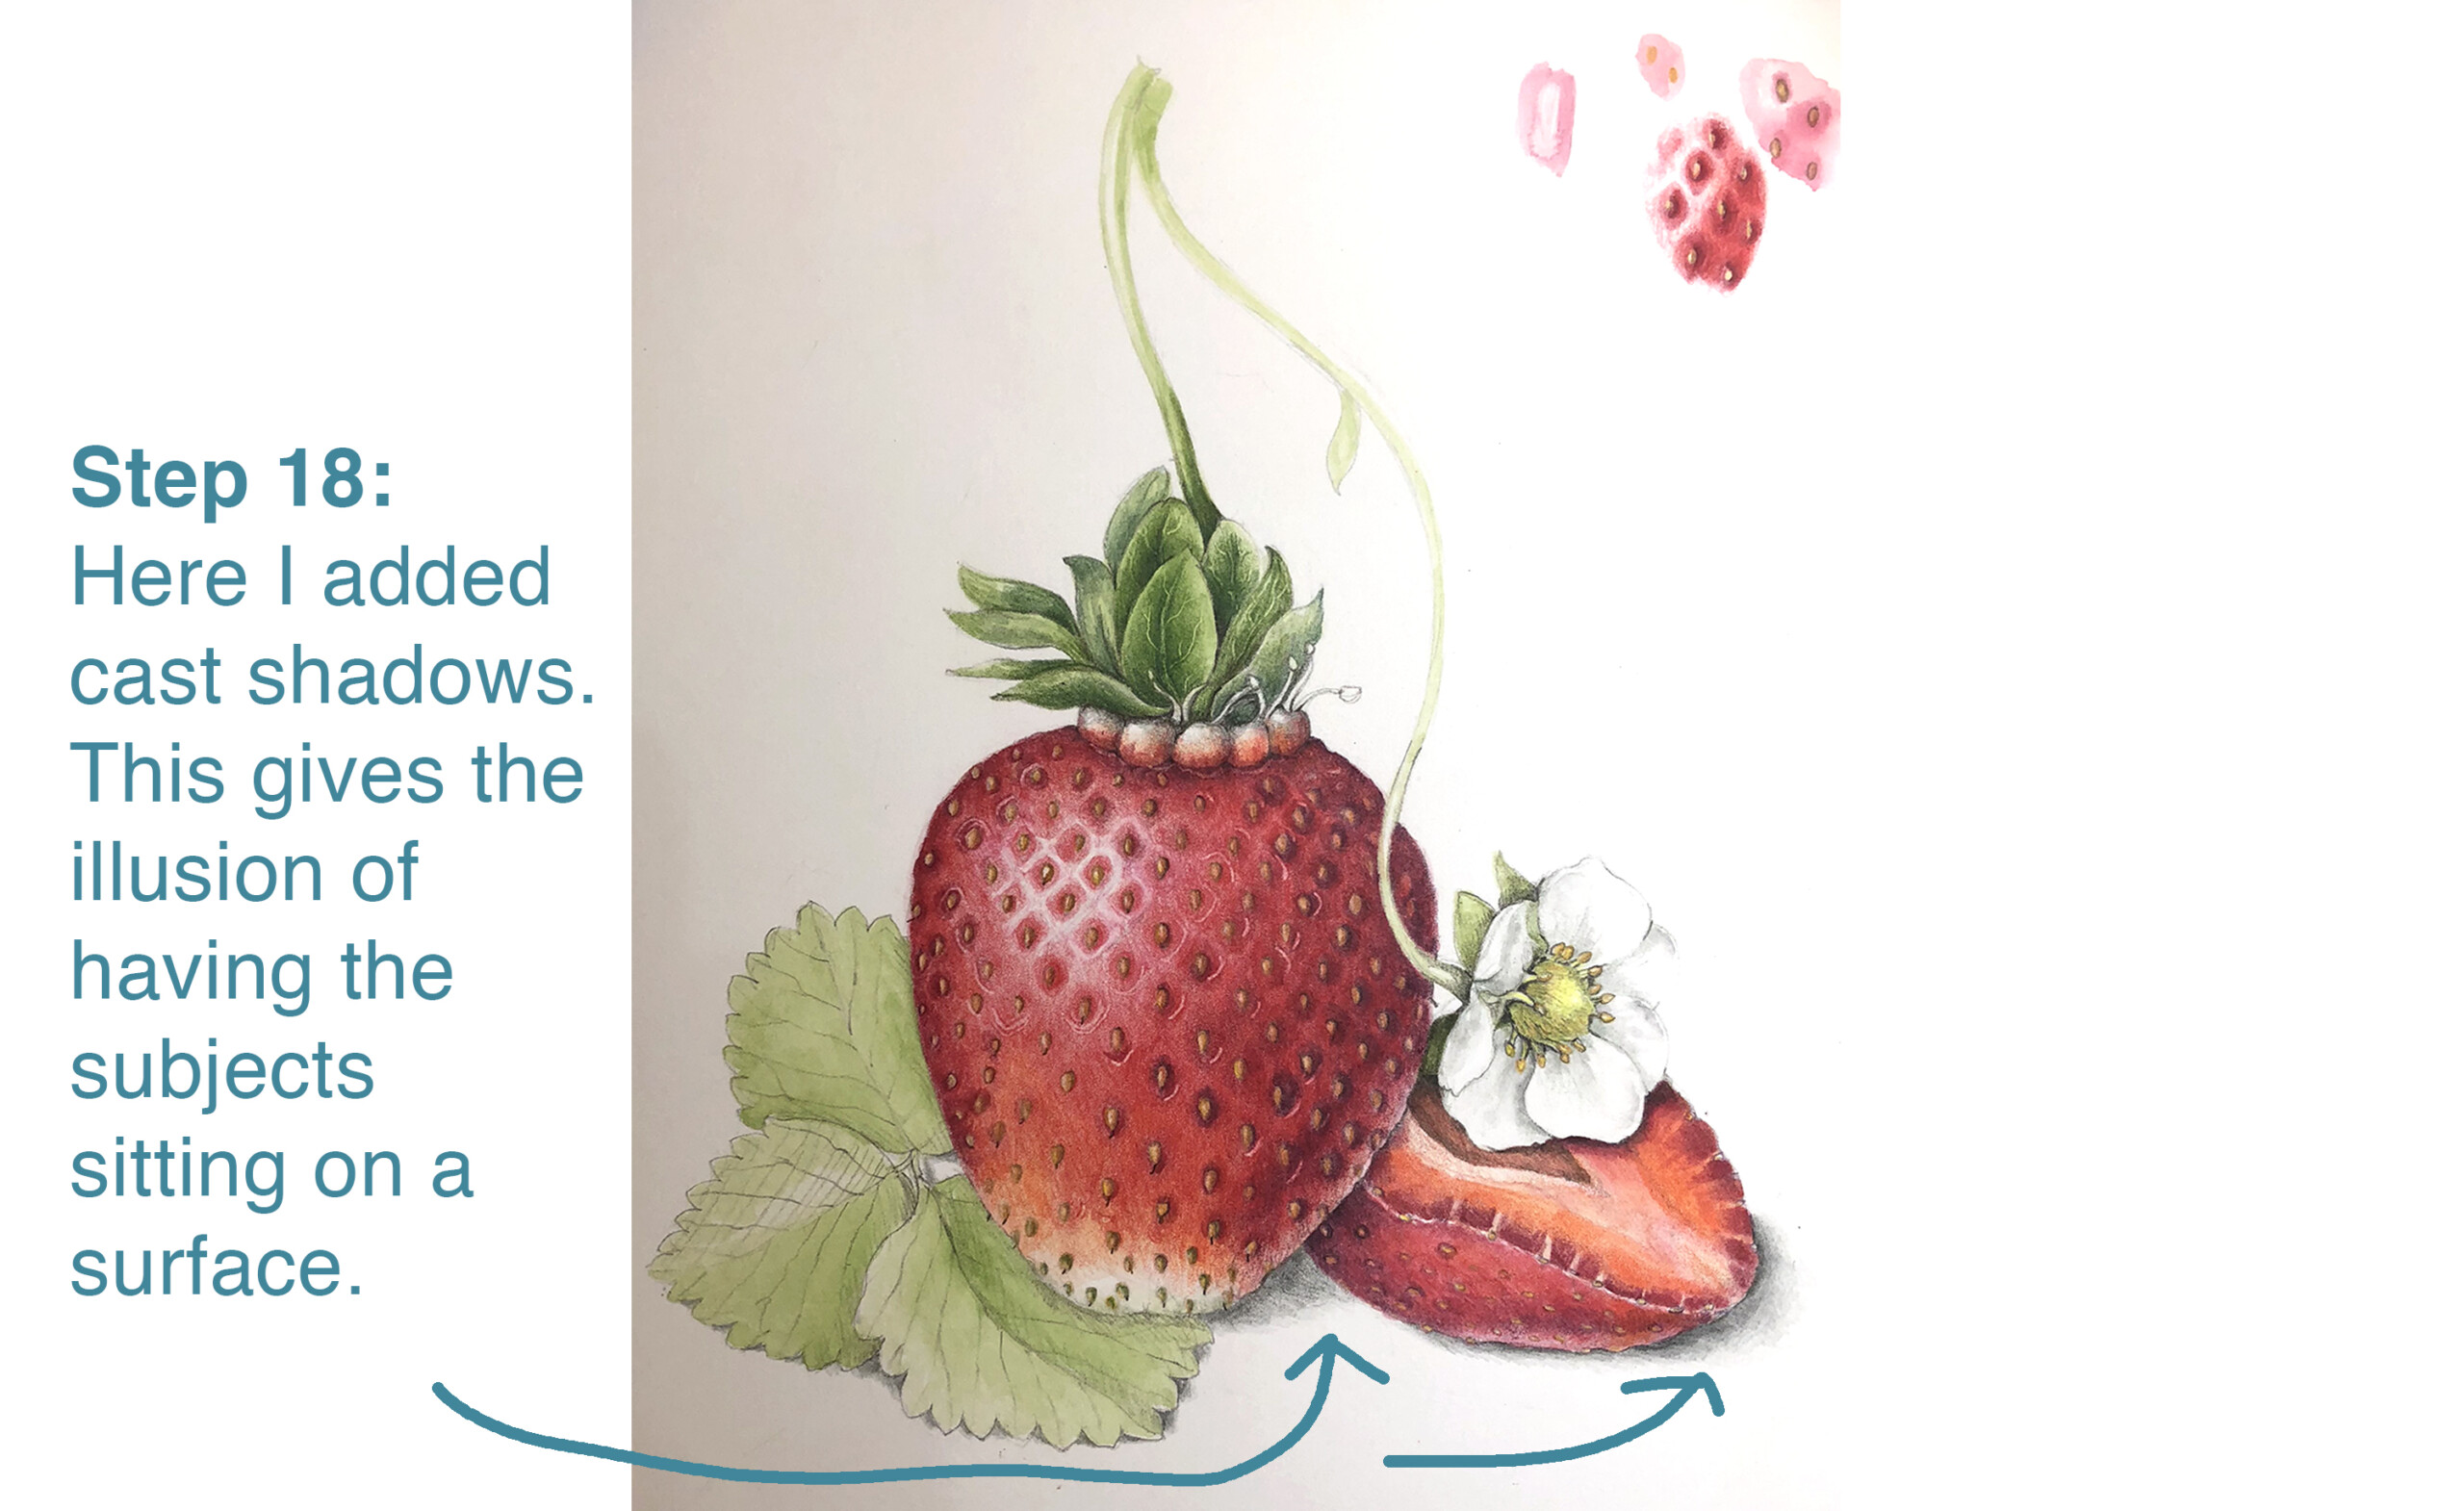
Create cast shadows to give the illusion that your subjects are sitting on a surface, adding a three-dimensional feel. (Learn more about cast shadows here.)
20: Final Details
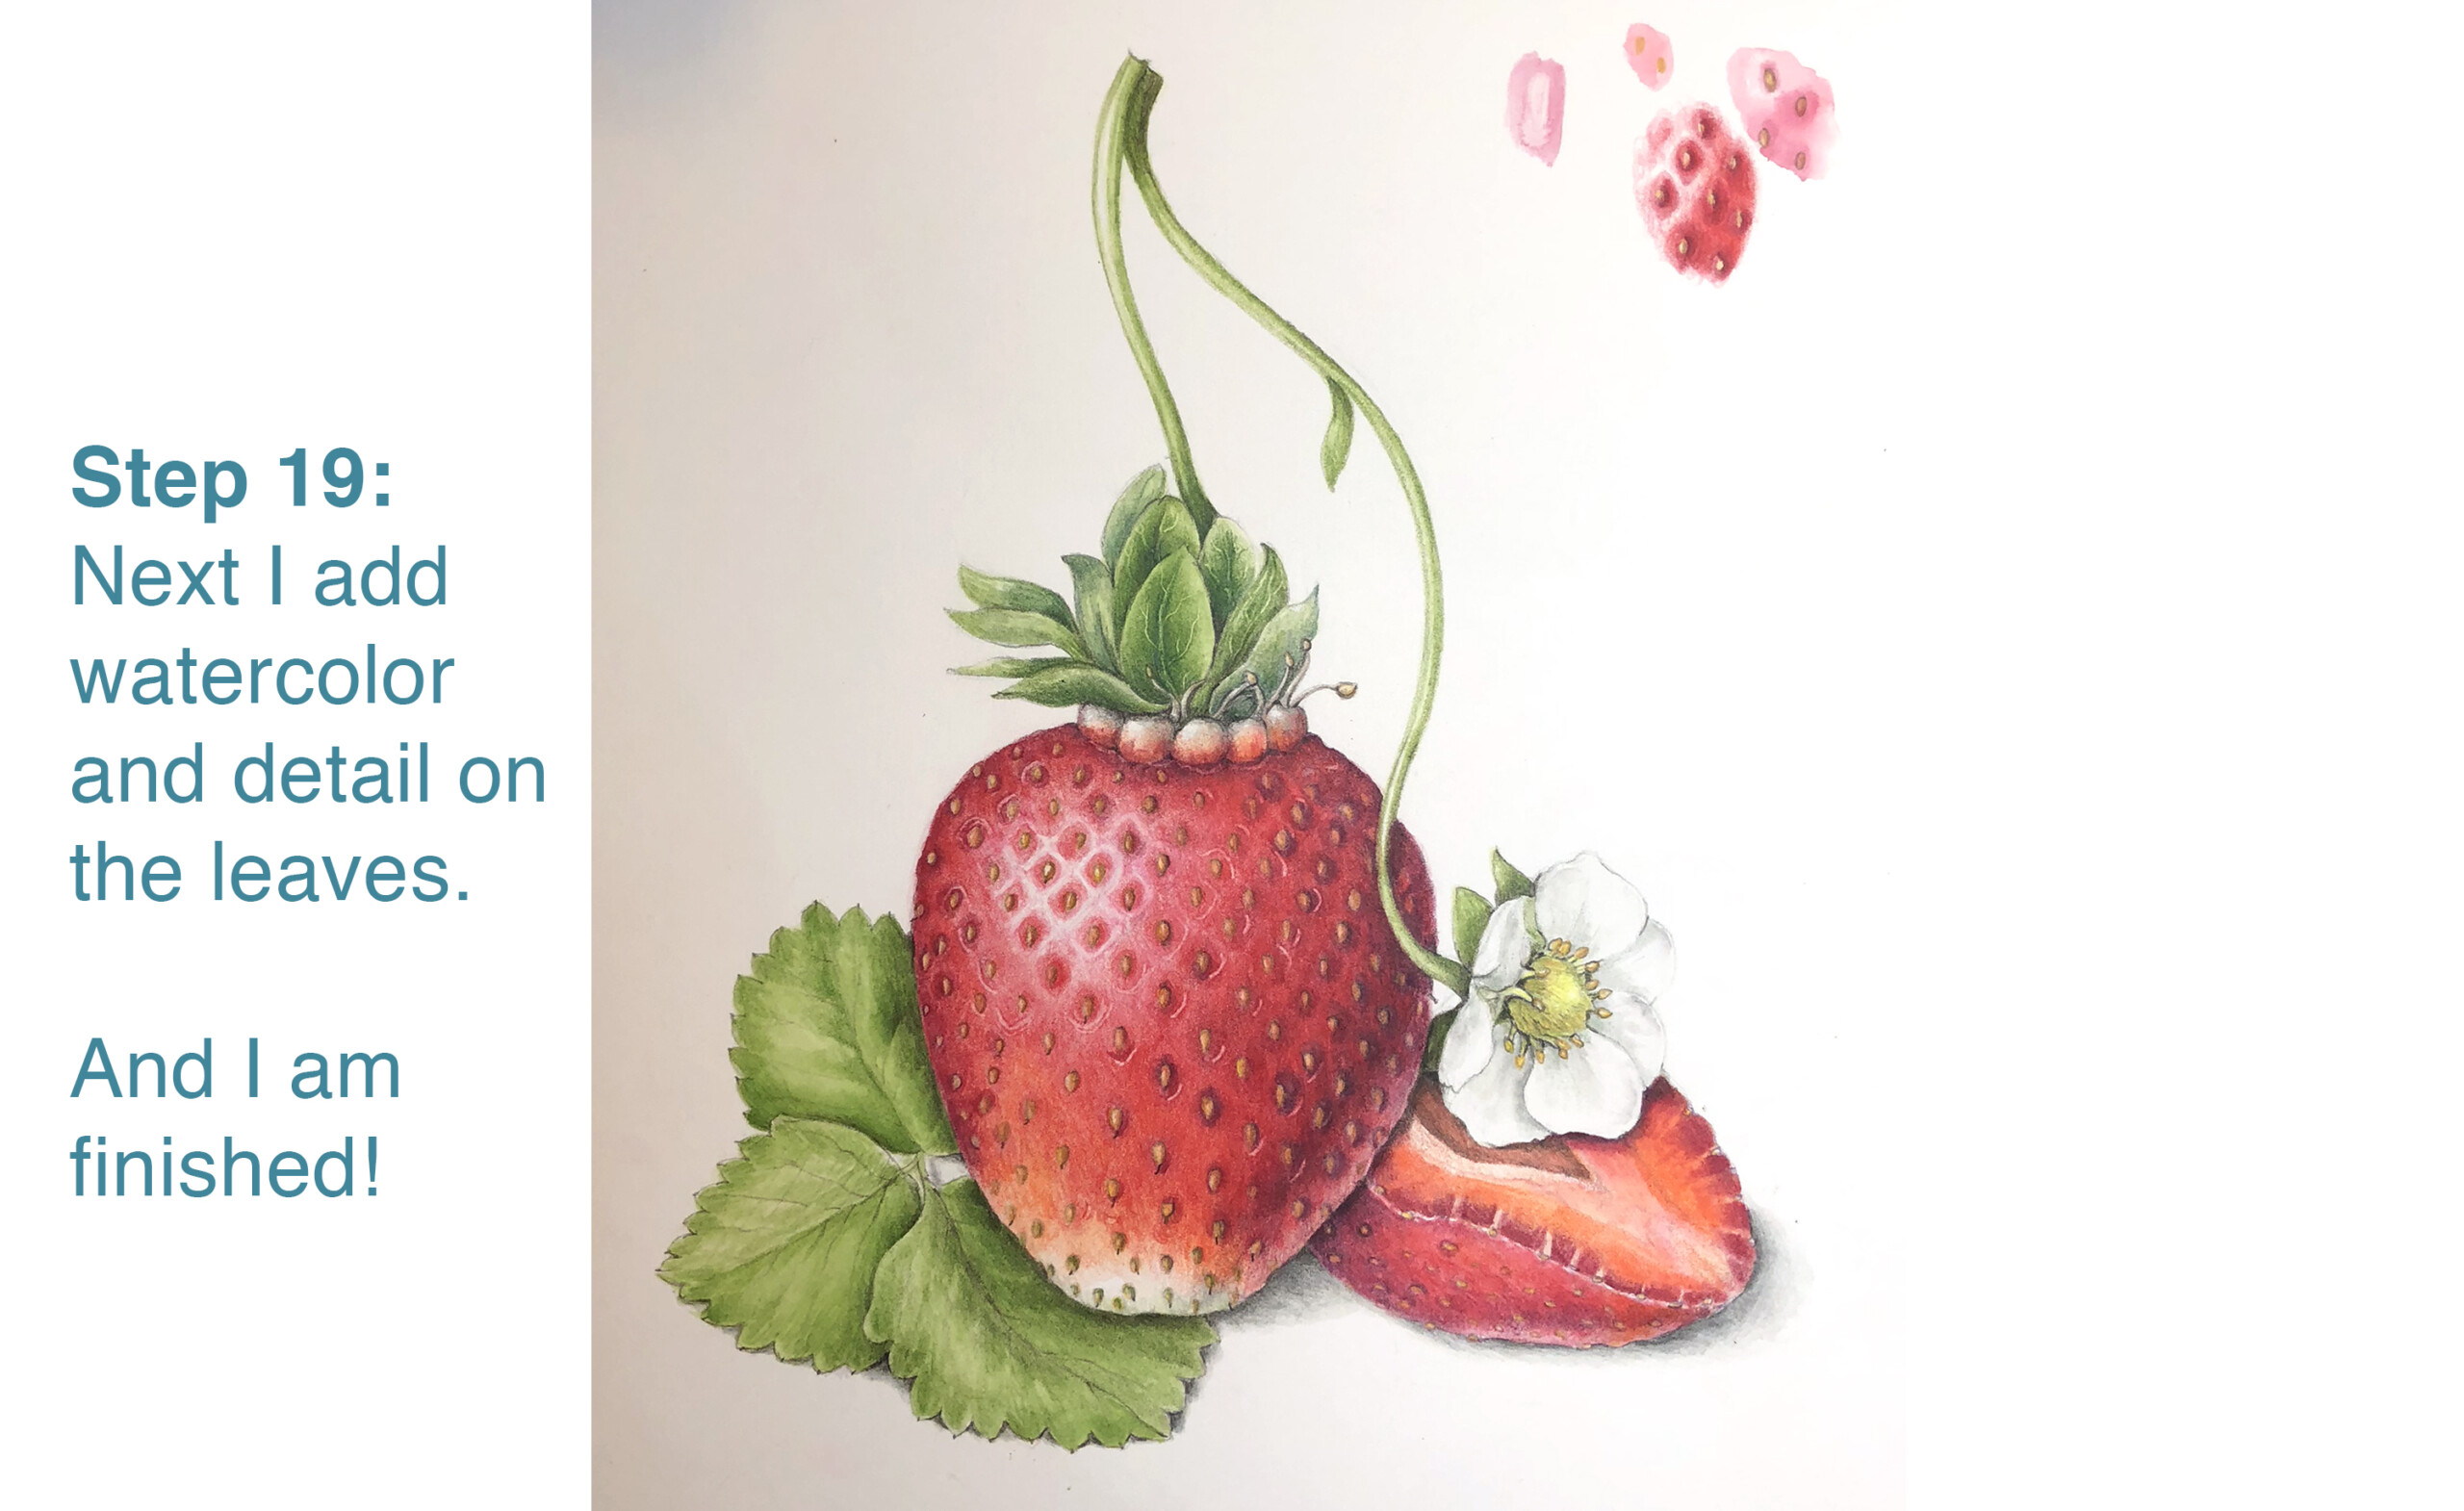
Add final watercolor details to the leaves, refining their texture and color.
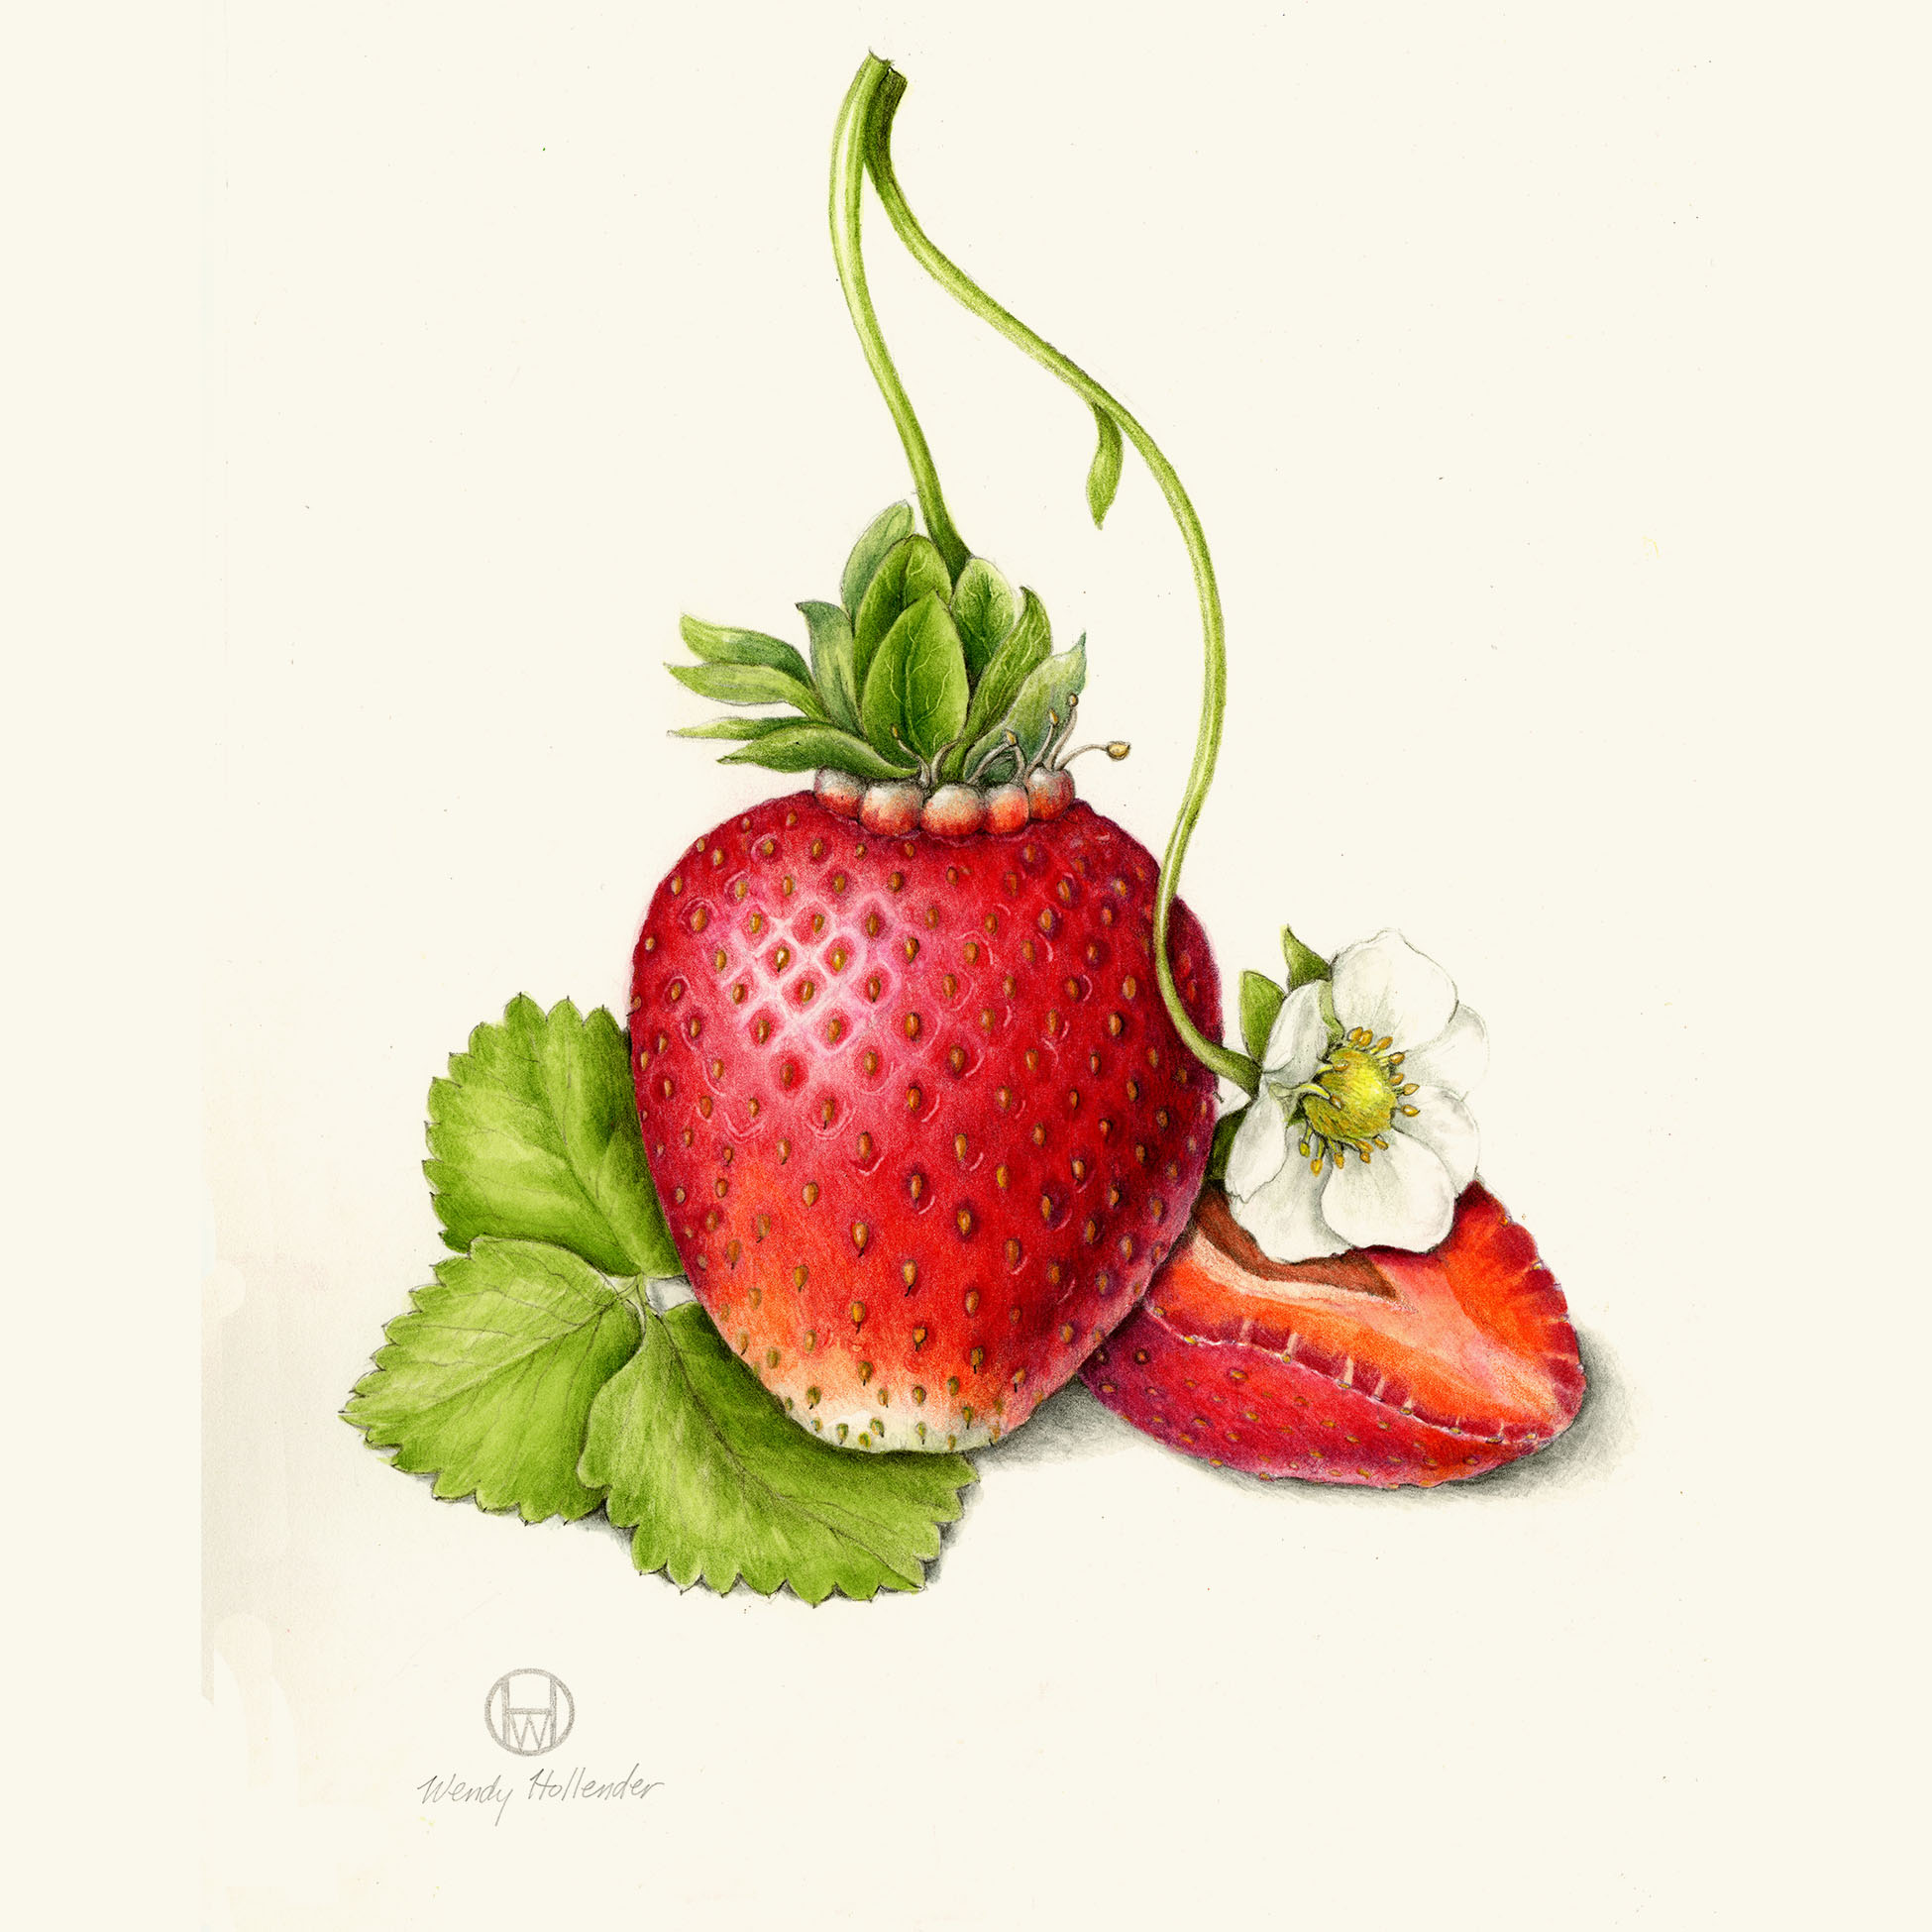
And voilà! You’ve created a stunning botanical illustration of a strawberry, capturing its beauty and complexity. It can be tough to know when your drawing is finished, but we’ve got 8 tips that will help you evaluate when your artwork is “complete.” Have fun and brighten the world with your creations!
Want to learn more?
For more tutorials and inspiration, explore our FREE informative blog. For future lessons delivered straight to your inbox, be sure to join our mailing list!