Scroll through this post for many techniques and step-by-step instructions you can try to improve your tulip drawings.
Flowers are notoriously tricky subjects to capture realistically because of their curling petals, tiny reproductive parts, and short life spans. If you feel like flowers are too difficult to draw or too complex for you to capture, I encourage you to start with tulips!
I was drawing a tulip when a lightbulb began to glow above my head (metaphorically); the Draw Botanical Method suddenly became clear to me. I almost titled my first book How to Draw a Tulip (instead of Botanical Drawing: A Beginner’s Guide) because I realized that if you could learn to draw a tulip, you could learn to draw anything!
Each year, I challenge myself to draw tulips that are more and more complex. I love drawing them so much that I planned a trip to the Netherlands during the height of tulip season in 2022!
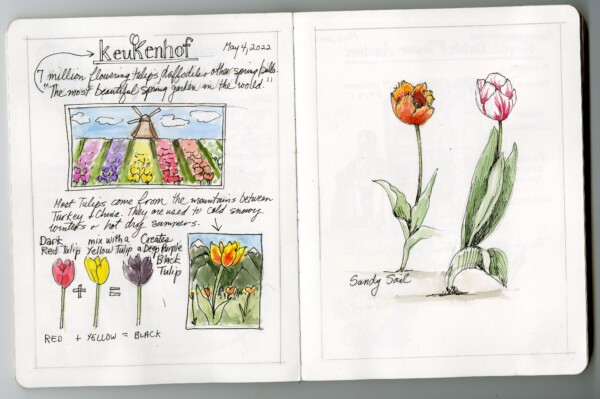
Mini history lesson – French botanist, Carolus Clusius, was an avid bulb grower who established a botanic garden at the University of Leiden in the 1590s where he cultivated tulips. “Broken tulips (tulips that bloom in streaks or flames of colour) were stolen from Clusius’s garden, and the genetically variable seeds of those purloined flowers became the foundation for a lively tulip trade. A speculative frenzy over tulips in the Netherlands in 1633–37 is now known as the Tulip Mania” (Source).

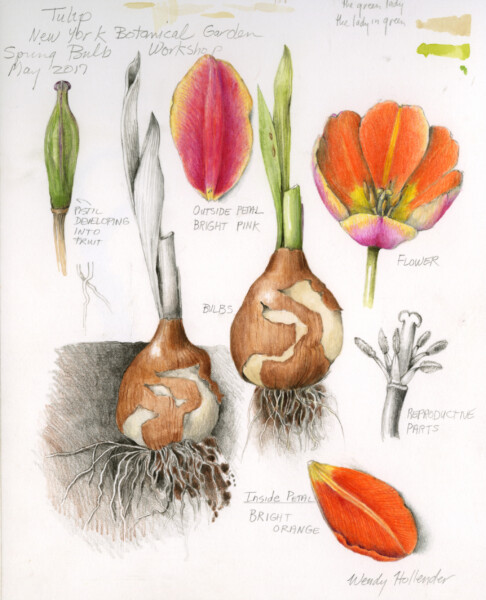
As I strolled through Keukenhof, one of the largest nurseries for tulips in Holland, my jaw couldn’t help but hang open in awe, gawking at the many amazing varieties in bloom. When I learned that I could select specific tulip species to have shipped to my farm, I was instantly inspired to hold a spring workshop! I had help planting 400 bulbs on my farm of many varieties of parrot tulips, unusual varieties of tulips, as well as classic tulips, all set to bloom in the spring of 2023, and I held a workshop at my farm.
Tulips teach us about:
PERSPECTIVE

Perspective is the way you see things from your unique vantage point. Before you start drawing, observe your subject from all angles, sketch some quick thumbnails, and decide which view will best capture the most important details.
Perspective drawing creates the illusion of depth, giving objects on a 2D surface a sense of three-dimensionality to make your work appear more realistic, so remember to look carefully at the perspective distortion of your drawing.
Try this – Foreshortening Ellipse Exercise
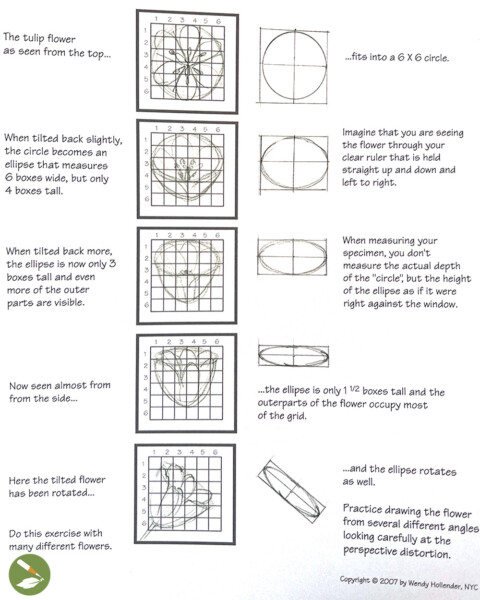
Look at a tulip from the top. Notice that the flower appears to fit into a circle with an equal height and width.
As you tilt back the tulip, watch the circle become an ellipse in which the width remains the same, but the height shrinks. This illusion is called foreshortening.
As you tilt it back, you’ll also be able to see more of the outer parts of the flower. If you rotate the flower, the ellipse will rotate as well.
LIGHT SOURCE
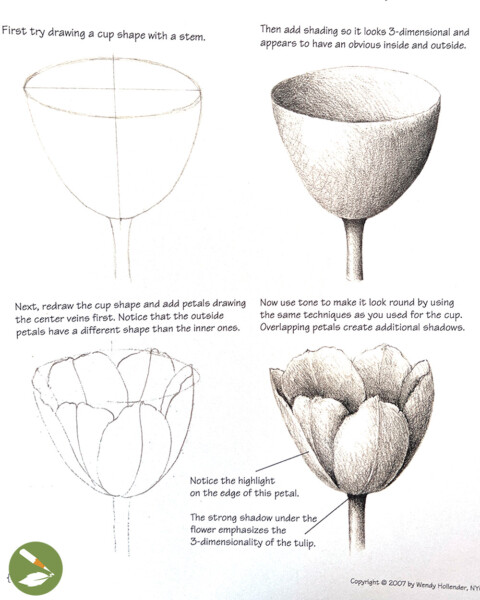
Tulips (simplified) are shaped like cups, and tulip petals (simplified) are shaped like spoons. Starting with a single petal is a great way to ease yourself into the world of flowers.
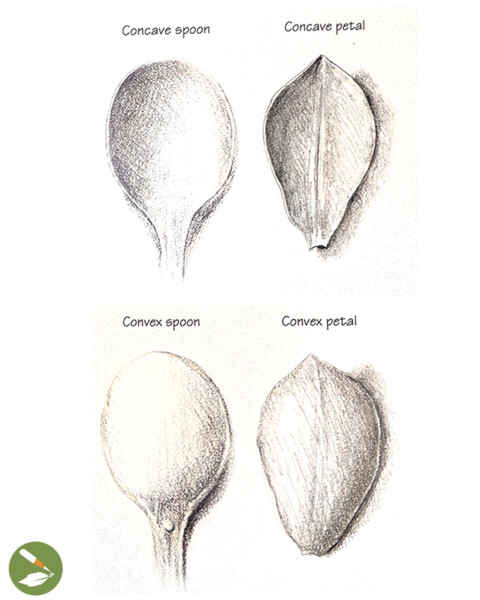
Imagine a spoon under a single light source coming from the upper left. The concave (bowl) side is shaded on the left with a highlighted edge that shows its thickness. The convex (back) side has the highlight on the left and a reflected highlight on the right edge near the shadow on the table. Then practice drawing individual petals from your tulip using the light source model you just practiced with the spoon.
Try this – Single Petal Practice
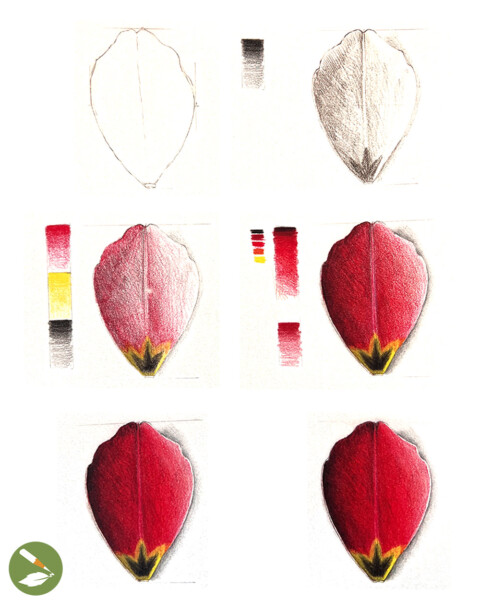
Draw a single tulip petal with colored pencils by following these steps:
- Measure your petal and lightly sketch guidelines. Lightly draw the outline of the shape and the center axis in graphite.
- Under-tone with neutral (dark sepia) clearly showing highlights and shading.
- Choose your palette of colors and build up tones in each of the colors, switching frequently.
- As you add details and build up colors, the paper texture disappears.
- Burnish and polish with cream color or colorless blender to eliminate paper texture.
- With a hard pencil or your sharpest Dark Sepia colored pencil and a good eraser, sharpen details and clean up background.
After practicing petals, try to draw the whole flower. (For step-by-step instructions, scroll toward the bottom of this post or click here.)
Tip: Sketch thumbnails of a simple cup and cylinder as light source models to reference while you draw to remind yourself of where to leave your highlight white and where to add your shadows.
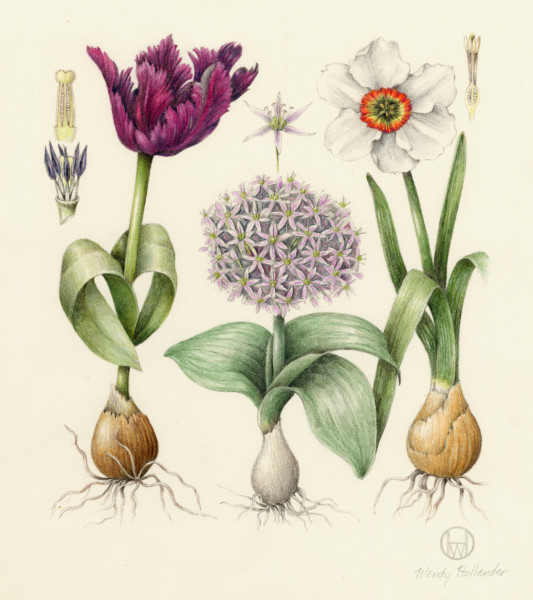
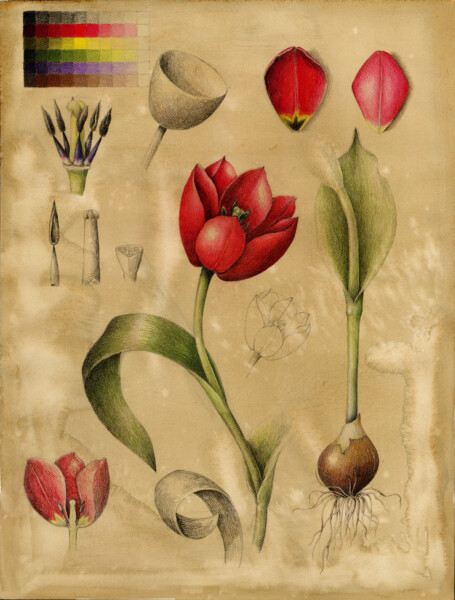
BOTANY
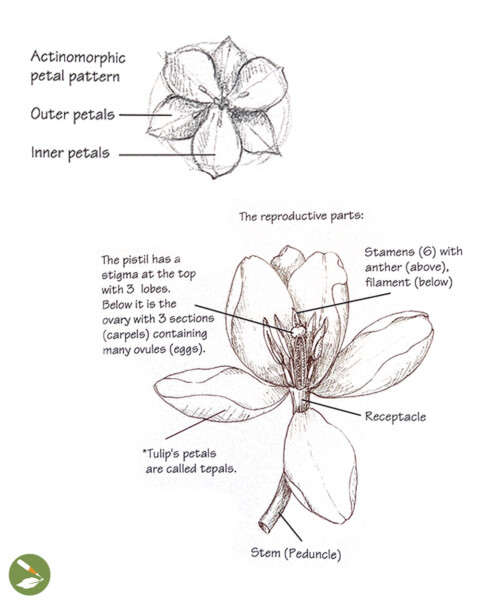
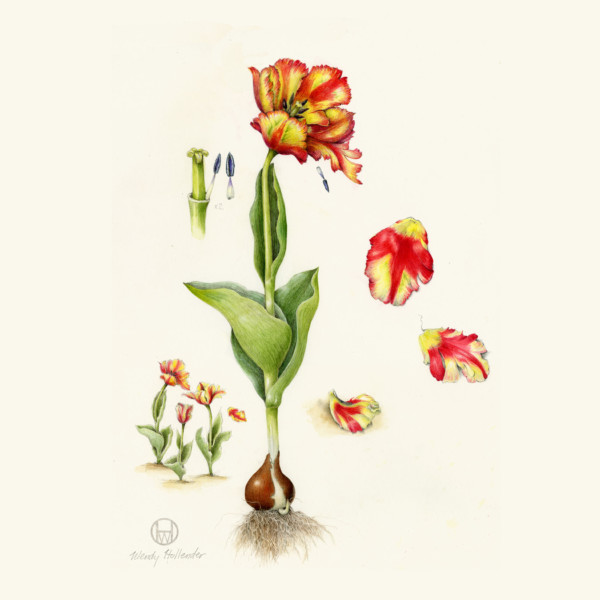
The tulip’s outer anatomy is essentially a cup (the flower) attached to a cylinder (the stem) with some flat ribbons (the leaves) attached to the stem. The reproductive parts are in the “bowl” of the flower growing out of the stem and are surrounded by 3 outer petals (narrower and more pointed at the top edge, which are actually the sepals) and 3 inner petals (broader at the top and narrower at the bottom) emanating from the stem in an actinomorphic pattern (radially symmetrical equal segments that meet in the center). Sepals cover the petals on a bud, and when the sepals look like petals (as tulips’ do), they are called tepals.
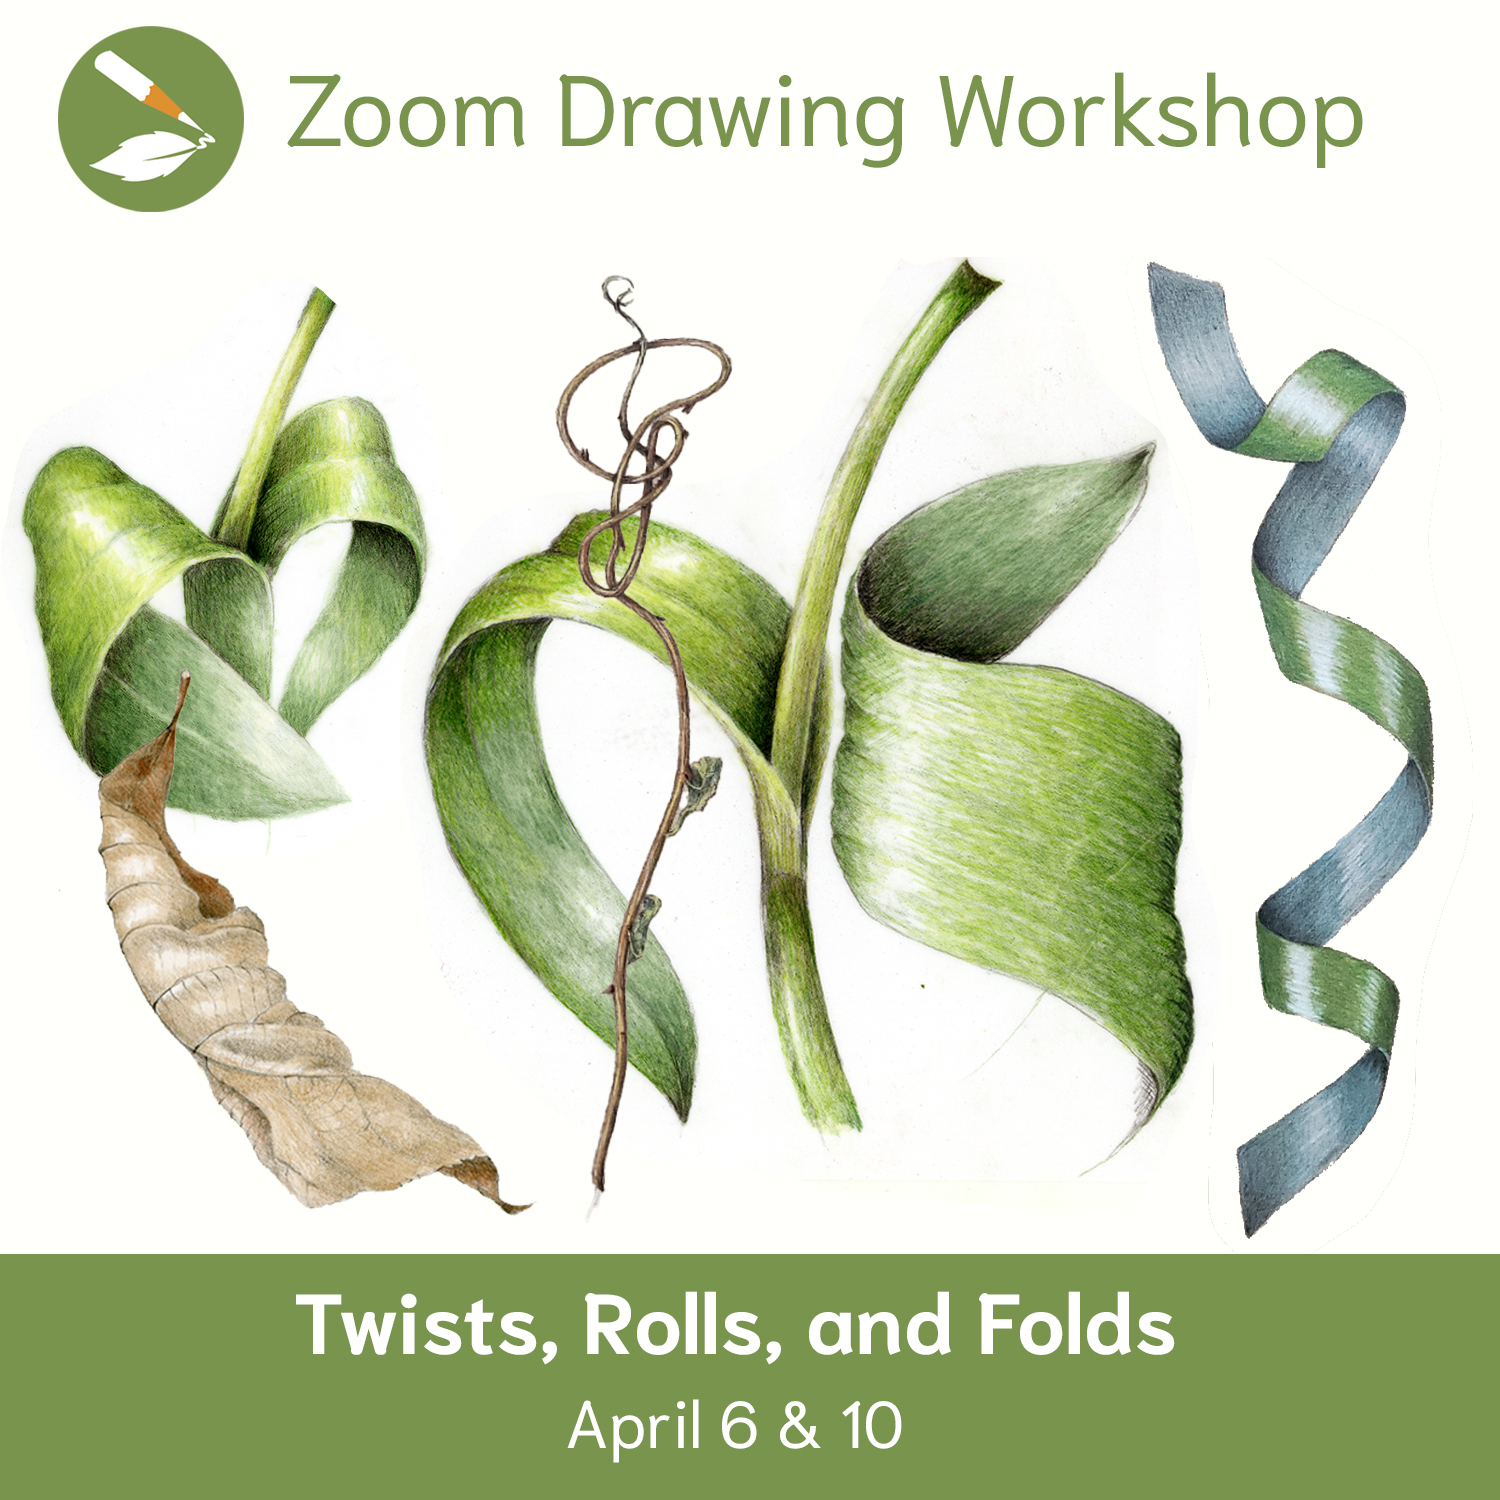
The tulip’s ribbon-like leaves can be tricky to draw because they come from different sides of the stem and fold over themselves. For help with these challenges, watch the RECORDING of our Twists, Rolls, & Folds Zoom Drawing Workshop.
Reproductive Parts
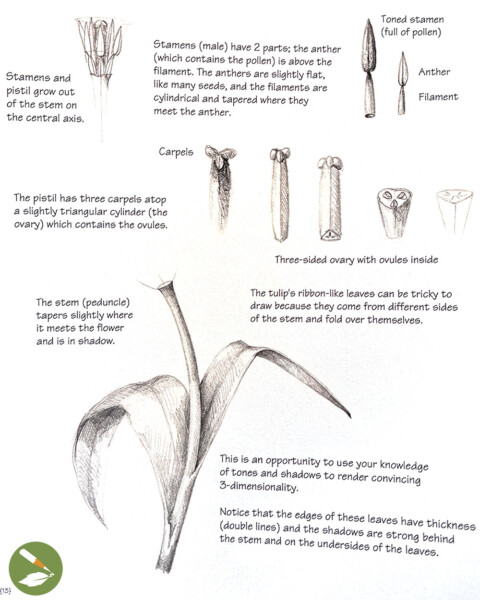
The pistil has a stigma at the top with 3 lobes. Below it is the ovary with 3 sections (carpels) containing many ovules (eggs). Stamens (6) with anther (above), filament (below). The reproductive parts all connect in the receptacle, which leads into the stem (peduncle). Tulip bulbs are also really fun to draw!
For more information about how to draw a tulip’s anatomy, see Botanical Drawing: A Beginner’s Guide.
Try this – Herbarium Page
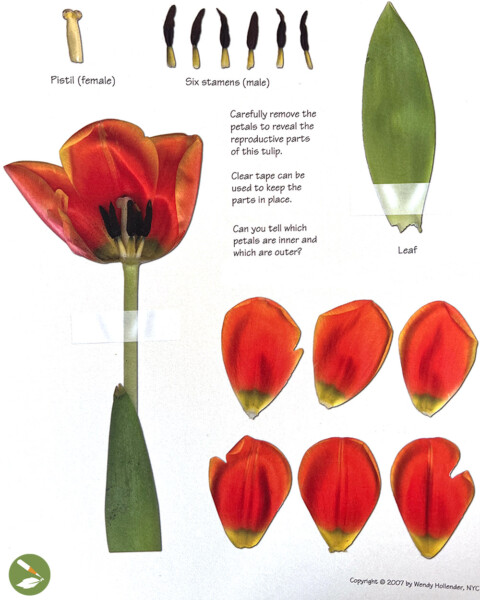
To help understand plant anatomy, create an herbarium page as a reference tool for after your specimen is not available. Carefully take a tulip apart and arrange the parts on your paper. Clear tape can be used to keep the parts in place. Label each element. Can you tell the difference between the inner petals and outer tepals?
Cover with another piece of paper, and it will be dry in about two weeks. (Press under some heavy books).
COLOR
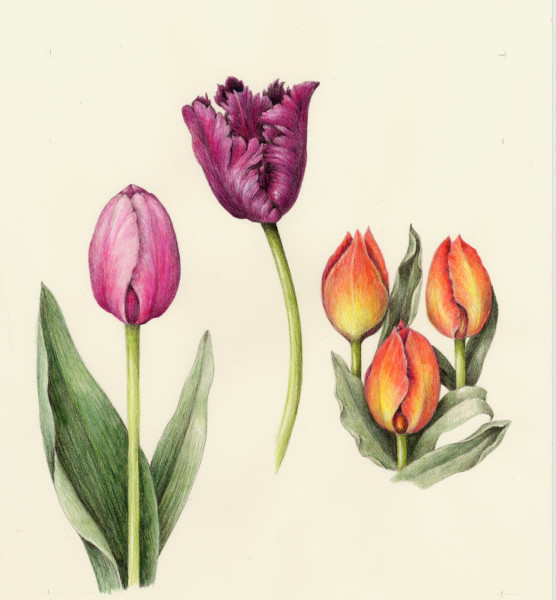
Tulips are so much fun to practice because there are so many different types in so many different colors!
“Tulip flowers occur in a wide range of colours except true blue—from purest white through all shades of yellow and red to brown and deepest purple to almost black. Almost 4,000 horticultural varieties have been developed from a number of species and hybrids. There are several different classification schemes based on the plants’ time of bloom, flower shape, and plant size” (Source).
Learn more about the Tulip Family here.

Fun fact: “The phenomenon of colour streaks in tulips is due to a harmless virus infection that causes the self colour to disappear in certain zonal patterns, leaving the flower’s white or yellow underlying colour to show through in irregular streaks” (Source).
HOW TO DRAW A TULIP
STEP-BY-STEP TUTORIAL
- Choose a view for your composition, and sketch a light source thumbnail to remind yourself of how you’ll want to shade your flower to emphasize its three-dimensionality. (For free tips about composition, click here.)
- Measure your specimen carefully, several times, to determine its proportions. (For more free tips about measuring & perspective, click here.)
- Sketch guidelines (based on your measurements) starting with the central axis, where all of the parts are anchored.
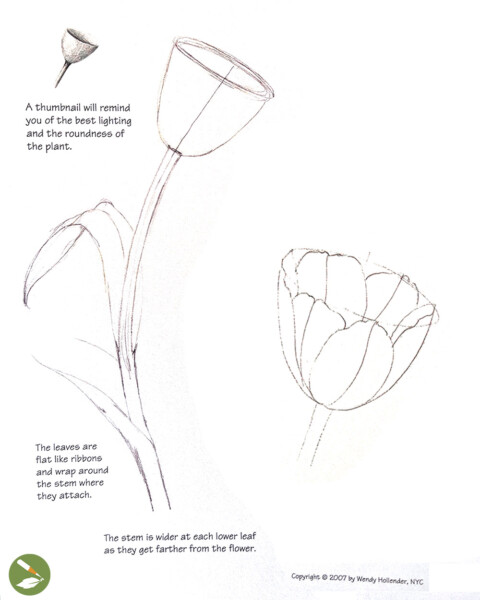
- Sketch in the simple cylinder of the stem. Remember that the stem is wider at each lower leaf as they get farther from the flower.
- Sketch in the ellipse and simple cup shape of the flower.
- Sketch the outlines and center veins of the 6 petals. Remember that the outer and inner petals alternate as they go around the “bowl”.
- Sketch in the leaves without tones. Be aware of the shapes, proportions, folds, edges, overlaps, and how they connect to the stem.

- Begin shading with a neutral color like dark sepia to create a good tonal range and convincing 3D illusion based on your light source model. Add tonality very gradually in light layers as you maintain a good range of values from bright highlights to dark shadows. Leave the white color of the paper to emphasize the highlights. Build up the tones until your drawing is well saturated and well blended.
- Evaluate. Ask yourself what is in front and what is behind to help understand how to use contrast and how to render the edges.
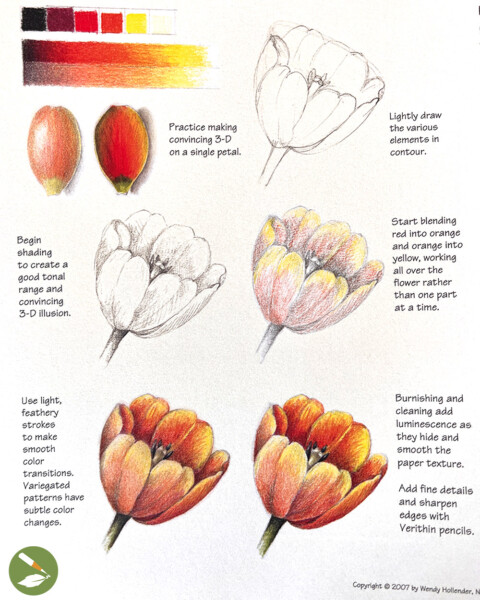
- Burnish and polish with cream color or colorless blender to add luminescence and hide the paper texture.
- With a good eraser, clean up the background and erase your guidelines.
- With a hard pencil or your sharpest Dark Sepia colored pencil, sharpen details. In your darkest shadow areas, press a bit harder to elevate your contrast and emphasize overlaps.
Want help adding color?
Check out Botanical Drawing: A Beginner’s Guide.
Questions about how to improve your drawing?
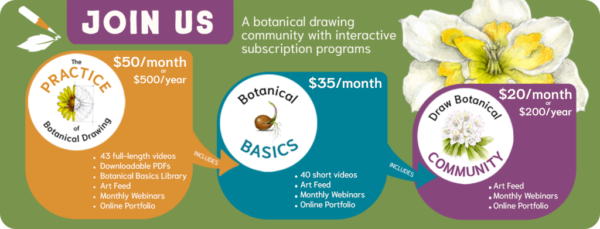
We’re always here to help! Join one of our course subscriptions to receive positive and helpful feedback from instructors on the Art Feed, or participate in a workshop.